Title Page
-
Conducted on
-
Prepared by
-
Location
-
Employees Name
-
Date Completed
Start Up
-
First, turn on the boiler by pushing switch down and pressing the reset button next to it. This will fire up the boiler. Ensure that the trap door is closed on the agitator. The boiler will take between 45 minutes to an hour to heat up to optimal temperature.
-
-
When temperature reaches between 65 and 70 degrees, turn on feed, agitator and bed from the control panel. This will ensure all components are running at the correct temperature for production. When temperature is between 70 and 80 degrees you are ready to introduce the raw material.
-
Sign to acknowledge understanding
First Pass
-
To run first pass you must have started the first pass feed by pressing the button on the control panel.
-
-
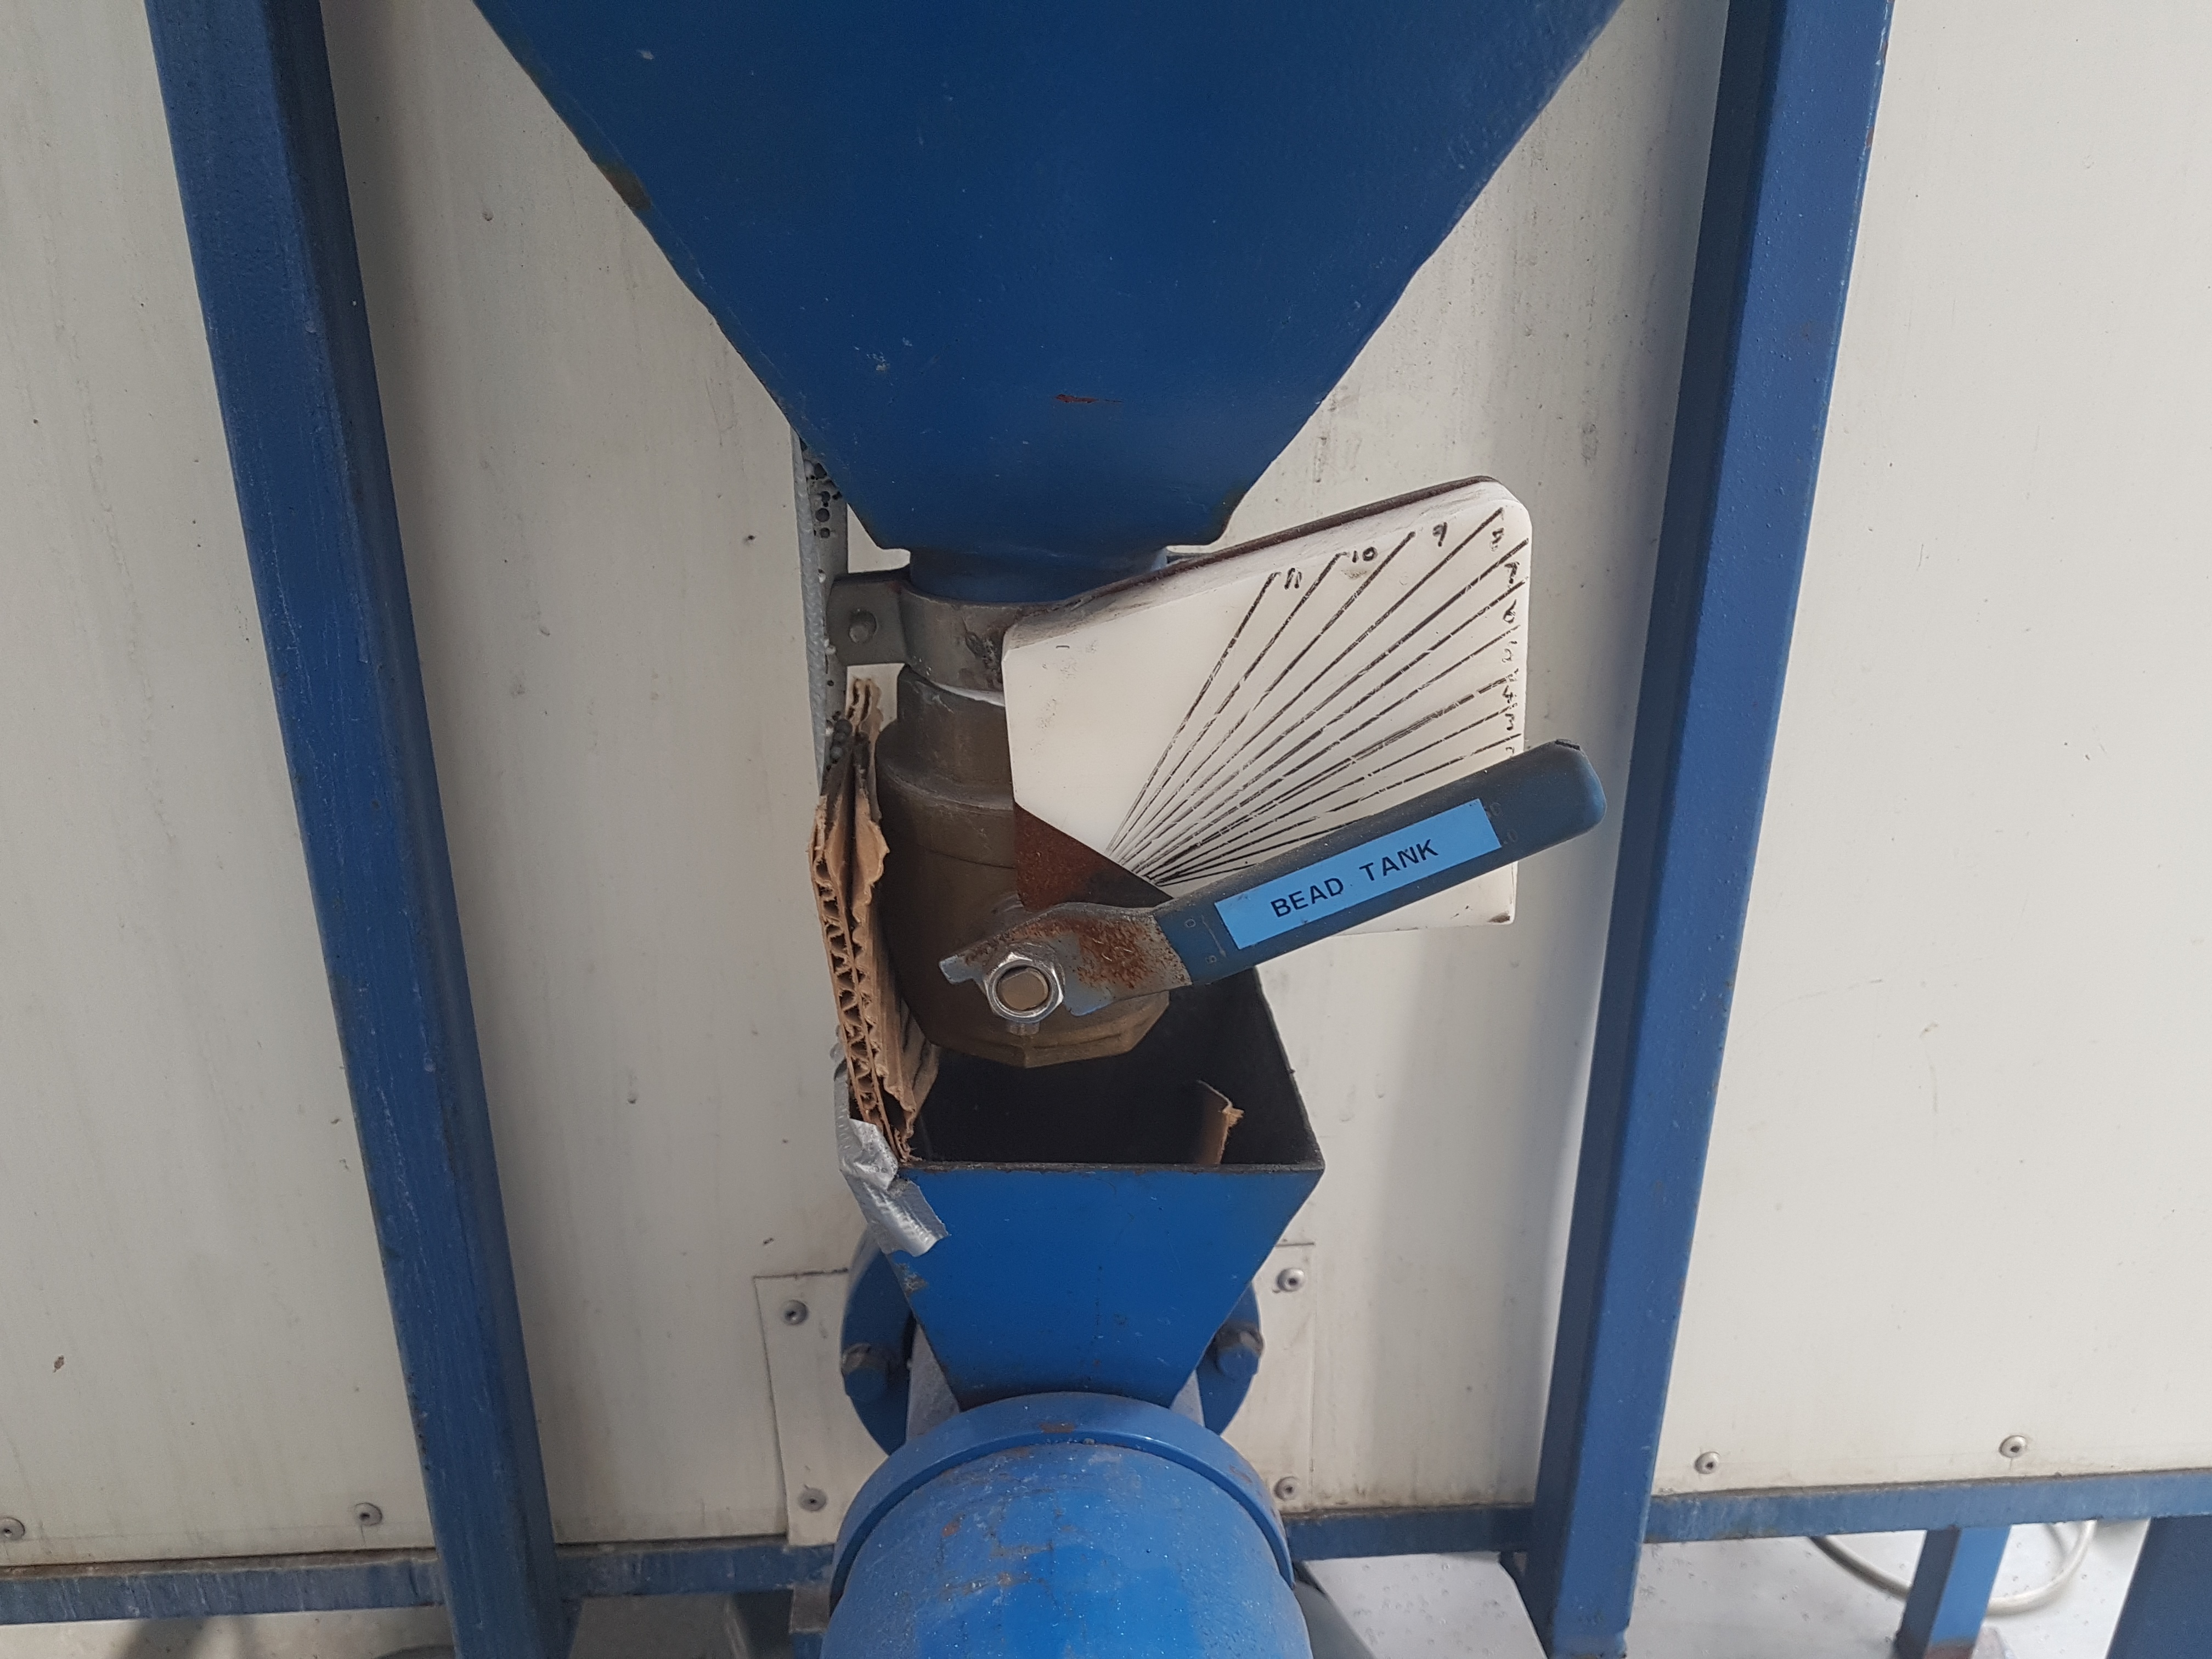
The first pass gate must be checked to ensure correct positioning for optimal flow of material. This will affect the weight of the product at the end of the process. On grey bead the gate is normally set between 1 and 2 On white this can be opened to between 2 and 3 depending on weight outcome.
-
-
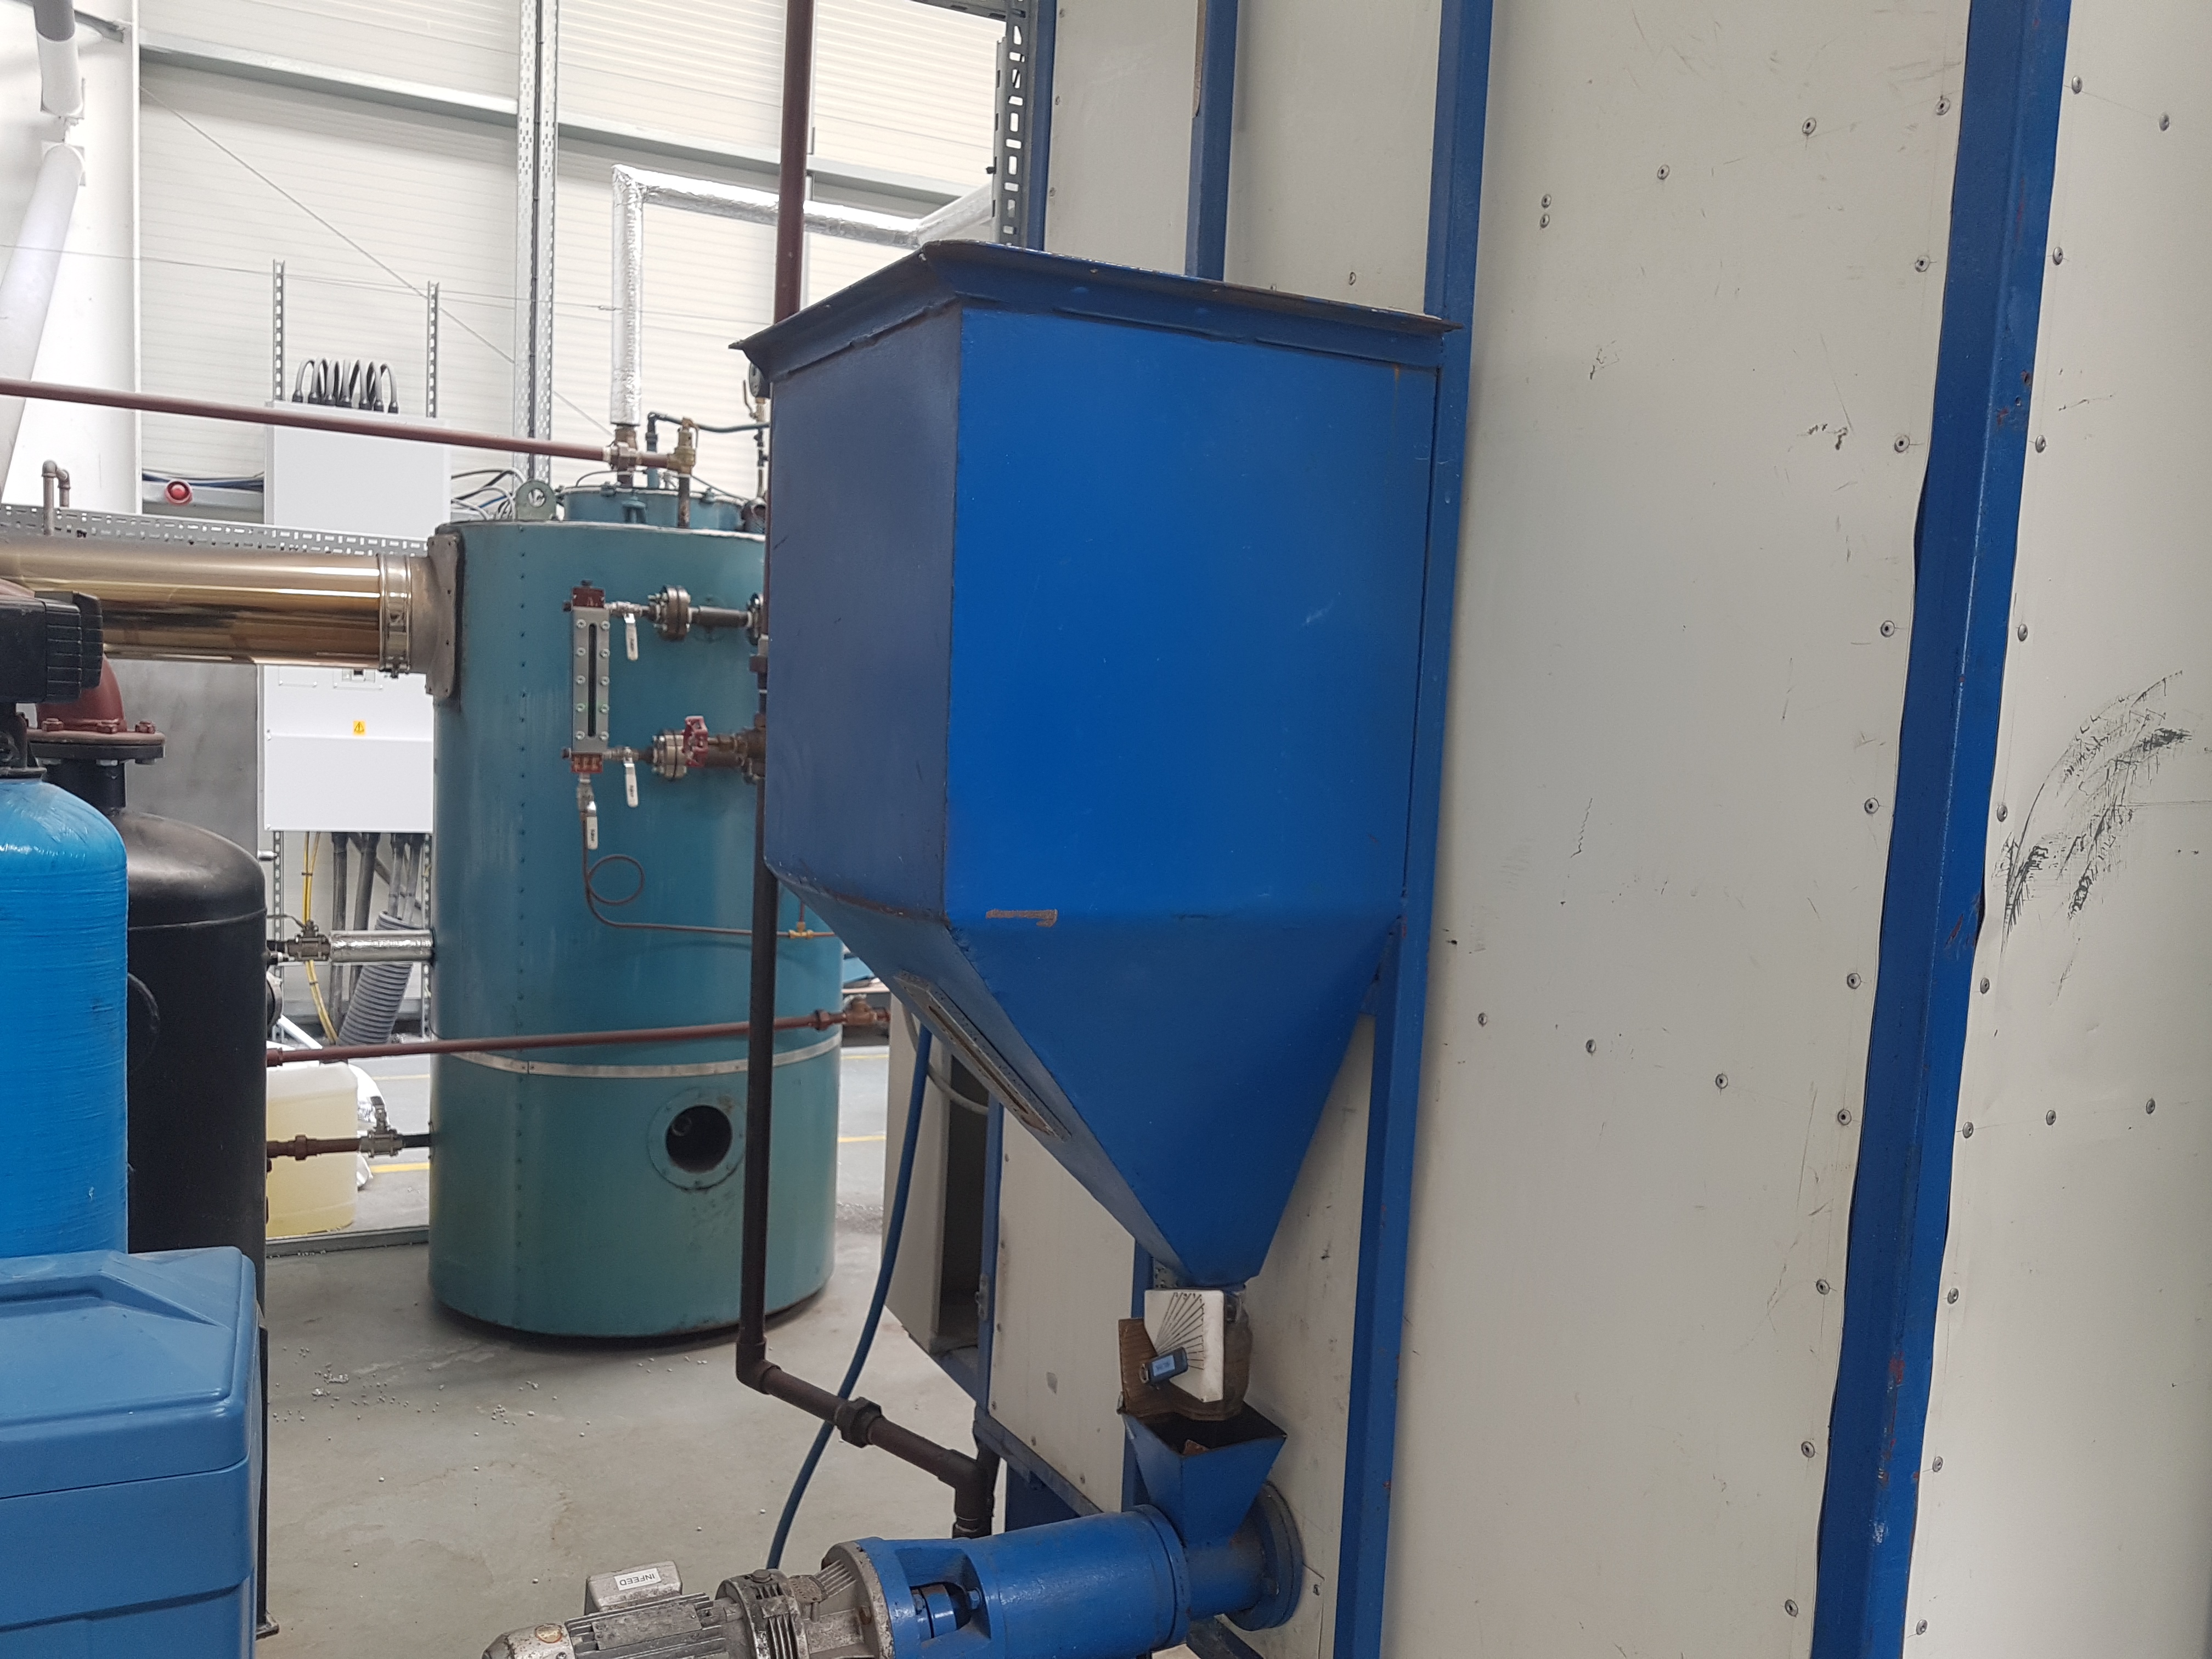
The hopper must be filled to the top with material ensuring that the bag of material is closed after each load. This is to reduce the amount of pentane gas allowed to escape. The hopper must be checked routinely to ensure that the product keeps a steady flow and does not run out.
-
-
The path of the bead exiting the bed must be checked to make sure it is reaching its desired location. First pass will be put into silo 1. Check the piping is all attached and the gate to the correct silo is in the correct position.
-
-
Start the silo fan from the control board to make sure the silo and pipes are clear. The silo should inflate to indicate this. Turn off the fan when all is checked and wait for the bed to fill with product. When the bed is full, you can turn the fan back on to pump the product into silo 1.

Measuring and surveilance of product
-
The product must be monitored hourly to ensure quality and weight are correct and meet the standards required. This is done using the digital scales and sieves. Pass 1 only requires the weights to be documented on an hourly basis. All paperwork must be completed correctly. The product type and batch numbers must be recorded. These are found on the label on the box of each bin of raw material. This along with the name of the operator, date of production and time of each measurement are recorded on the paperwork provided.
-
-
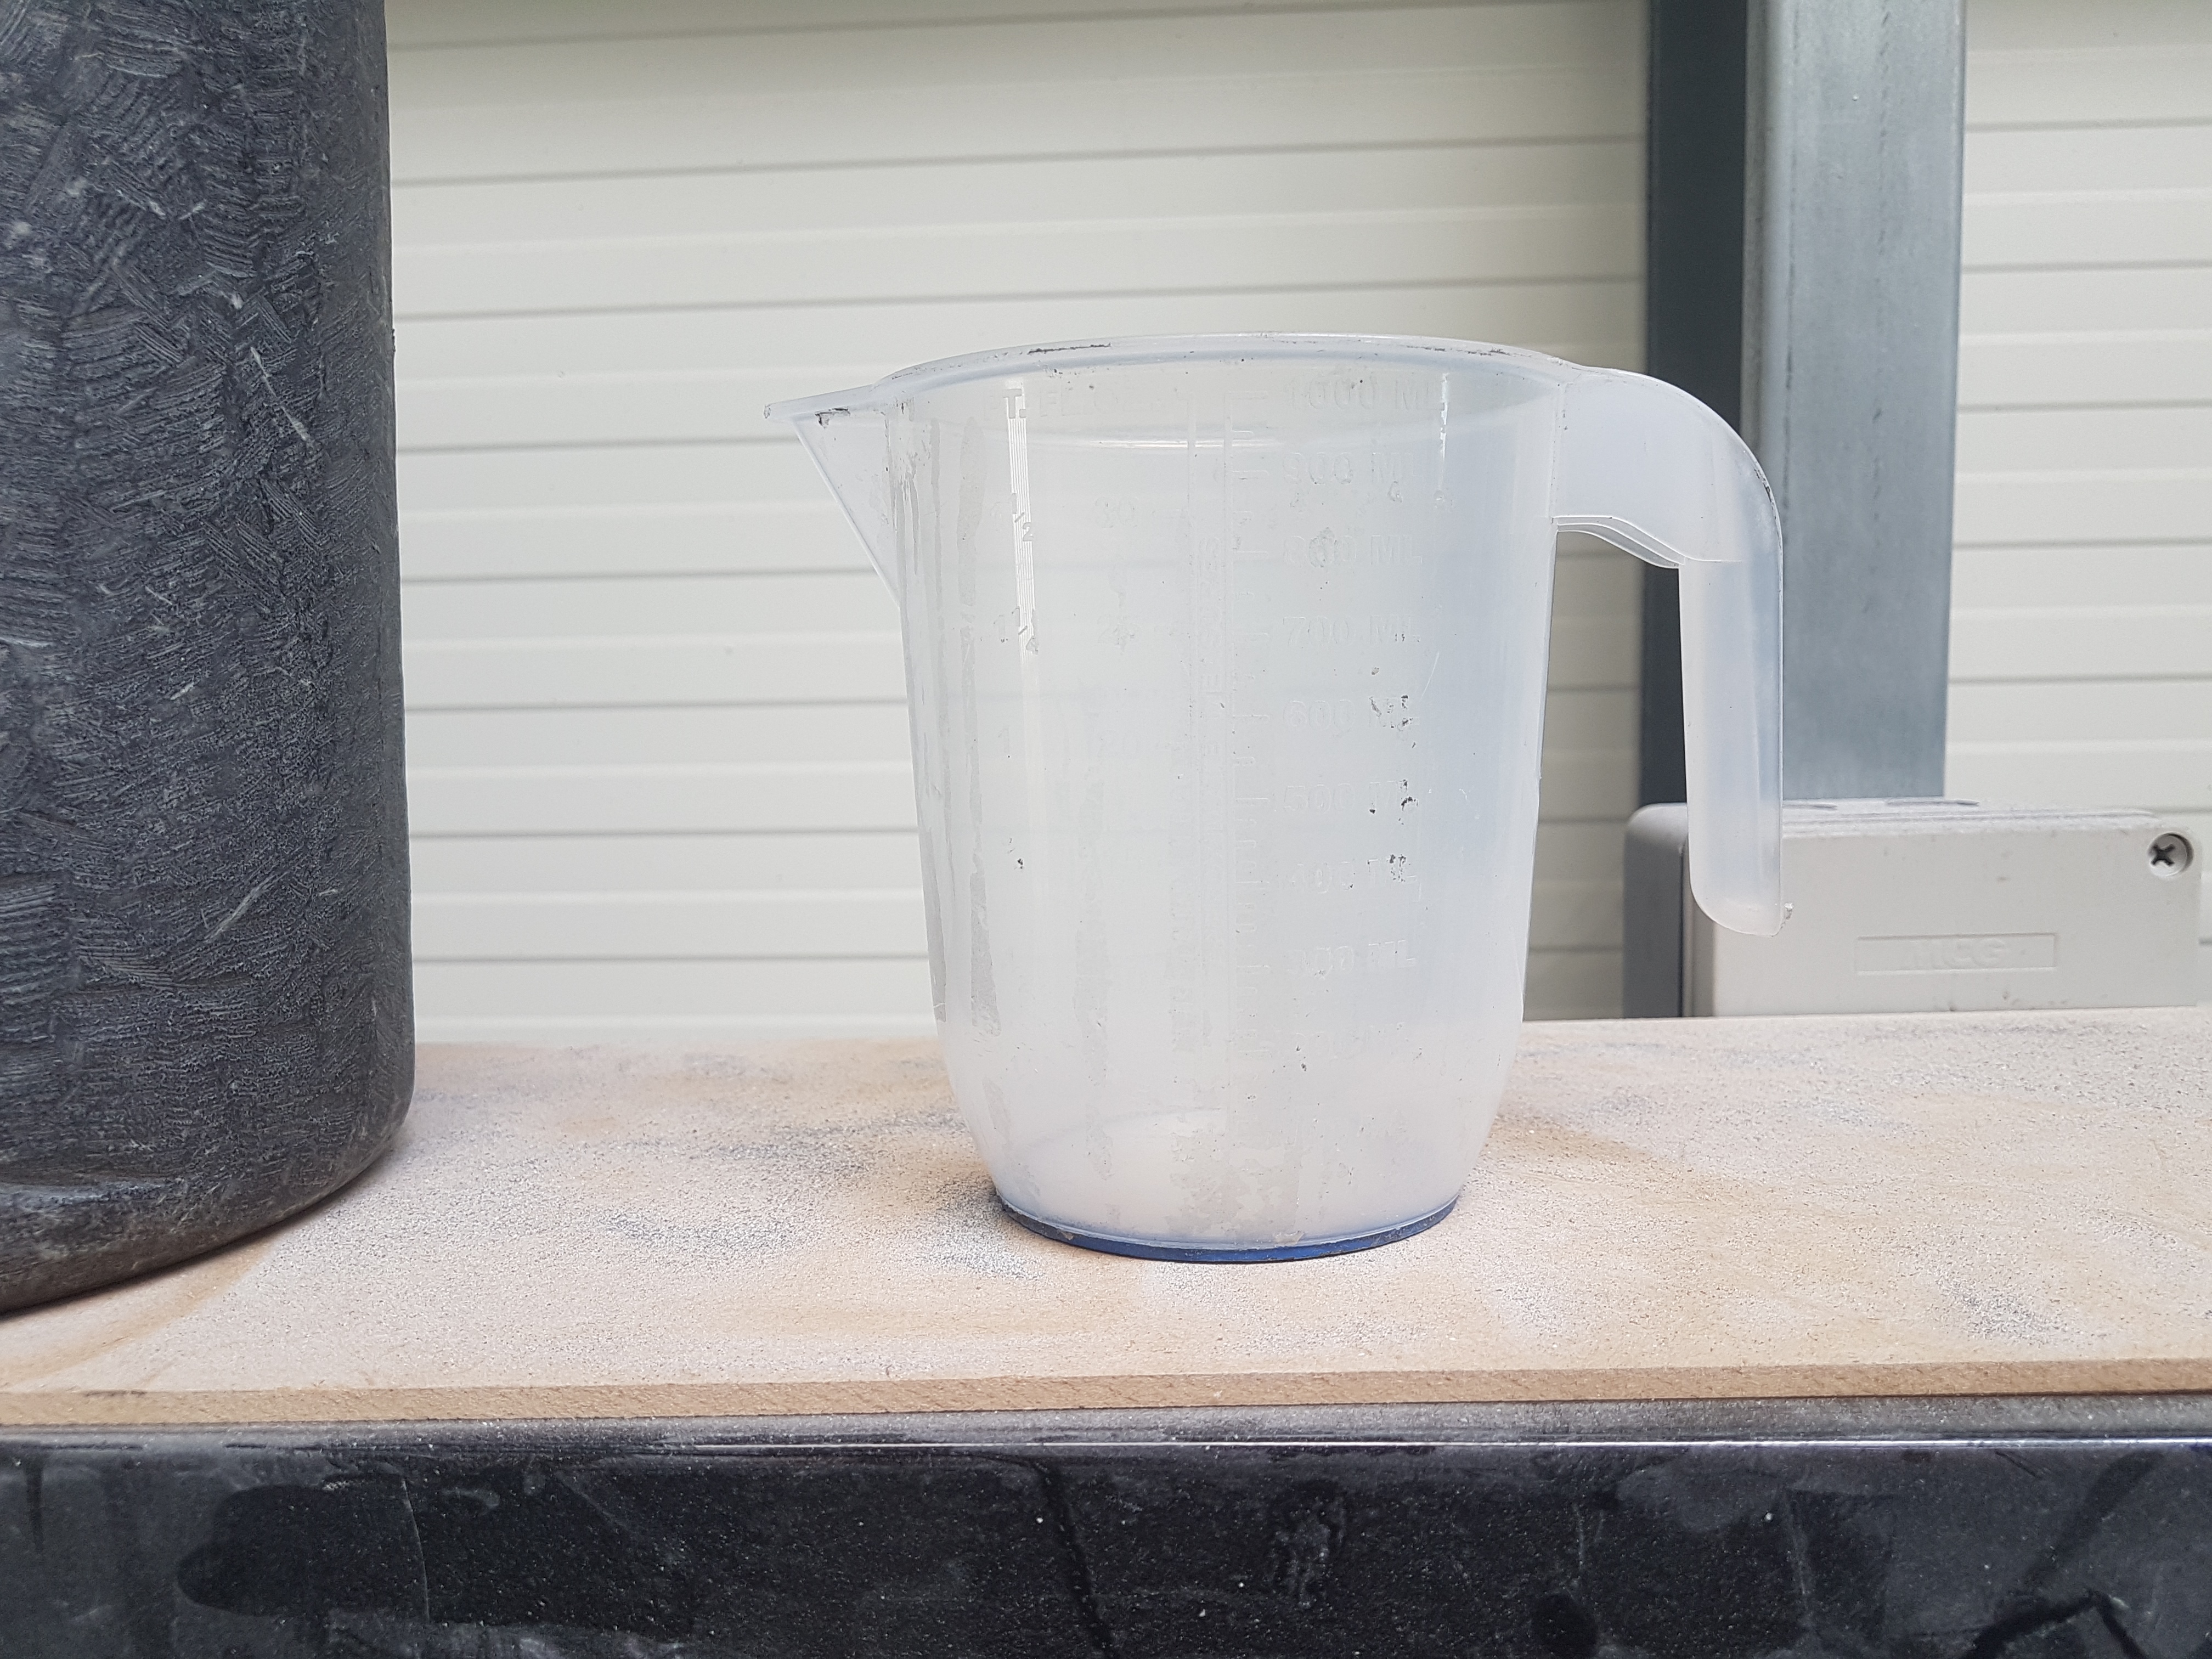
To weigh the beads the 10 litre jug must first be placed on the scales to set the default weight. When jug is steady on the scales press the Tare button to get the weight to zero. Now fill the jug with beads from the bed and weigh again. Divide the result by 10 and record. This is to be done on an hourly basis.
-
-
When performing pass 2, the size of the beads must be recorded also. This is done by filing the smaller measuring jug and emptying into the sieves. Make sure the sieves are stacked in the correct order first. Largest at the top. Shake the sieves to allow beads to fall and then empty each sieve in turn back into the small measuring jug. This will enable you to get a correct percentage reading to record in the log. This is to be completed hourly along with the weight of the bead to ensure correct quality of bead.
-
-
Sign to acknowledge understanding

Second Pass
-
To perform second pass, follow steps on pass1 up to feeding the hopper. The material will now be coming in from silo 1 to pass through the process. When machinery is ready and up to temperature (70 -80 degrees) you can begin. First start second pass feed from the control panel. Plug the second pass fan into the socket at the far end of the bed. Make sure all piping is fixed and secure and route the direction of the bead. This will be going into one of the other silos. Check all gates on the ducting and test the route by turning the silo fan on for a few seconds to see the correct silo inflate.
-
-
When all is correct you can start the second pass fan from the control panel. This will fill the cage with beads and introduce them to the agitator. The gate on the bottom of the cage determines the speed of entry and is marked with corresponding lines. Grey and white for each of the products.
-
-
When the bed starts to fill , the silo fan can be turned on to direct the bead to the desired silo.
-
Sign to acknowledge understanding
End of process procedure
-
When all the material, whether it be first or second pass, has been entered into the agitator you must wait at least 20 minutes for the product to expand. When little or no material is exiting the agitator you can begin the shutdown procedure. First turn off the boiler by pushing the switch to sit in the middle.
-
Start up the air compressor and unwind it fully. When ready, material can be cleared from the cage if doing second pass using the compressed air. The second pass fan can be turned off via the control panel at this stage. The beads that are left in the bed can be blown to the end to be pumped out. When the bed is empty, the silo fan is to be turned off. Detach the pipe at the silo end and place into the feed end of the bed. Make sure pipe is inserted so that I will blow down the bed. Now detach the other pipe at the bed end and place close to the trap door of the agitator. Now turn the silo fan back on and make sure you are wearing gloves. Double up on gloves if need be. Use the pipe to empty the product from the trap door being careful nothing enters the agitator. as this is still running. When empty, agitator and silo fan can be turned off and pipes to be connected to original positions. The bed must now be emptied using the silo fan and compressed air to blow beads through. When completed, everything can be turned off via the control panel and bed to be cleaned of any material.
-
Sign to acknowledge understanding
Routine checks and maintenance
-
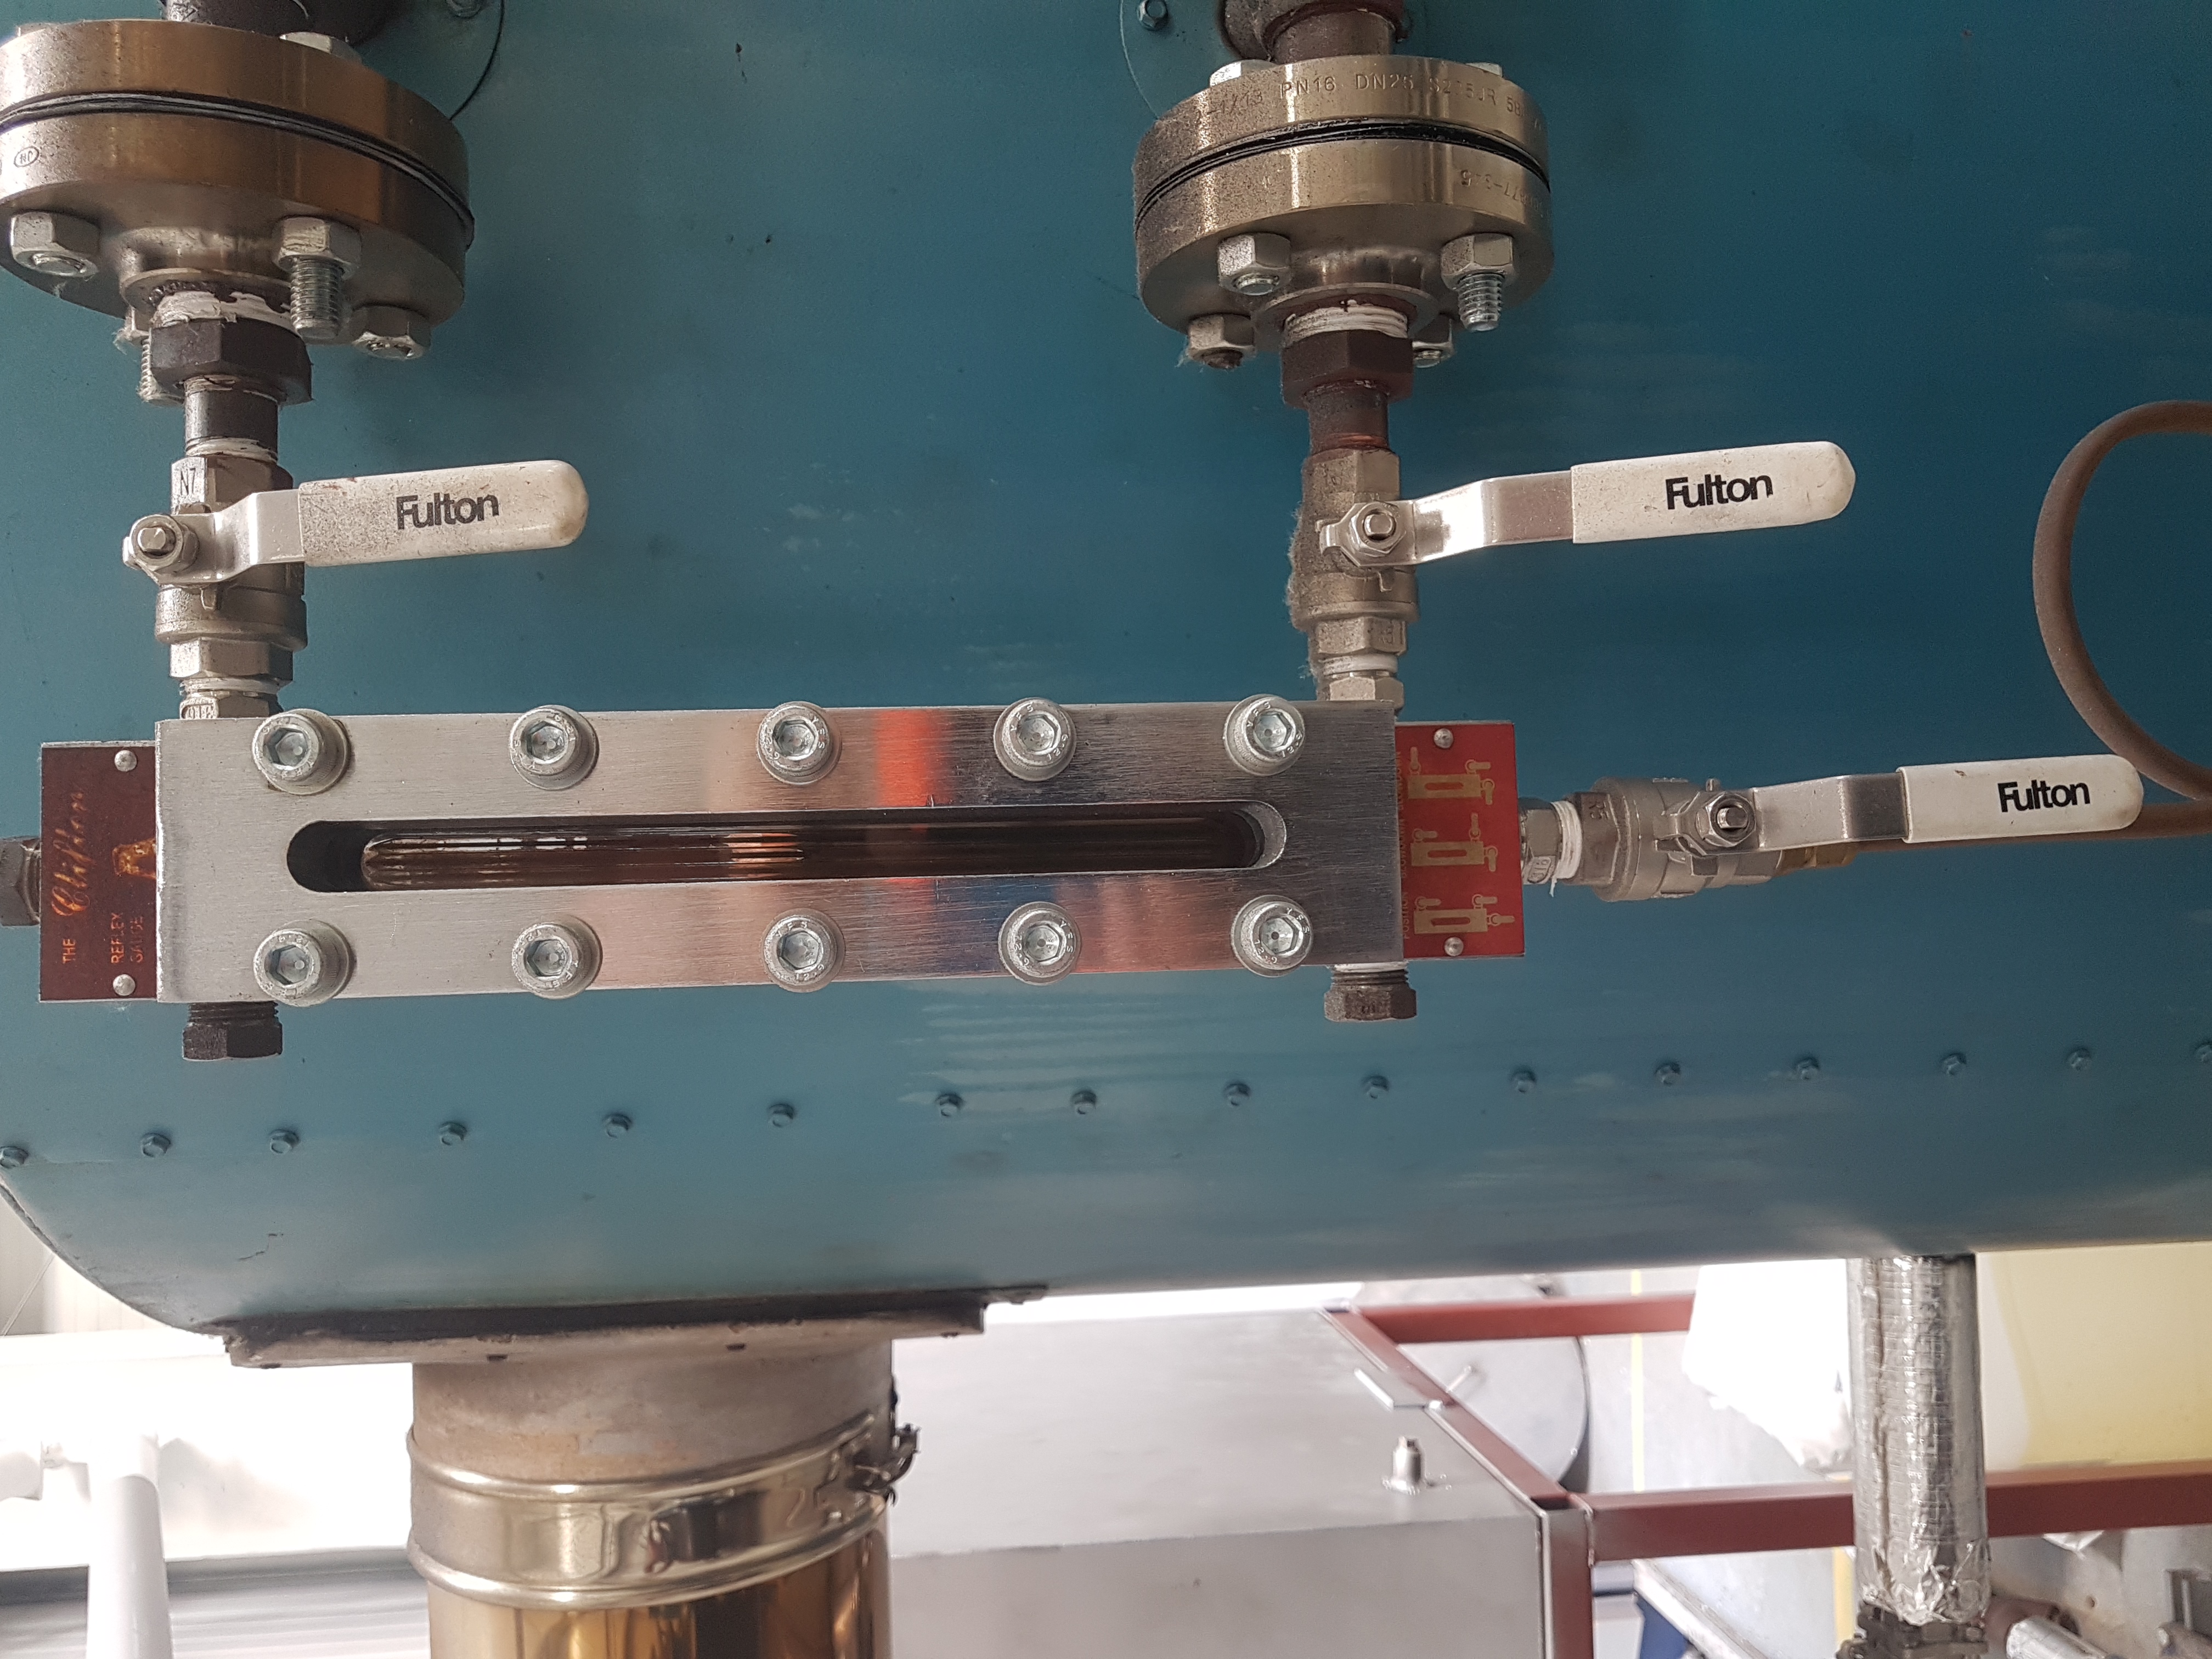
The boiler must be blown down once a week to ensure optimal performance. This is done by following the instructions on the taps. Each section will show you what taps to turn and in what order. These are turned for 10 seconds and then returned to original positions.
-
-
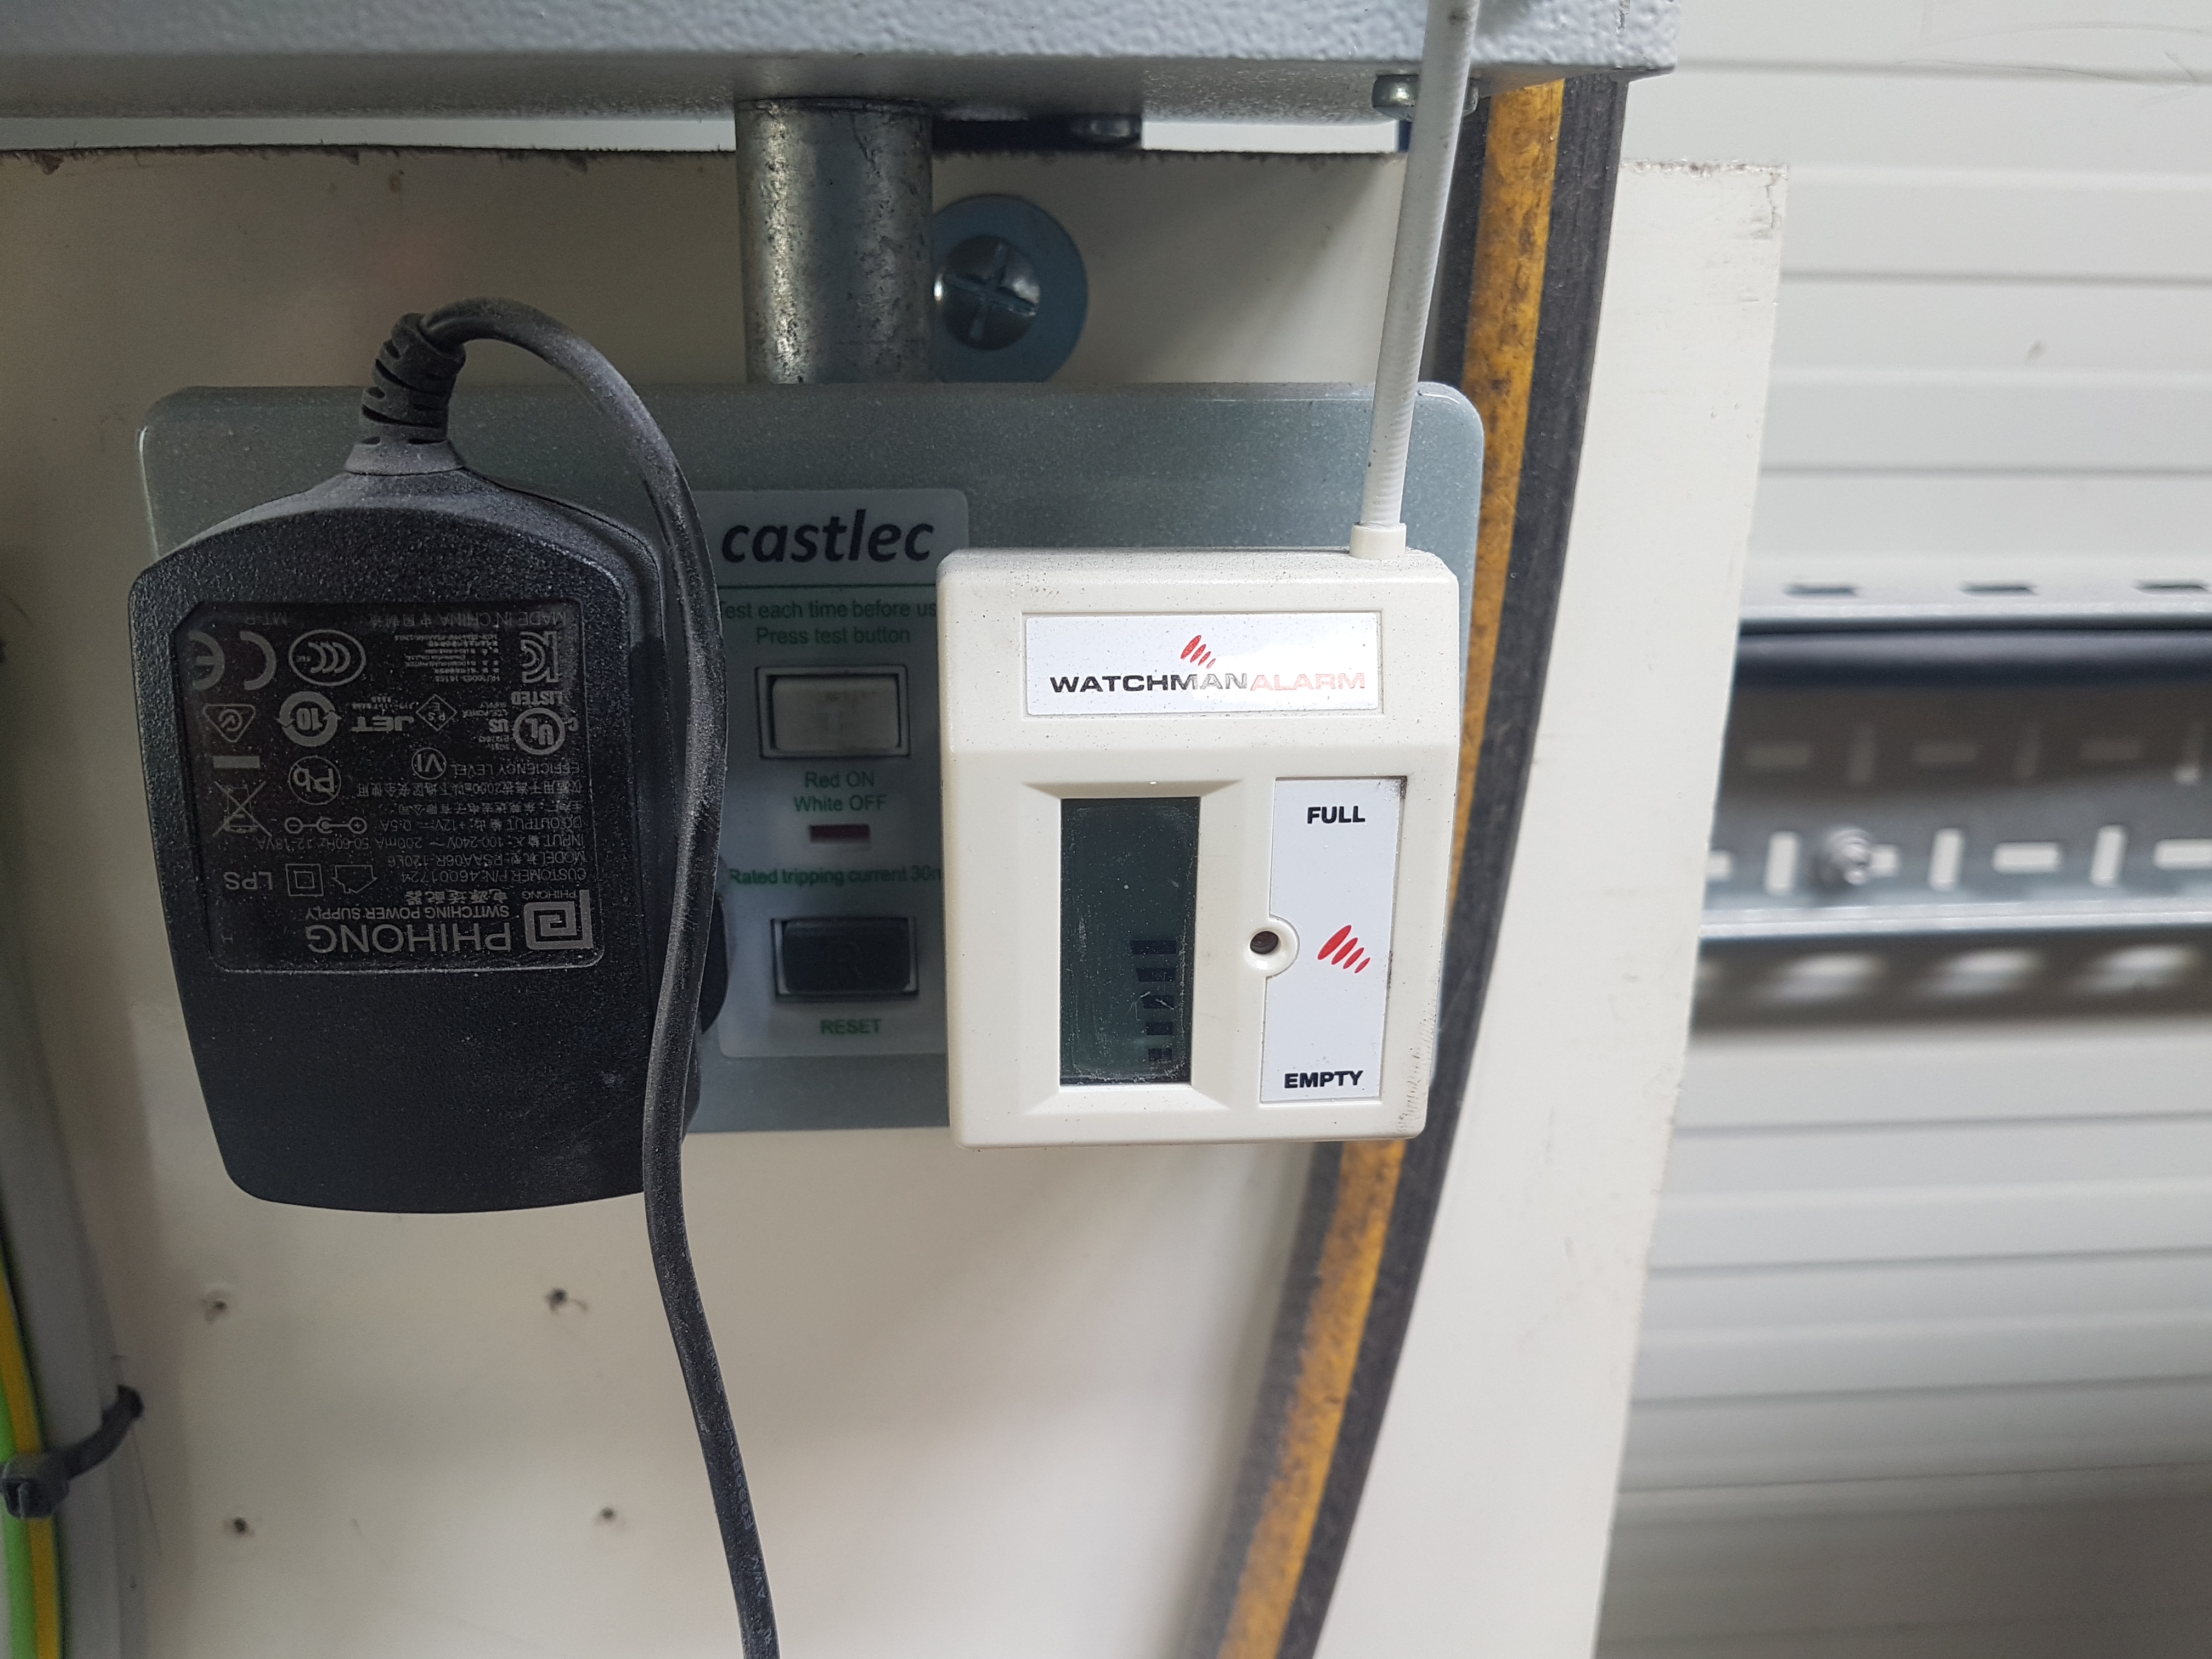
Diesel must be checked routinely to avoid running the boiler low. This is checked by the plug in fuel indicator next to the fuse board. When indicator reads 3 bars or less, diesel is to be ordered.
-
-
After each run, the agitator must be cleaned out to prepare for the next run. This is done via the trap door when machine has had time to cool down. Brush out remaining material and using a vacuum cleaner, remove product from feed and steam entry points. All machinery is to be blown clean using the air compressor. Once a month the agitator is to undergo a full clean by opening the door and cleaning all moving parts.
-
Sign to acknowledge understanding