


Title Page
-
Doc Number Insert Full Vin Number -
-
The site conducted (the project and vehicle vin last 6 are to be selected)
-
Prepared by
-
Conducted on
Pre PDI Checks - Inspection
-
Is Build Book Complete - Bingo Sheets Stamped For All Jobs
-
Are Keys present? Confirm 2 ignition keys, 2 fuel cap keys, CES key. Check the key serial number is recorded correctly on the serial number check sheet.
-
Photo the sign off sheet and CES: Example: Photo added
-
CES layed out with laminated, signed off complete checklist record failers
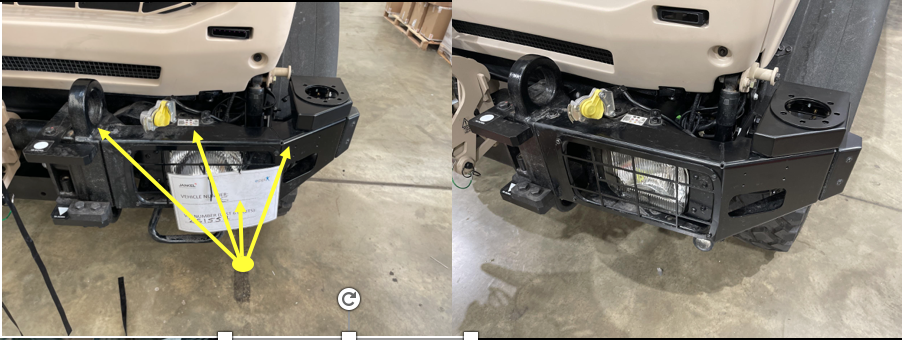
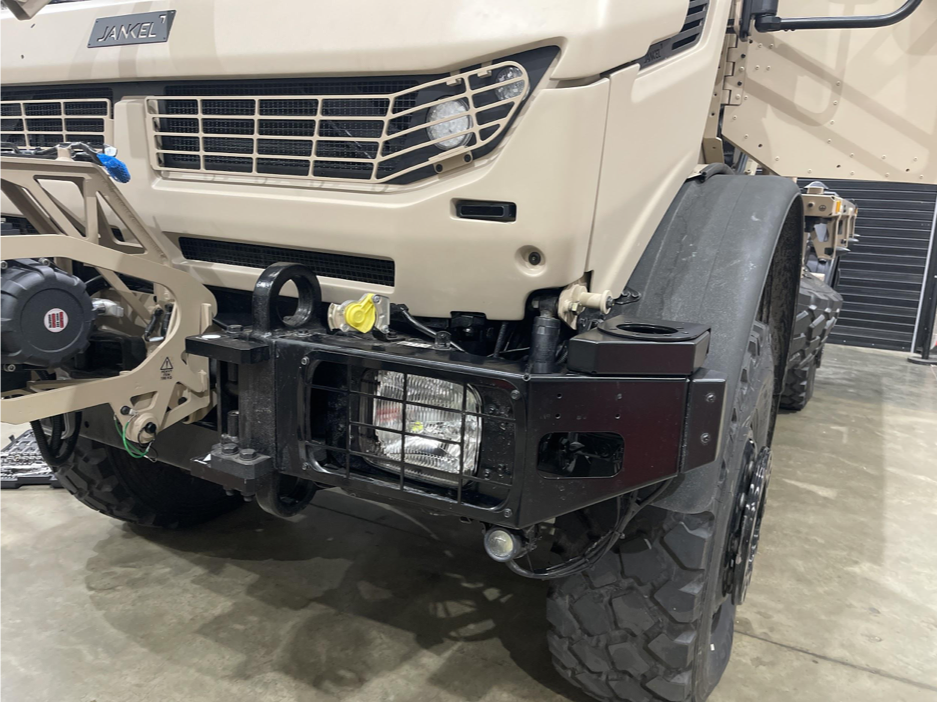
External - Front of Vehicle
Front of Vehicle LH
-
Instruction
-
Front Bumper LH check its fitted, secure - check bolts for torque marks.
-
Instruction
-
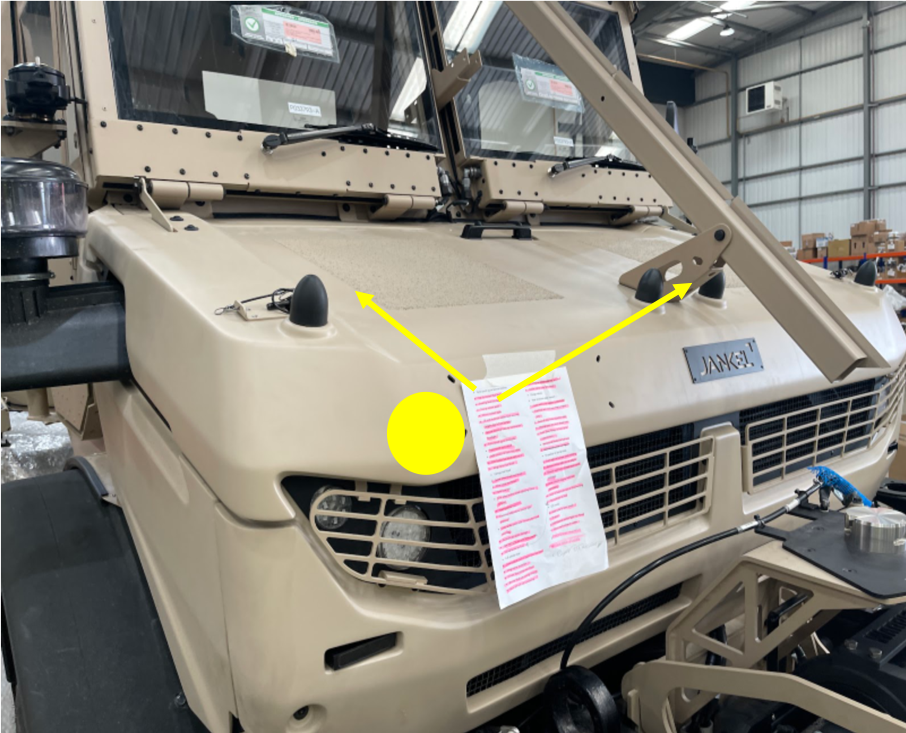
Bonnet Latches and Safety Systems Check fitment, security, damage and shut lines
-
Instruction
-
Bonnet rubbers Fitment, security and damage
-
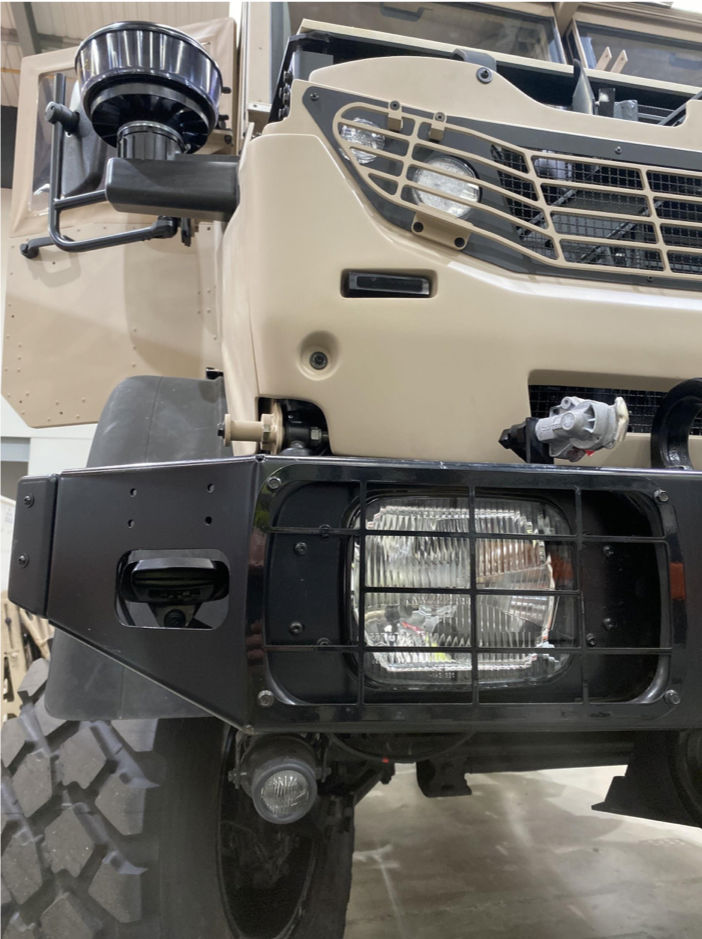
Lights and guards
-
Lights and guards
-
Lights and guards checking DRL, and indicator in the front grill and then the Head light, fog light, Side repeater
-
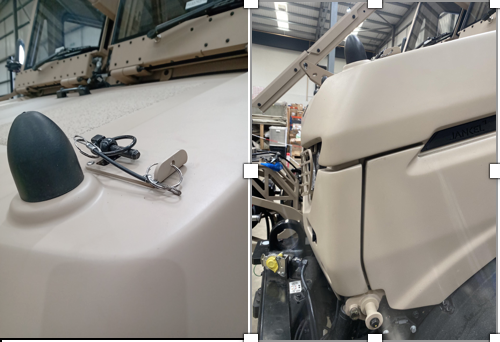
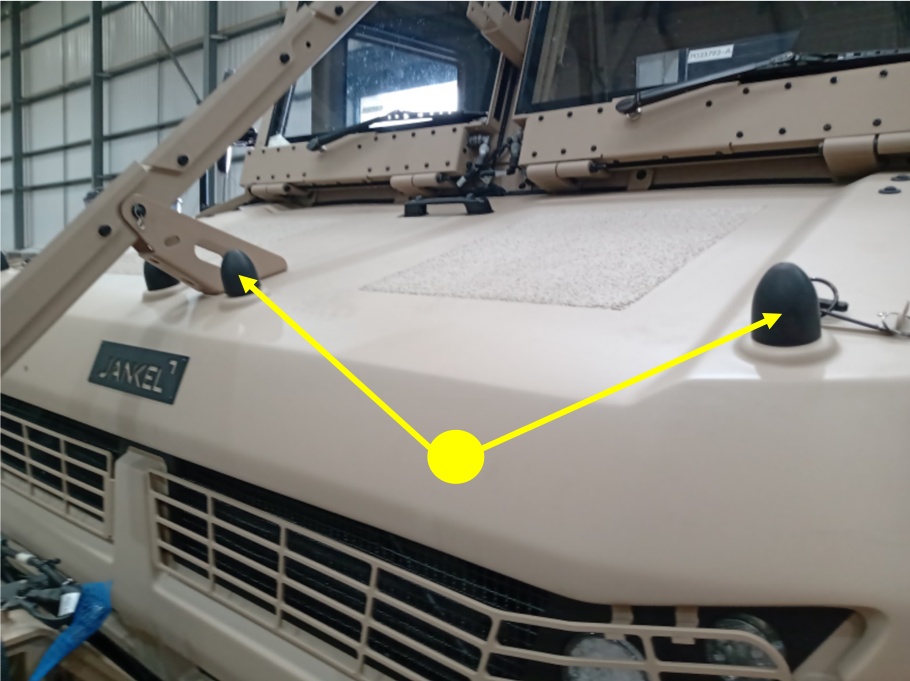
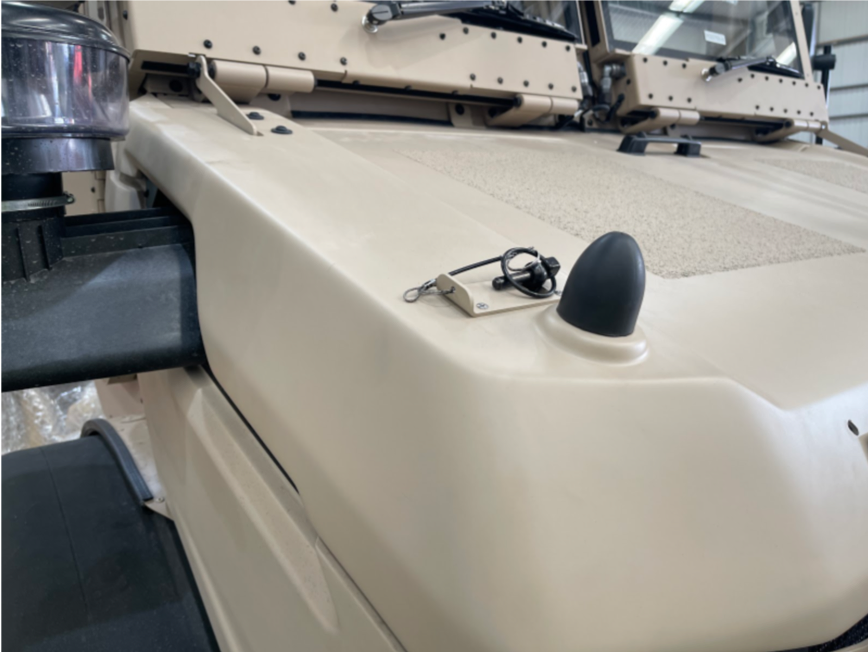
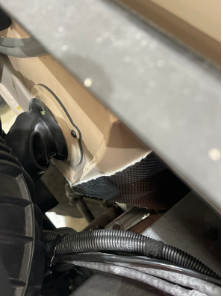
Antenna Base
-
Antenna Base Check fitment, security, for damage, earth bonding cable fitted and Antenna cables fitted
-
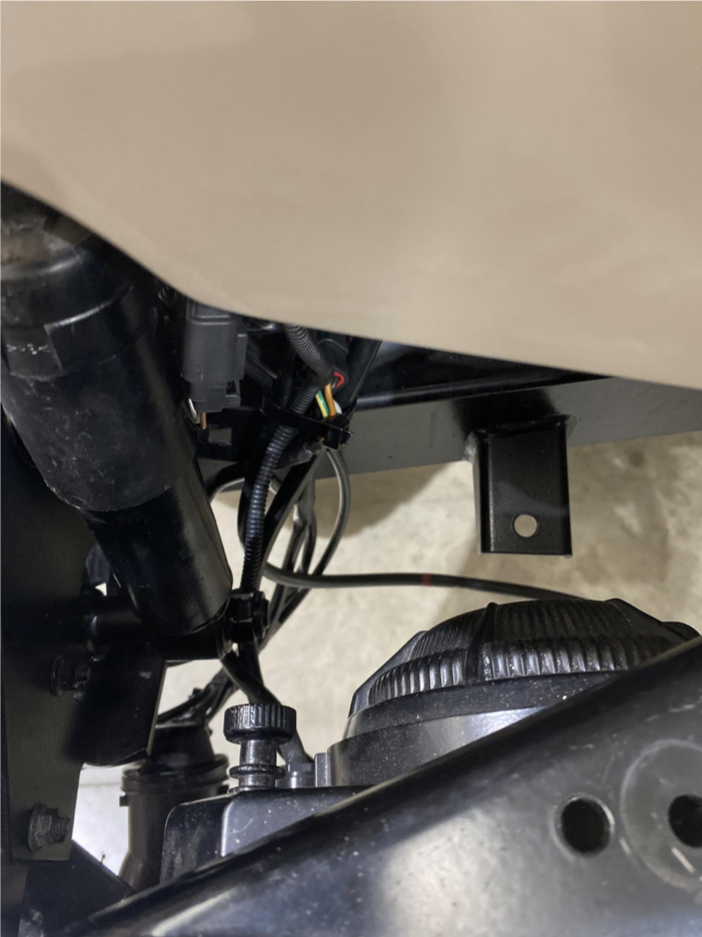
Wiring or lose plugs
-
Check for loose insecure and bare wiring and or plugs
-
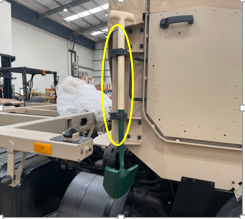
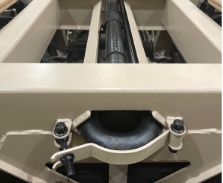
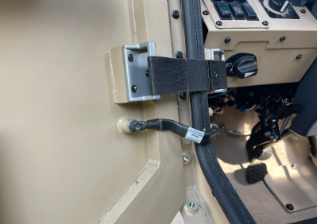
Cab tilt damper and brakes
-
Check Cab tilt brakes and damper for fitment, security


Front of vehicle center
-
Instruction
-
Winch (fitted with serial no. visible) Check Security and condition of cradle, Lanyard and pins fitted, earthing straps fitted and greased
-
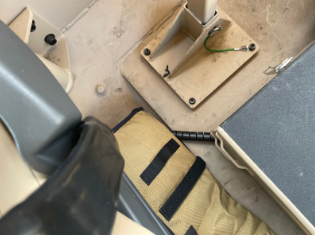
Front Smoke Disccharger
-
Front Smoke discharger cable check fitment, security, damage, earth lead fitted and greased
-
Front Air Line Connectors
-
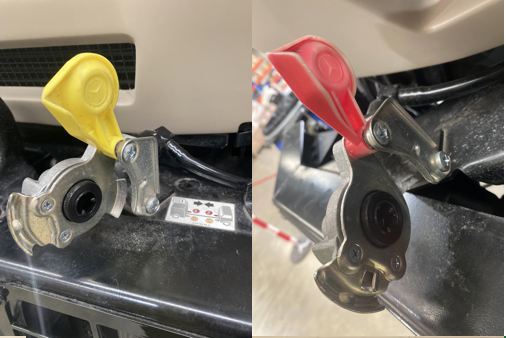
Auxiliary and Emergency Air connectors check fitment, security and covers not damaged. colours to be correct, yellow on left, red on right. colours can be faded so long as they are identifiable
-
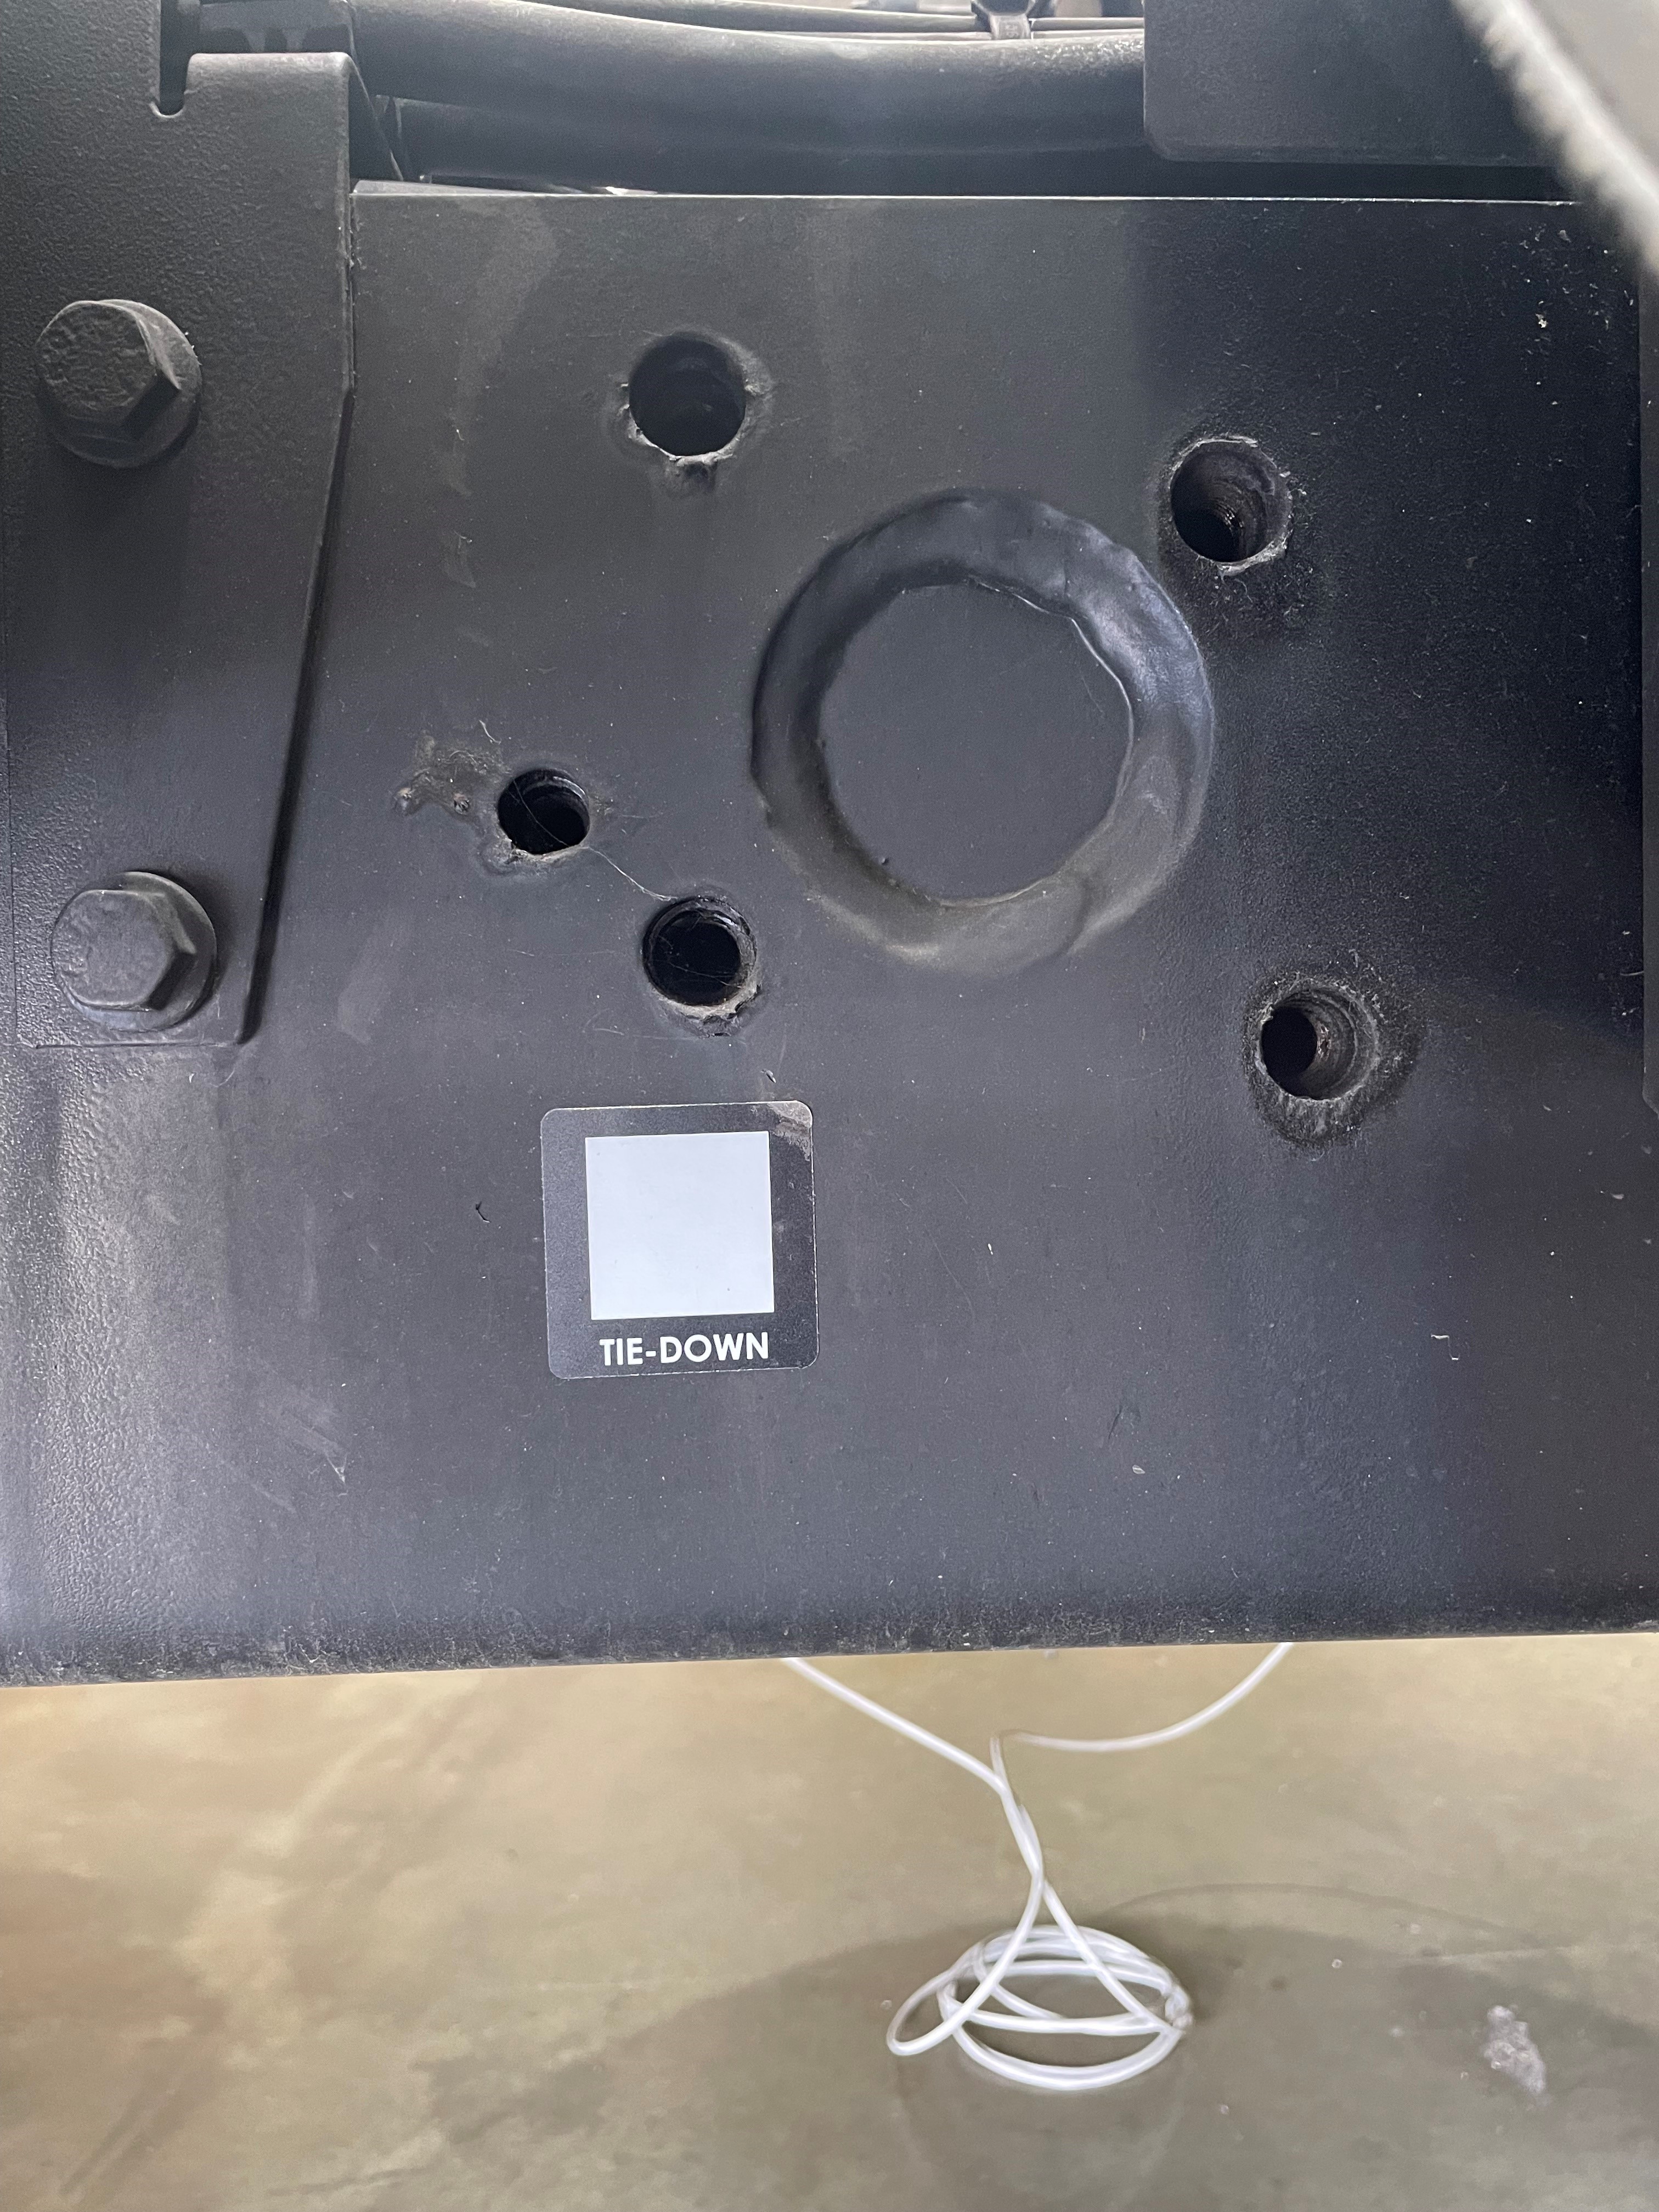
Front Tie Downs
-
Front tie downs Check fitment, security, damage and bolts torque marker
-
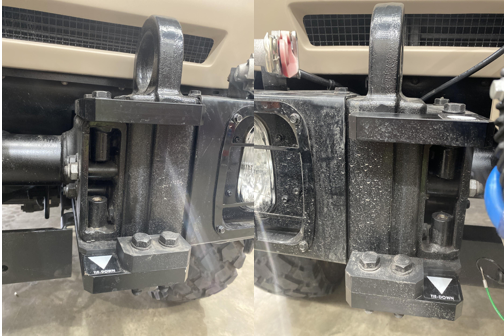
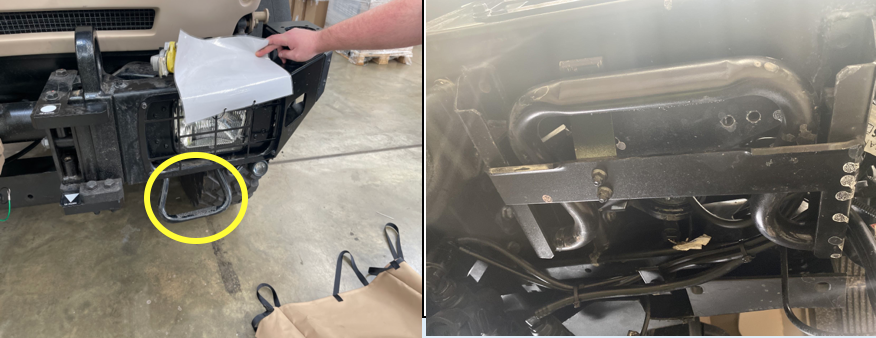
Front Pintle Function
-
Check front recovery pintle function and security. pin cannot be removed without rotating it so that the spring is out of the grooves in the pin
-
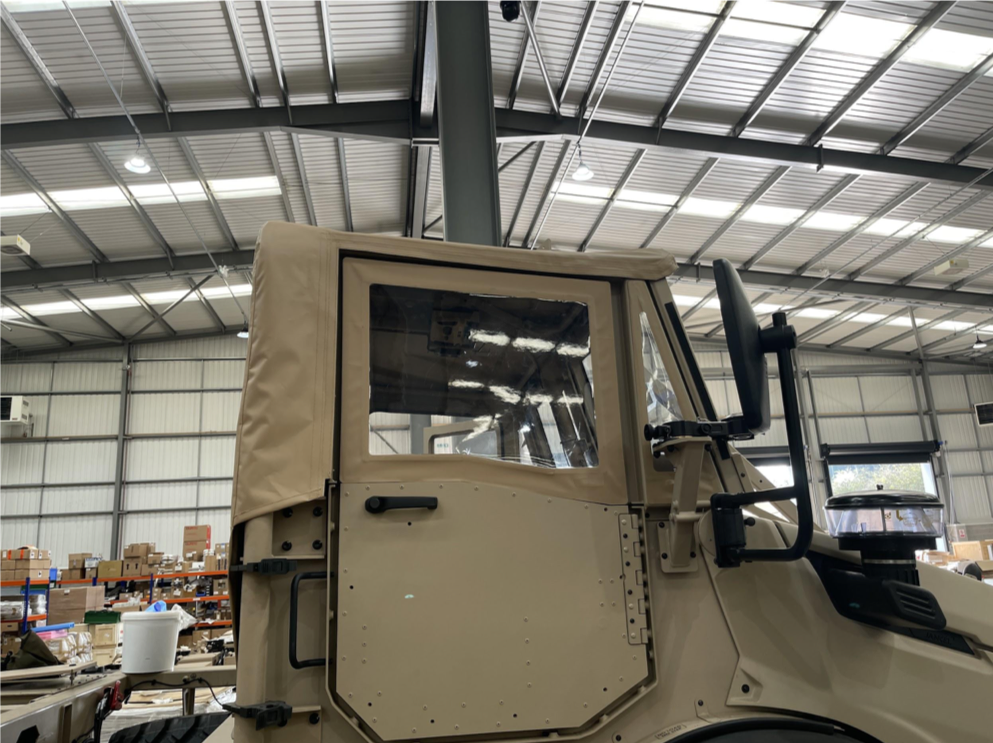
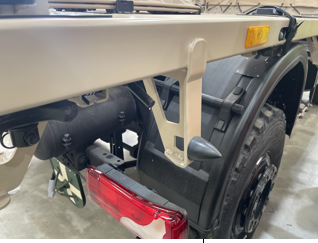
Check Step - Security and Function
-
Check Step security and function. stowed, locked and deployed

Front of Vehicle RH
-
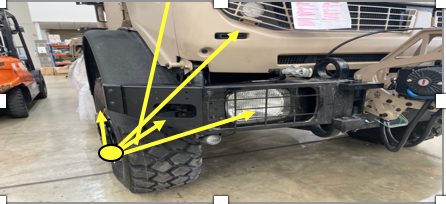
Front Bumper
-
Front Bumper LR check its fitted, secure, report any damage and ensure bolts are tight
-
Bonnet Latches
-
Bonnet Latches and Safety Systems Check fitment, security, damage and shut lines
-
Bonnet Rubbers
-
Bonnet rubbers Fitment, security and damage
-
Lights Front
-
Lights - Front - DRL - Indicator - Front Grill - Headlight - Fog - Side Repeater -
-
Lights and guards checking DRL, and indicator in the front grill and then the Head light, fog light, Side repeater
-
Loose Insecure Wires Front Bumper
-
Check that there is no loose, insecure or bare wiring/plugs
-
Cab Tilt Brakes and Damper
-
Check Cab tilt brakes and damper for fitment, security
-

External - RHS of Vehicle
Right Hand Side of Vehcile
-
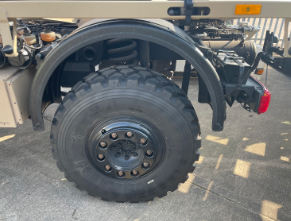
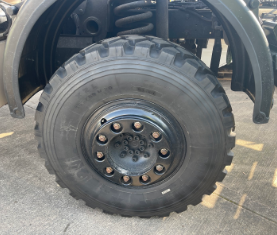
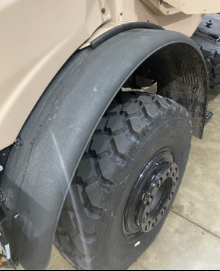
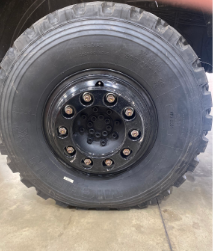
Wheel Condition - Runflat Markings
-
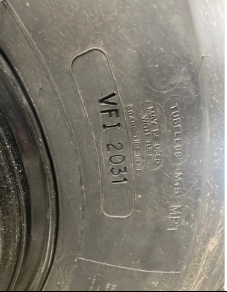
Wheel & tyre condition Check for wear, damage, run flat fitted and Paint damage
-
Wheel Torque
-
Wheel nut torques 600NM+/50. Check three nuts on each wheel. if one failure found, all wheels to be failed and rework is 100% set to correct torque
-
Tyre pressure check on all wheels. Ensure that valve caps are secure once checks are complete
-
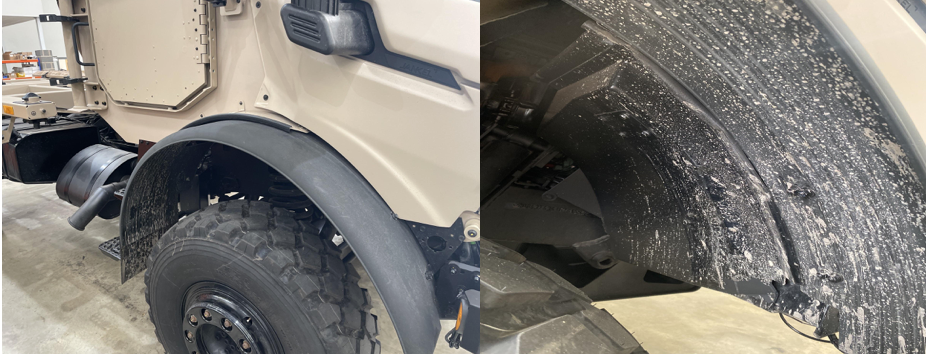
Instruction Front Wheel Arch Fitment and Security
-
Front Wheel arches and spray suppression fitment security, seal fitment, and damage
-
Instruction Heat Shielding
-
Heat Shielding fitted
-
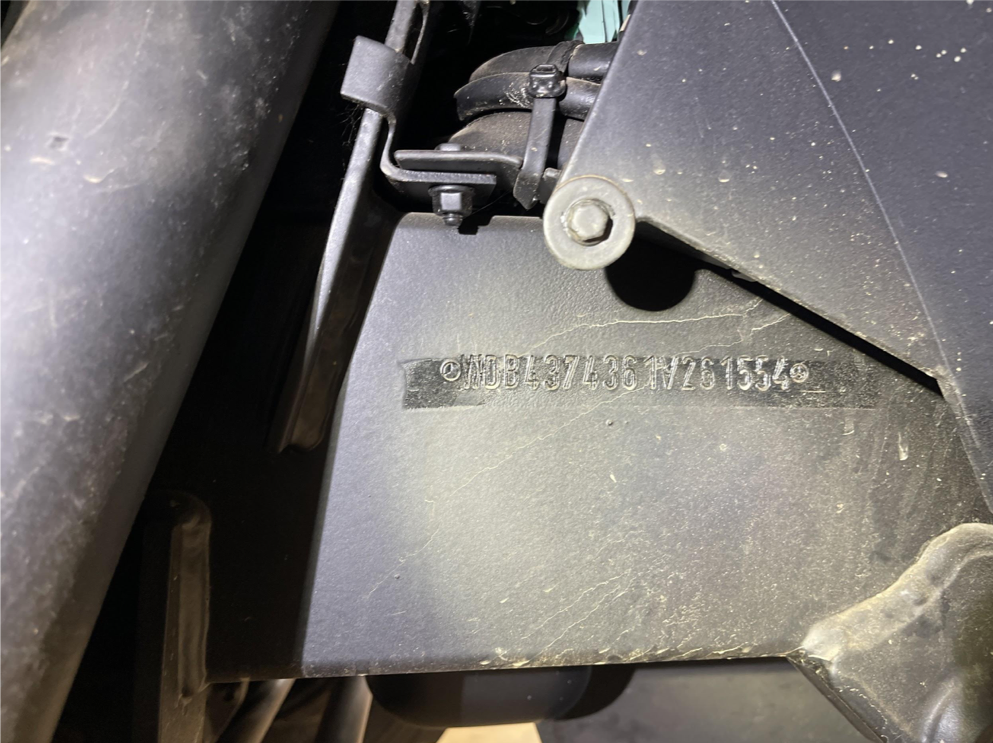
OEM VIN "X'd" out and new vin engraved underneath (A/W New Image)
-
OEM VIN X'd out and JAL VIN engraved on chassis. Paint repair completed
-
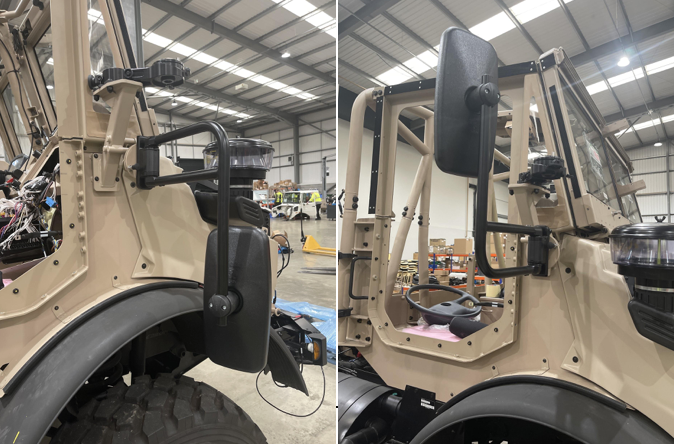
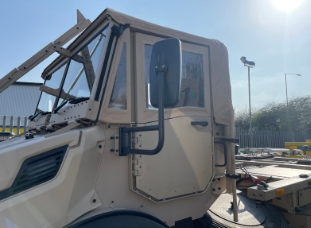
Instruction Wing Mirror Fitment
-
Wing mirrors Check rotation, locking mechanism in both directions, and full range of swing can be achieved. Check that the mirror is set to the correct angle as per work instructions.
-
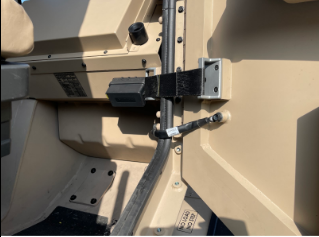
Instruction Commander Swing Arm - Weapon Mount -
-
Commanders weapon swing arm check lock wire is fitted and not damaged, check operation and condition
-
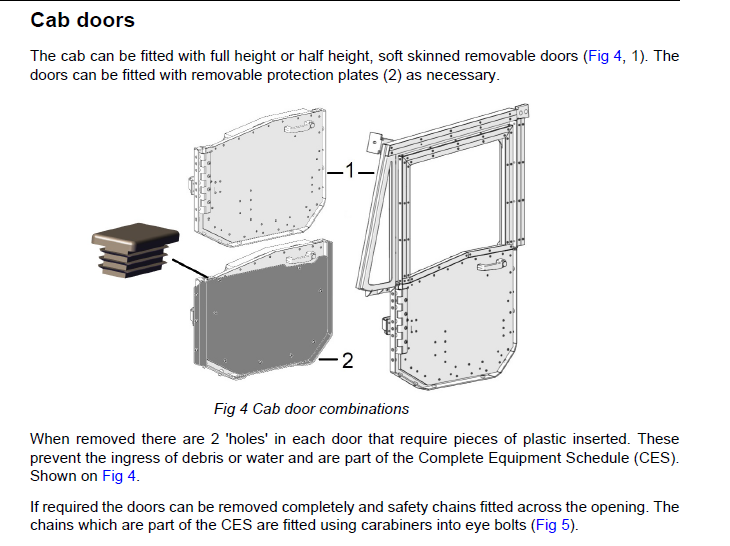
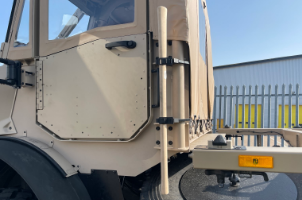
Instruction Door Cab
-
Instruction RH Cab Door
-
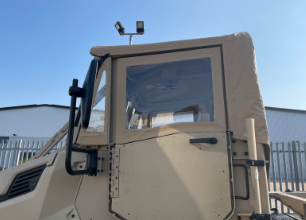
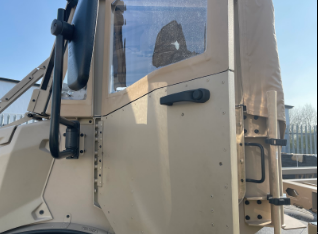
RH Door Check that the door fitment - condition - damage = FAIL
-
Instruction
-
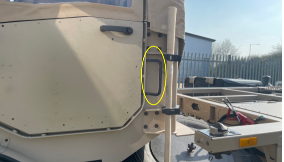
Check - door quarter glass fitment - condition - damaged = FAIL
-
Instruction
-
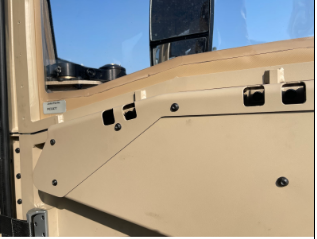
Cab step Check for fitment, security, condition
-
Instruction
-
Grab handles Check for fitment, security and condition
-
Instruction Tool Stowage Cab
-
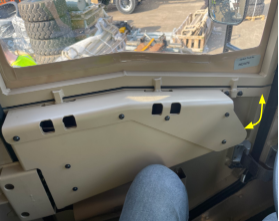
Tool Stowage (Handle) check it fitted and condition
-
Instruction Fuel Filter
-
Fuel filter and guard check for fitment, security, condition and check for any leaks
-
Instruction
-
Blast plate - Check for fitment and the RH bolts are torque marked
-
Instruction
-
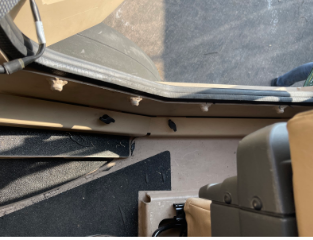
Side marker light 1 (Front to Rear) Check for fitment and damage
-
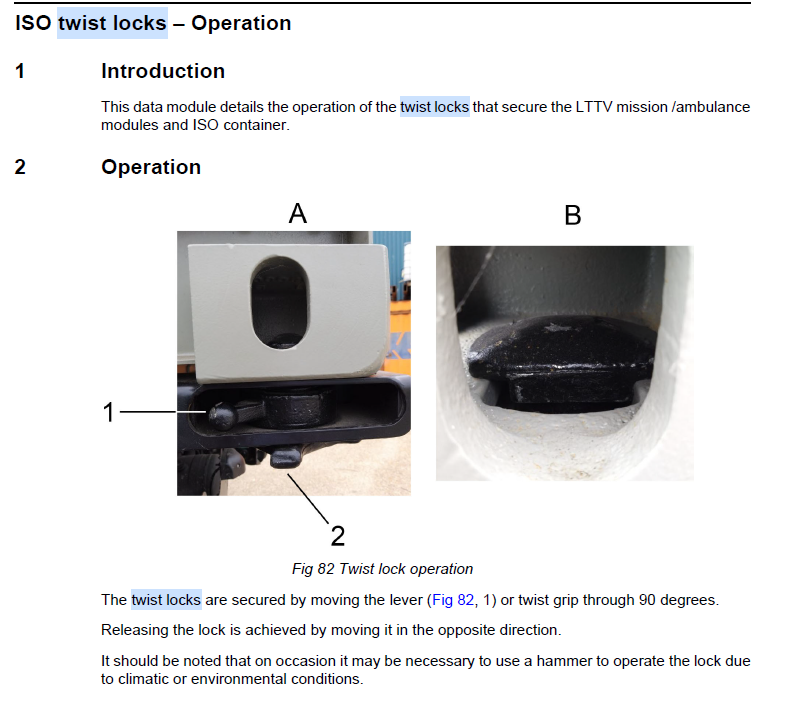
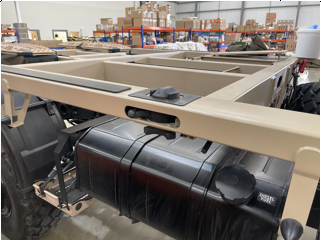
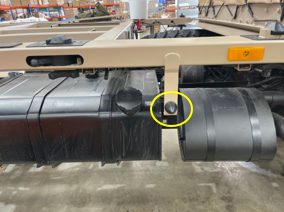
Instruction - Twist Lock -
-
Instruction - Twist Lock 1
-
Twist lock 1 (front to Rear) Fitment, operation and damage
-
Instruction -Twist Lock 2
-
Twist lock 2 (front to Rear) Fitment, operation and damage
-
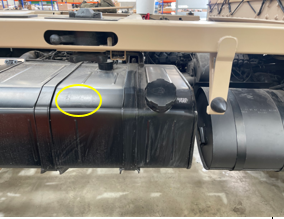
Instruction - Bump Stop
-
Rubber bump stop fitted 1 (front to Rear) Check for fitment, security and damage
-
Instruction
-
Exhaust Fitment, security, condition and the Badge is covered
-
Instruction
-
Fuel Tank and cap operation Fitment security. Sticker removed and ensure there are no leaks Check key locks and unlocks the cap
-
Instruction Tie Down's
-
Tie Down
-
Centre tie down security and condition
-
Instruction - Jerry Can Holder
-
Jerry can holder check for fitment, security, rubber matting, straps fitted and damage
-
Instruction Bump Stop 2&3
-
Rubber bump stop fitted 2&3 (front to Rear) Check for fitment, security and damage
-
Instruction Twist Lock 3
-
Twist lock 3 (front to Rear) Fitment, operation and damage
-
Wheel Arch Fitment
-
Rear wheel arch and stay check for Security, condition, gap between interface frame, orientation and position on the wheel >= 15mm Gap Pass, less than 15mm Gap Fail.
-
Rear RH wheel
-
Wheel & tyre condition Check for wear, damage, run flat fitted and Paint damage
-
Instruction Twist Lock No 4
-
Twist lock 4 (front to Rear) Fitment, operation and damage
-
Bump Stop
-
Rubber bump stop fitted 4 (front to Rear) Check for fitment, security and damage
-
Side Marker Light
-
Side marker light 2 (front to rear) Check for fitment and damage


External - Rear of Vehicle
RH Rear of Vehicle
-
Bump Stop
-
Bump stops and spacer Fitted, security and condition
-
Rear Air Connectors -
-
Rear air connection fitment, security and condition check internal rubber seal face for: damage - dirt - Note - fading of caps is ok, but the colour must still be distinguishable.
-
Rear tie down
-
Rear tie down fitted and torqued
-
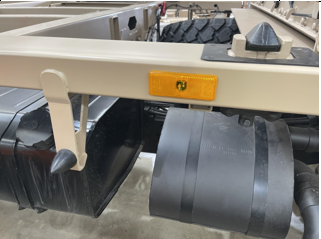
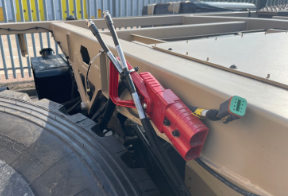
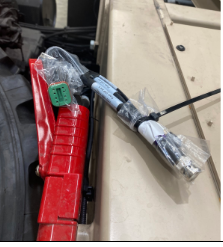
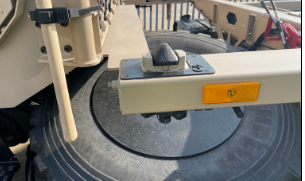
Sand Ladders and strap
-
Sand ladders fitted, security and damage. Nylon Blocks are Bolted Down.
-
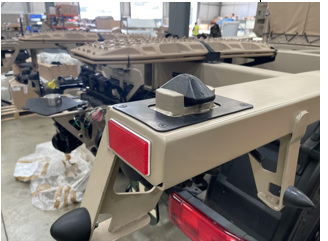
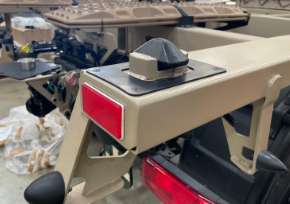
Convoy Light
-
Convoy Light fitted, security and condition
-
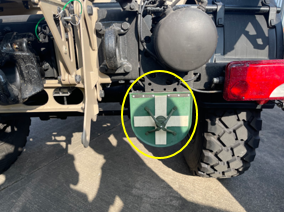
Interface Frame Serial ID Plate
-
Serial plate fitted to interface frame Record number below
-
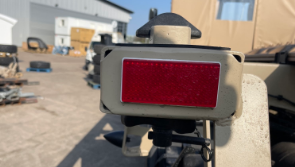
RH Rear Reflector
-
check Reflector is fitted correctly and has no damage
-
Cable Routing
-
Routing and security of all cables
-
Rear RH Lights
-
Rear lights and IR lights fitted security, and harness routing


Rear of Vehicle - Centre
-
Rear Smoke Grenade Discharger Mount
-
Rear Smoke Discharger Mounting plate fitted, security and condition. check earth bonding strap is fitted, secure and not damaged
-
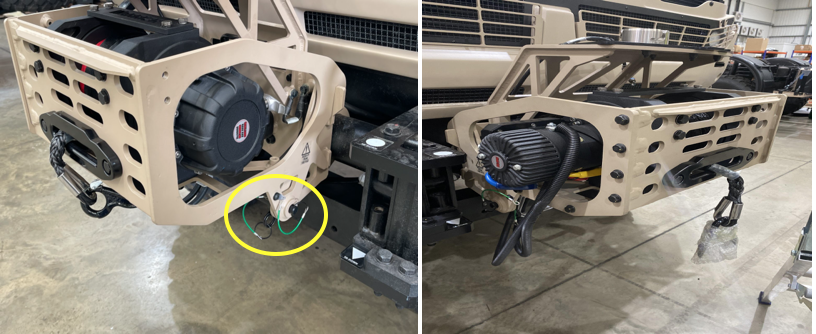
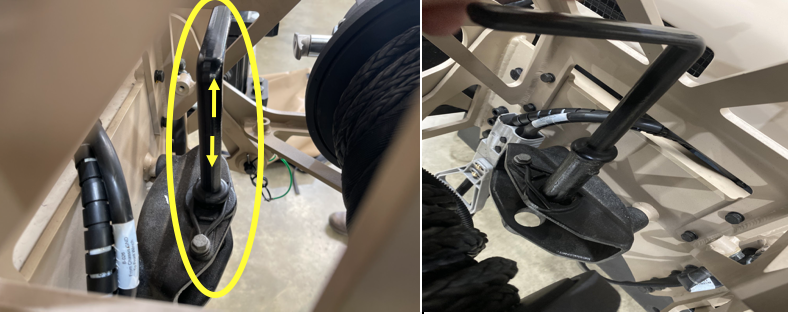
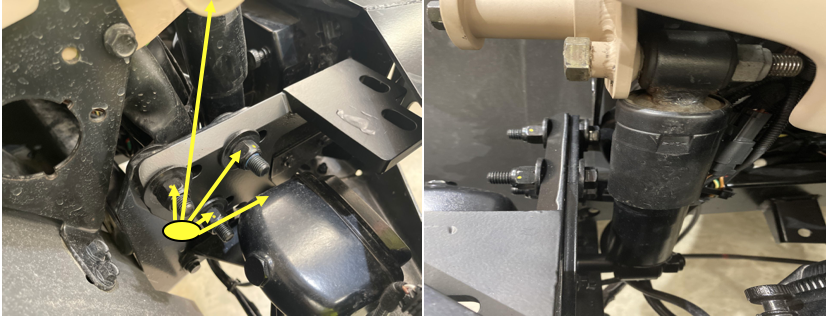
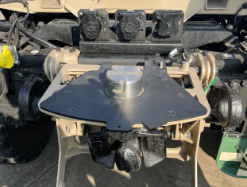
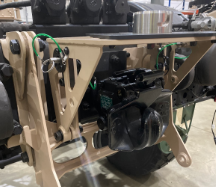
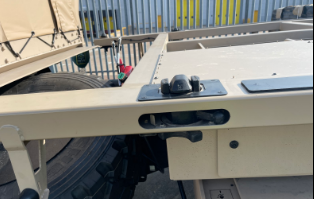
Rear Winch Mount
-
Winch mounting plate fitted, security. Condition, pins and lanyards fitted and bolts torqued marked and dry fit winch Warrior Cradle
-
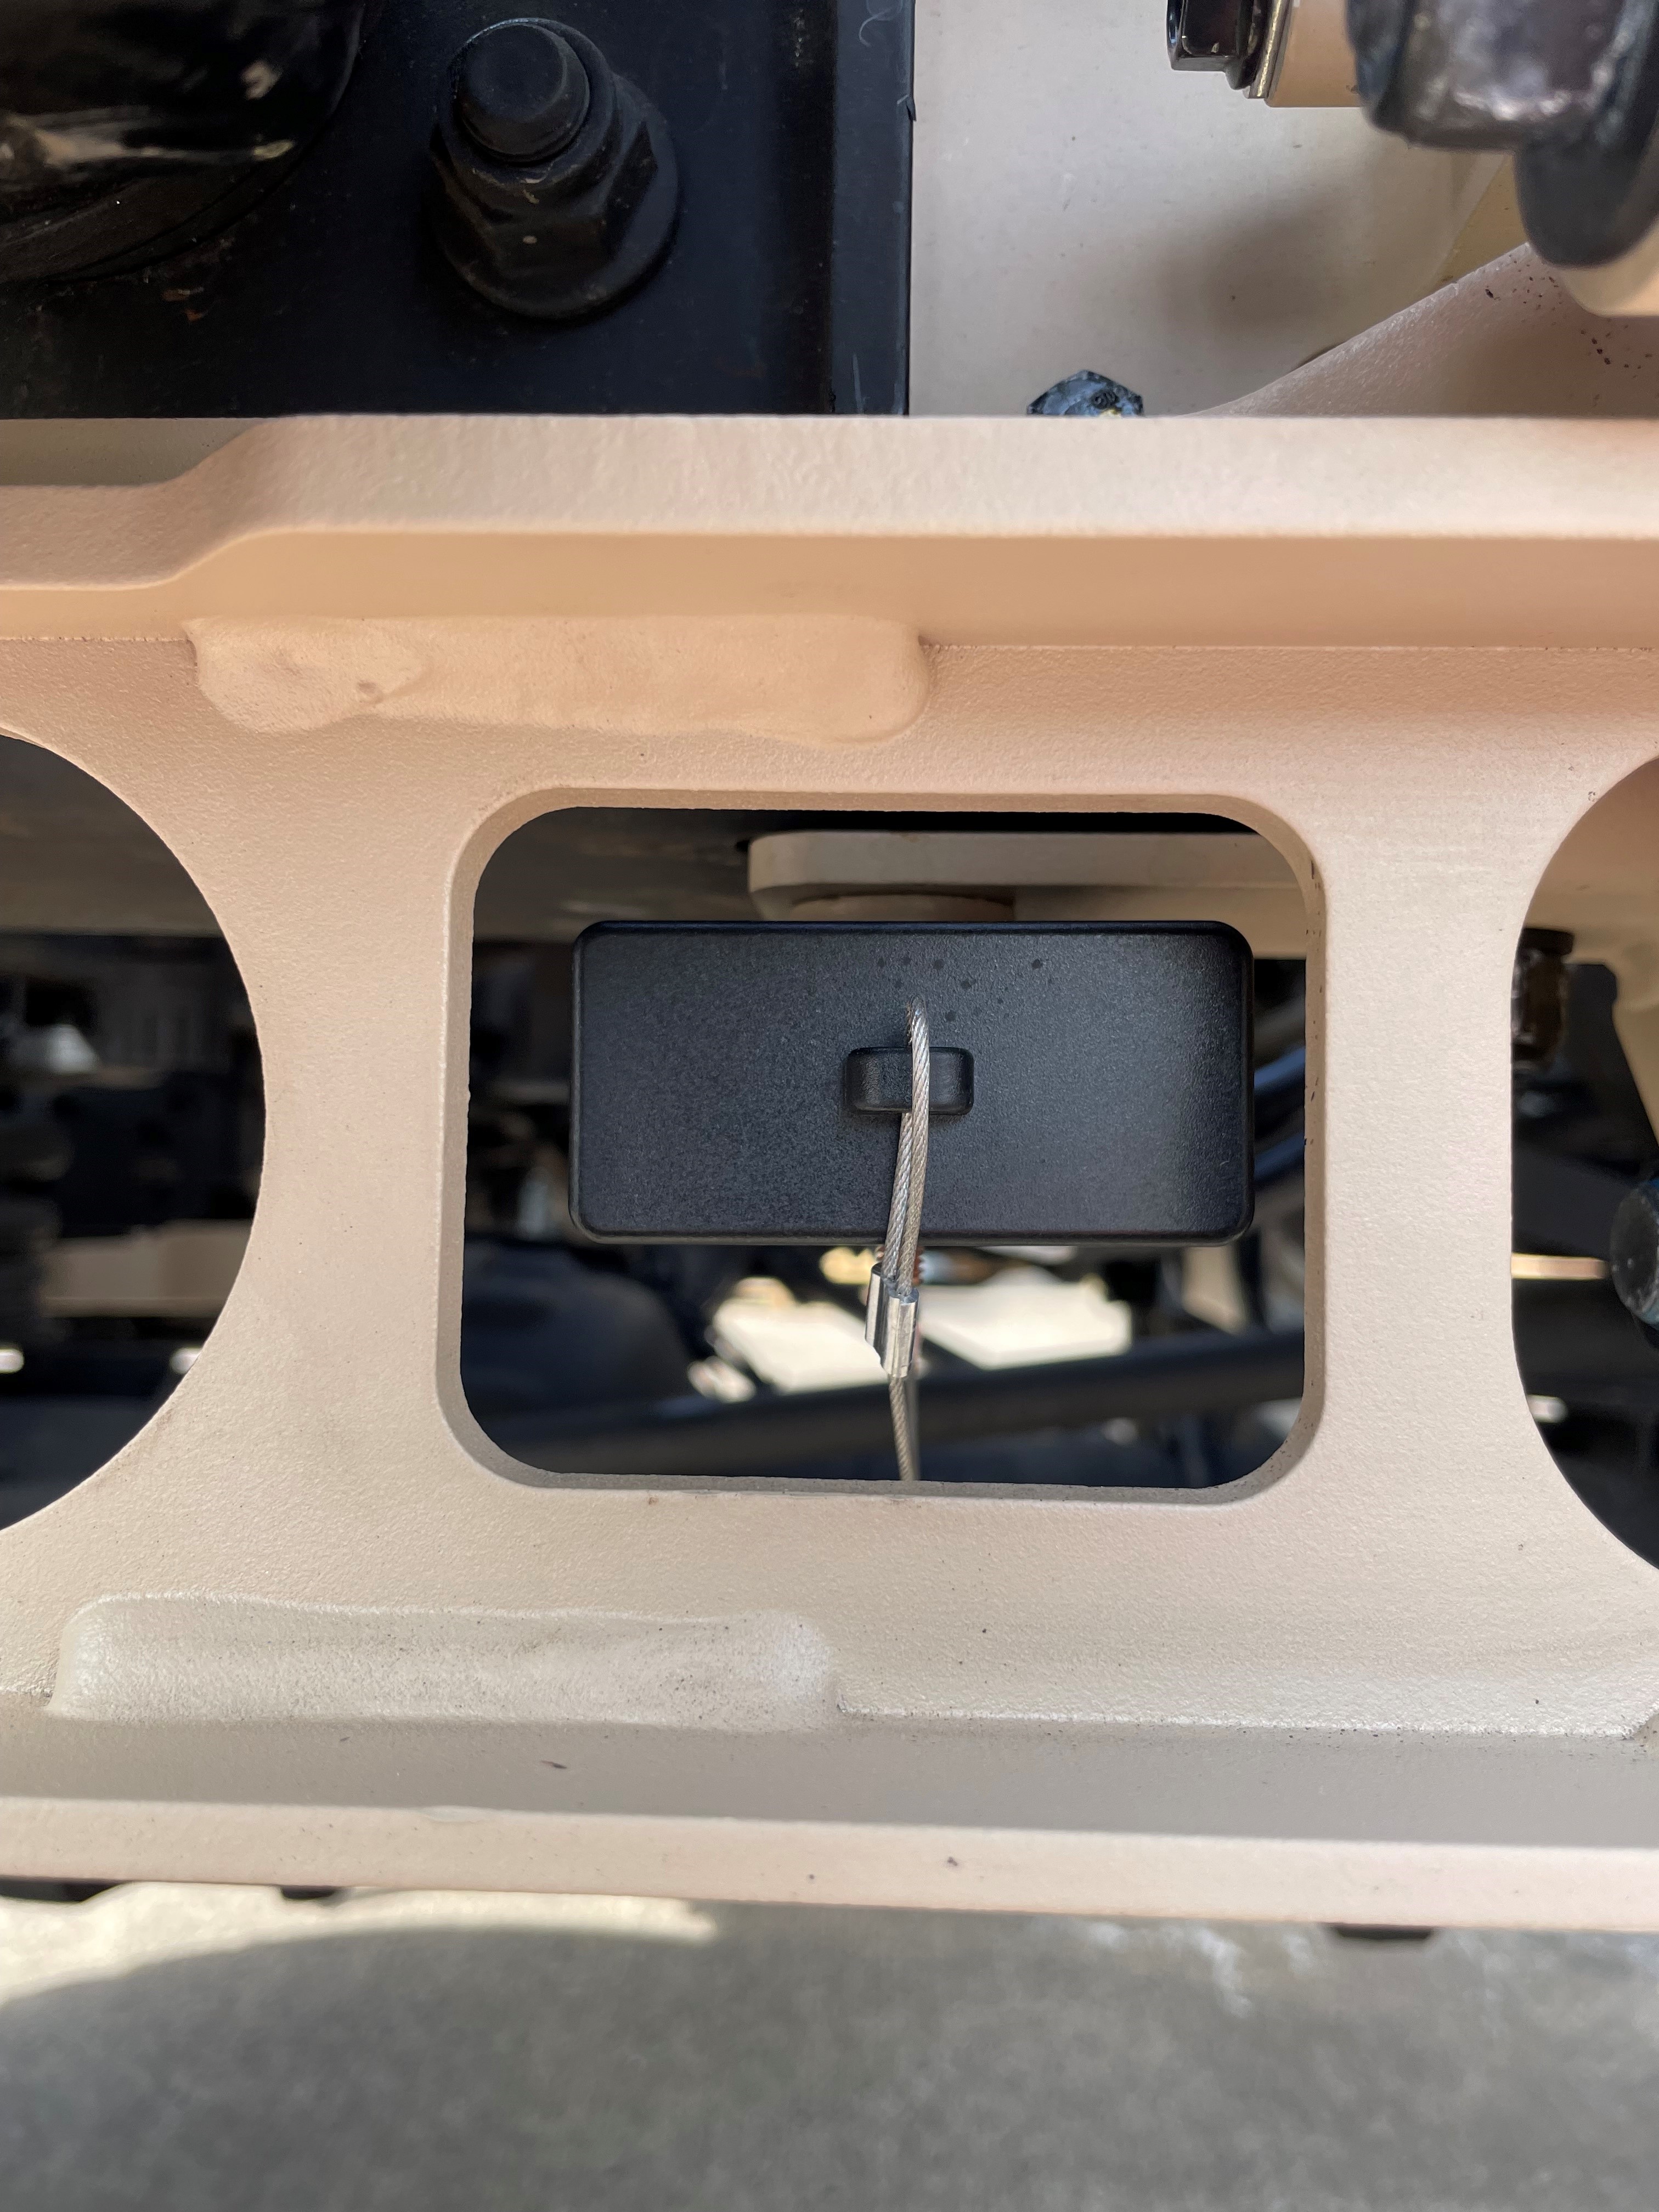
Rear Winch Power Socket
-
Check that the cover is fitted, secured to vehicle via lanyard, can be removed and that the winch power socket can be connected during the dry fit.
-
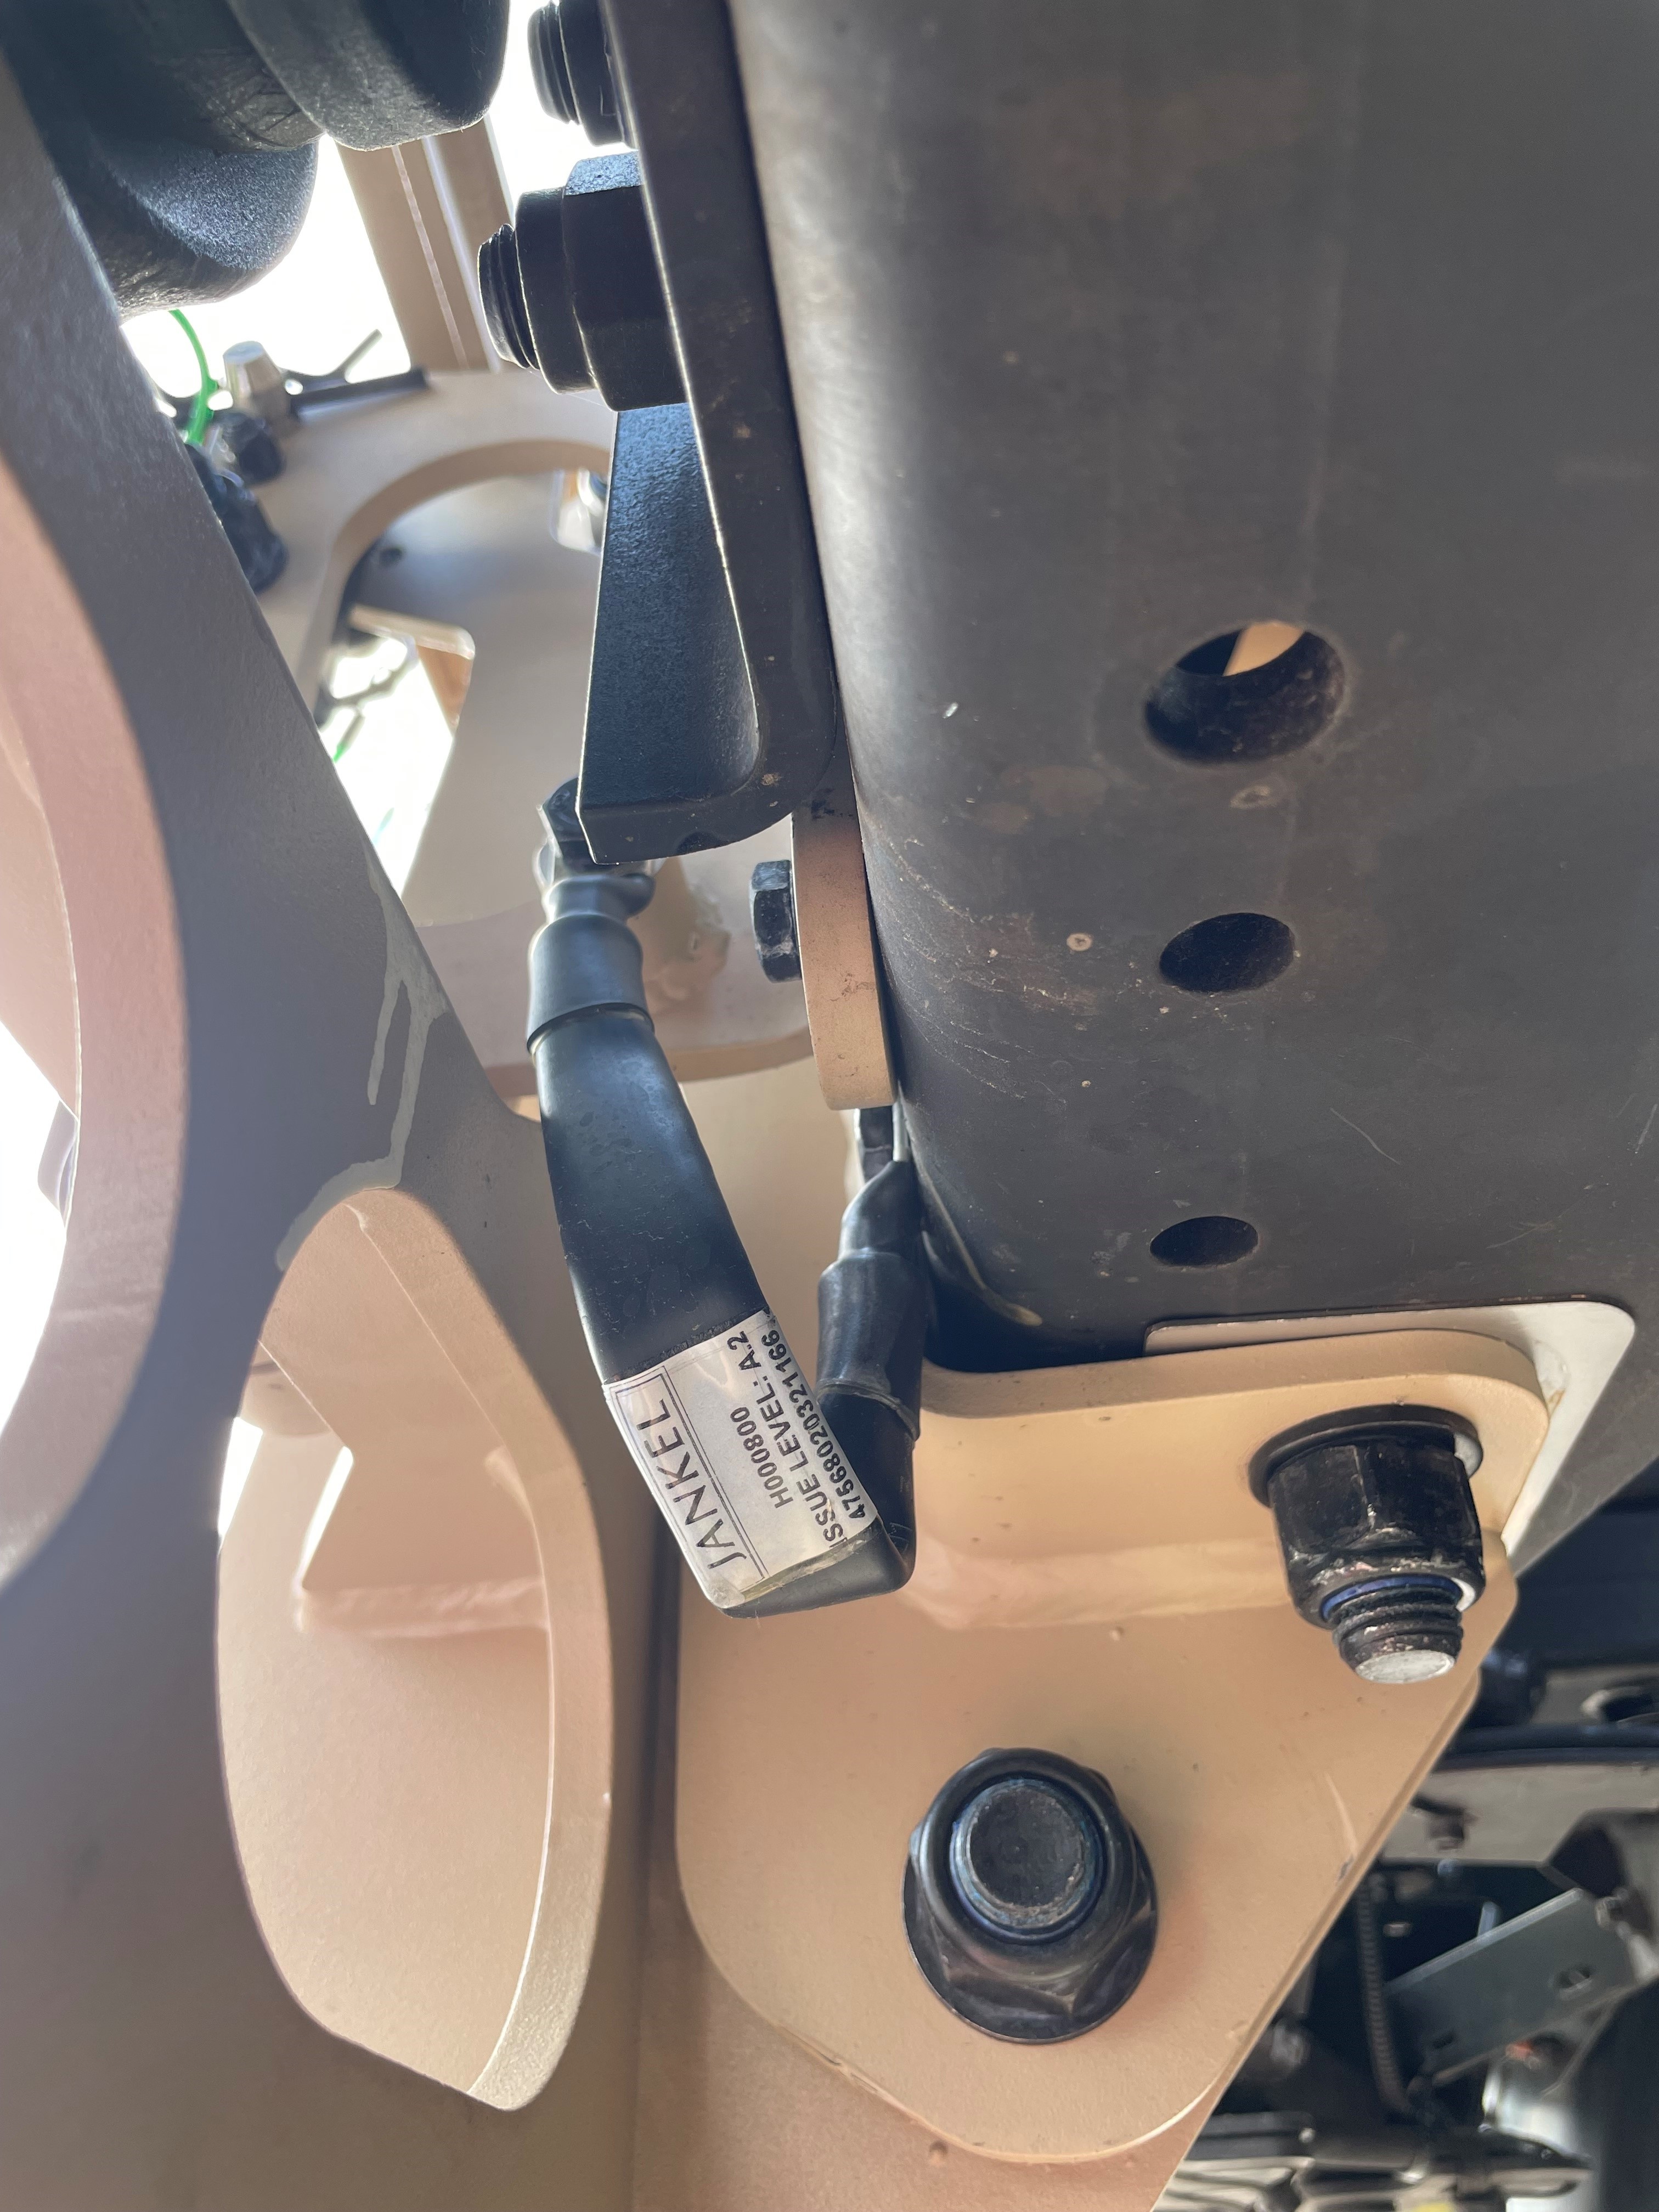
Rear Winch Chassis Earth Cable
-
ensure winch mounting plate earth bonding cable to chassis is fitted, secure and protected from corrosion
-
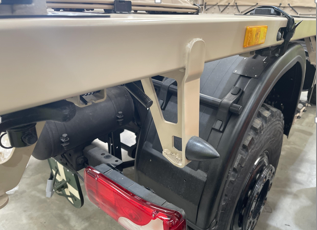
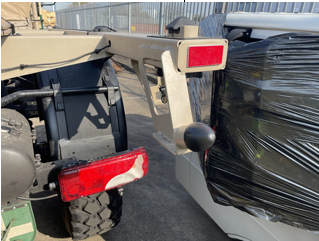
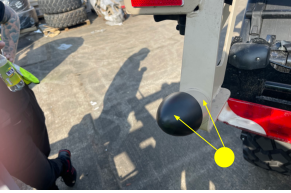
Recovery Bar
-
Recovery bar and retaining plate fitment and security
-
Towing Pintle
-
Rear Towing Pintle fitted, check operation using tool from CES, check for damage, ensure it has a serial plate fitted, record serial number
LH Rear of Vehicle
-
Chocks
-
Chocks (rear left) fitted, security and condition of straps and chocks. Ensure Rubber Safety Edging is Fitted Securely.
-
LH Rear Reflector
-
Check Reflector is fitted correctly and has no damage
-
Cable Routing and Security
-
Routing and security of all cables
-
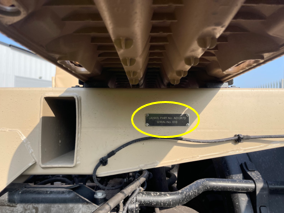
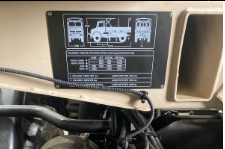
Data Plate
-
Fitment and condition of the data plate
-
LH Rear Lights
-
Rear lights and IR lights fitted security, and harness routing
-
Bump Stop
-
Bump stops and spacer Fitted, security and condition
-
LH Rear Tie Down
-
Rear tie down fitted and torqued


External - LHS of Vehicle
Left hand side of Vehicle
-
Twist Lock
-
Twist lock 1 (Rear to front ) Fitment, operation and damage
-
Bump Stop
-
Rubber bump stop fitted 1 (Rear to front ) Check for fitment, security and damage
-
Side Marker Light
-
Side marker light 1 (Rear to front ) Check for fitment and damage
-
Twist Lock
-
Twist lock 2 (Rear to front) Fitment, operation and damage
-
Wheel Arch Fitment
-
Rear wheel arch and stay check for Security, condition, gap between interface frame, orientation and position on the wheel >= 15mm Gap Pass, less than 15mm Gap Fail.
-
LH Rear Wheel
-
Wheel & tyre condition Check for wear, damage, run flat fitted and Paint damage
-
Bump Stops
-
Rubber bump stop fitted 2&3 (Rear to front ) Check for fitment, security and damage
-
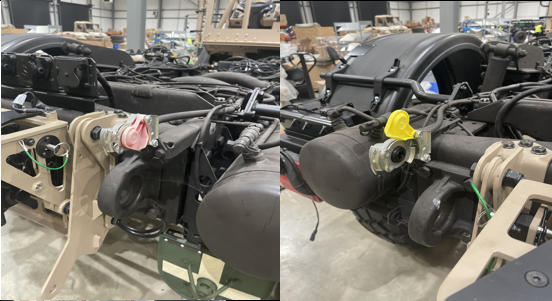
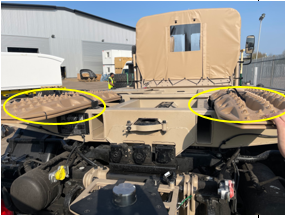
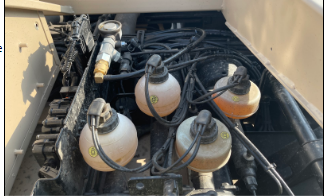
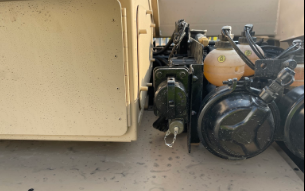
Brake Fluid Reservoirs
-
Brake fluid level X4 ensure the all bottles are secure, level is between min and Max Line and no signs of leaking
-
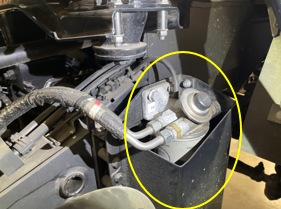
Inter-vehicle Connections
-
Slave start connections Ensure there fitted and secure and all caps are fitted and secure. remove the caps, check the condition of the connections and then replace the caps
-
Twist Lock
-
Twist lock 3 (Rear to front) Fitment, operation and damage
-
Battery Box
-
Battery box & lids Fitment, security and damage,remove cover and check earth is connected
-
Battery Isolator
-
Battery isolator Fitted, security and damage
-
Battery Box Earth Bonding Check
-
Earth bonding plate is fitted to the chassis, secure, greased and all cables present. earth cable is present and protected between the battery box and the plate
-
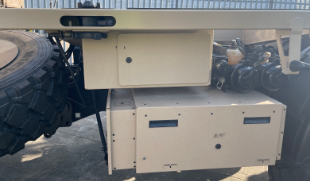
CES Box
-
CES box Fitment, security, condition, door seal fitted and Lock function
-
Tie Down
-
Centre Tie down. security and condition
-
Mission Module Power Cables
-
Mission module cable fitment, security and ensure orientation of anderson plug is correct
-
Mission Module Power Cables
-
Mission module cable fitment, security ensure protective bag over plugs fitted
-
Twist Lock
-
Twist lock 4 (Rear to front) Fitment, operation and damage
-
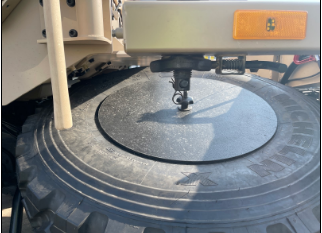
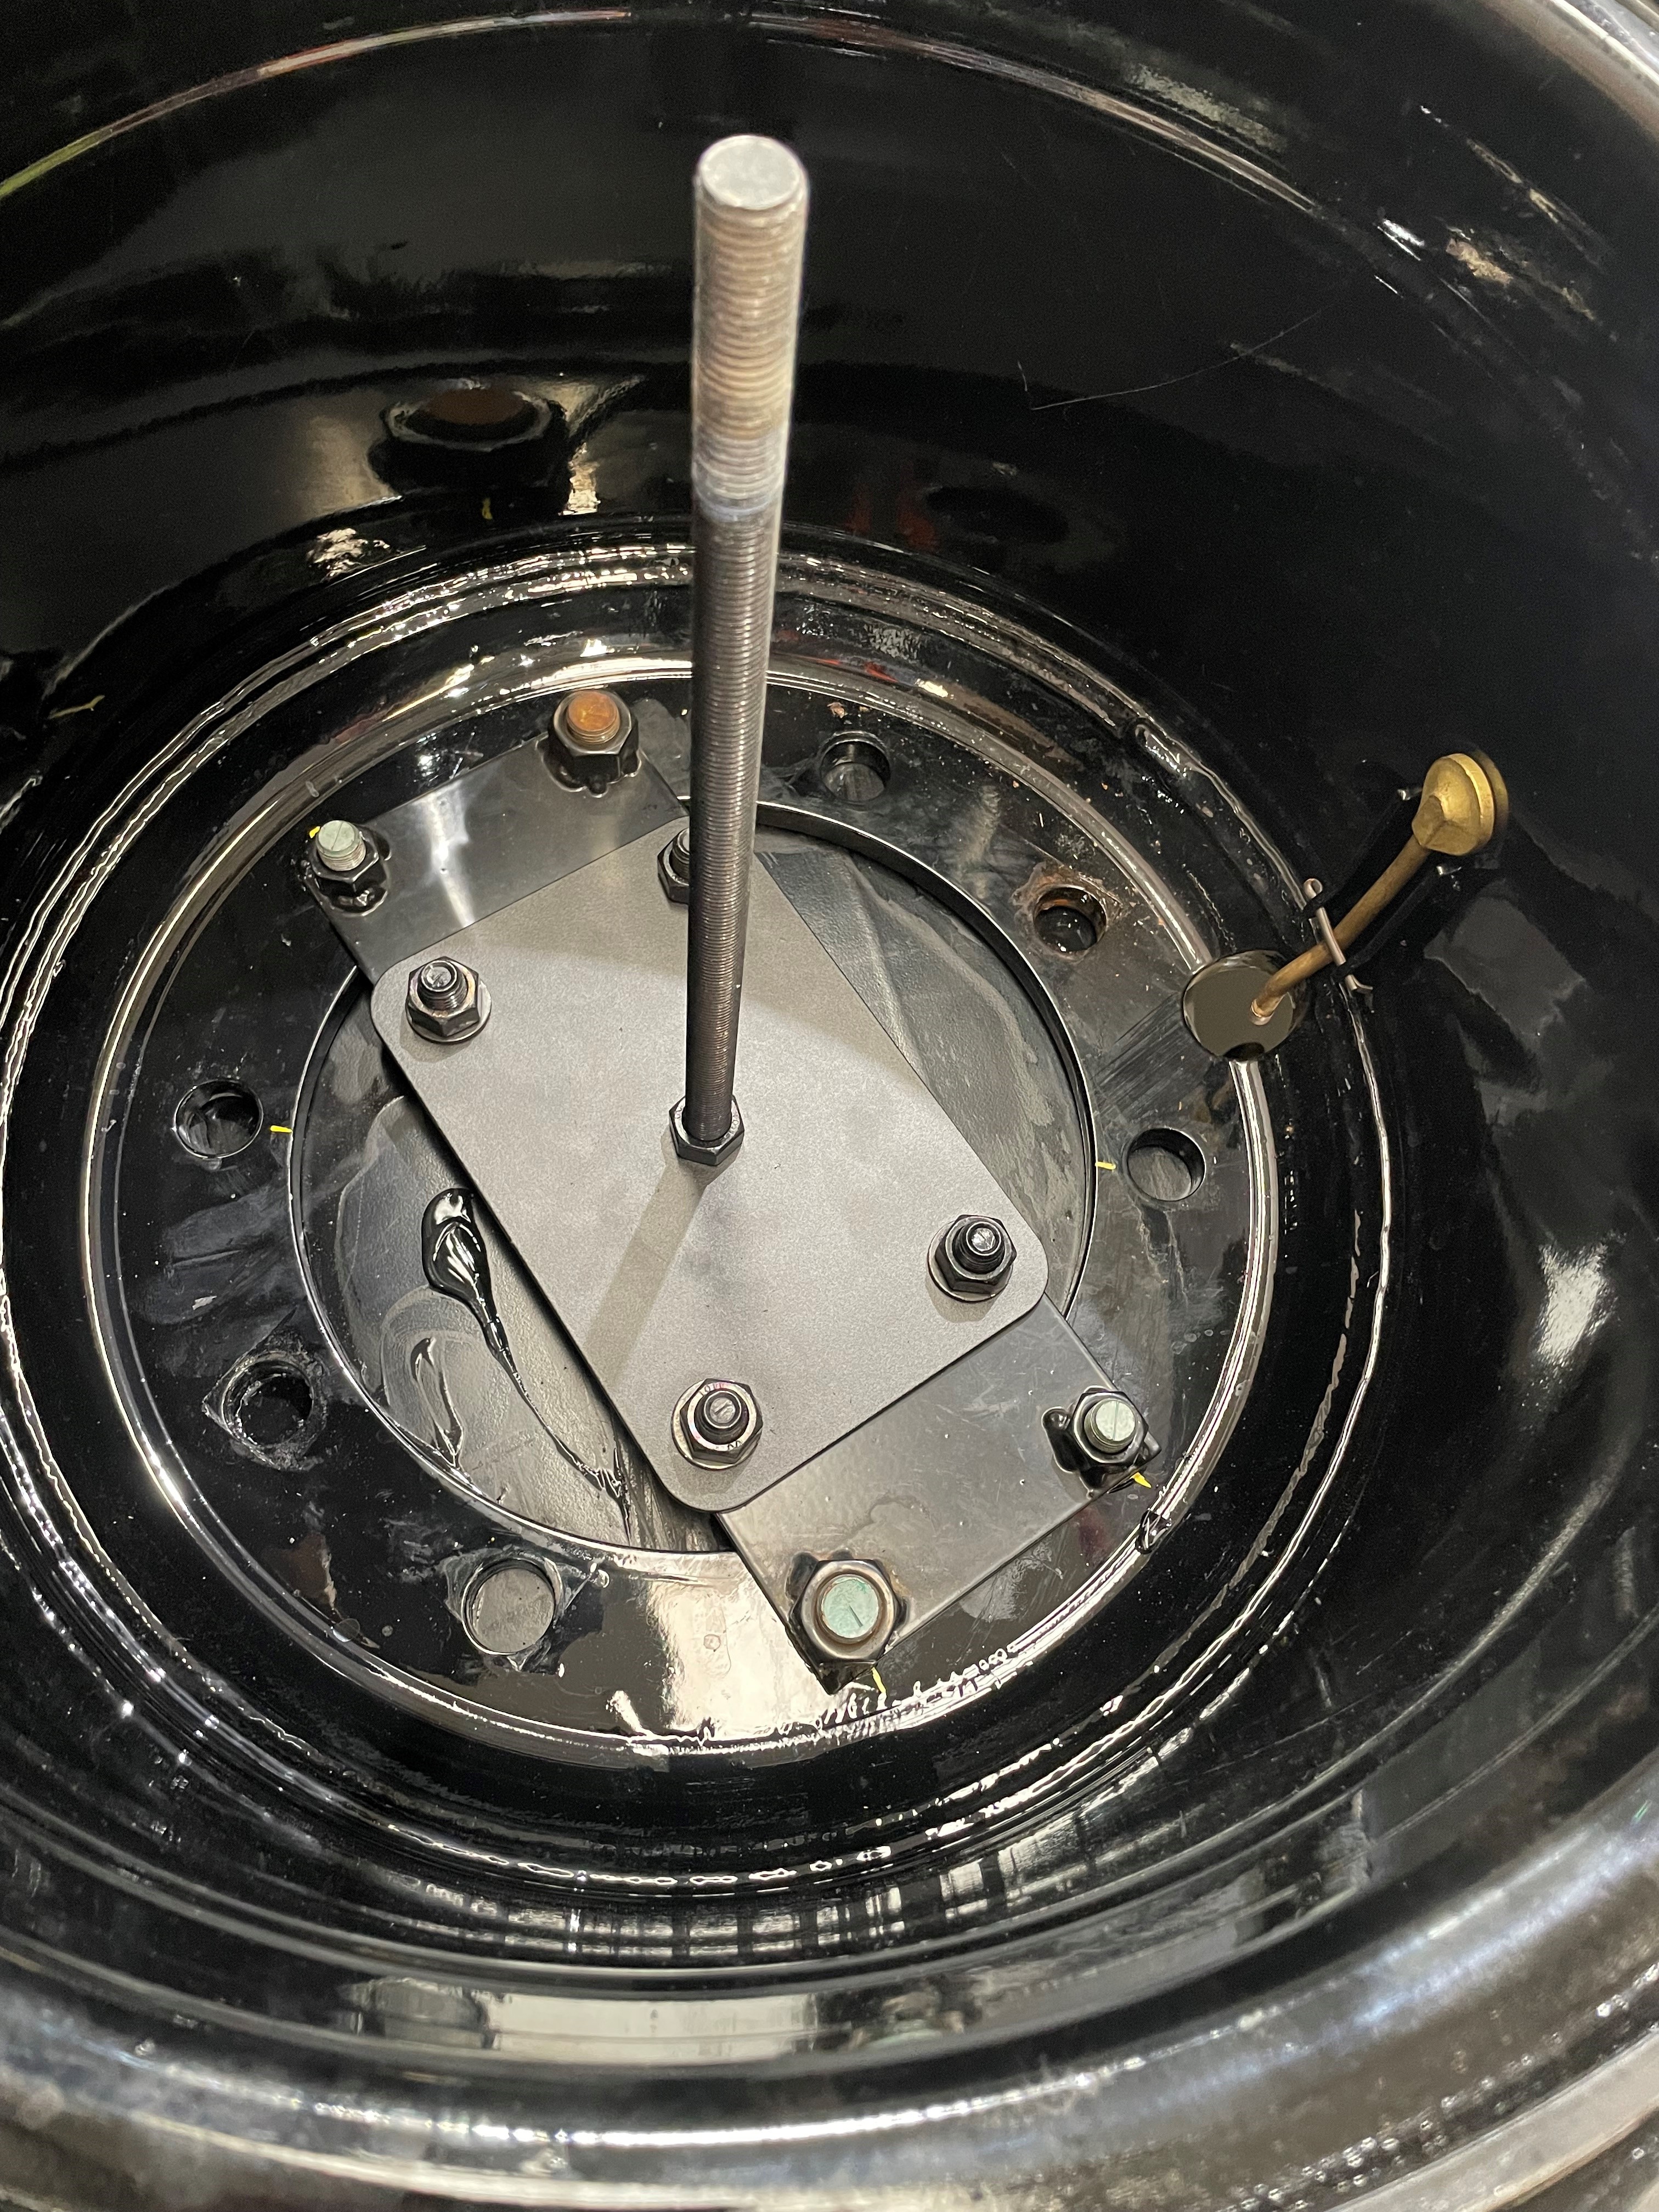
Spare Wheel
-
-
Spare wheel fitment, security and condition. Valve should be at the 3 o'clock position and accessible from underneath. tyre pressure should be 6.1bar. valve cap fitted and secure
-
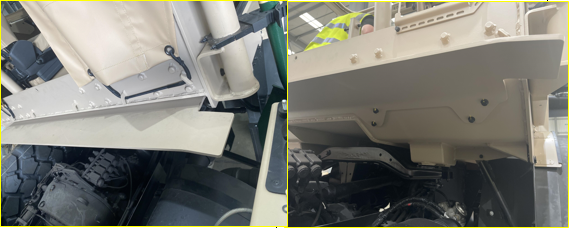
LHS of Blast Plate
-
Blast plate Check for fitment and the LH bolts are torqued and the Earth cable is present, secure and greased
-
Pick Handle Stowage
-
Tool Stowage (pick handle) check it fitted and condition. Brackets should be at 60 degrees from cab wall.
-
Grab Handle
-
Grab handles Check for fitment, security and condition
-
Cab Step
-
Cab step Check for fitment, security, condition
-
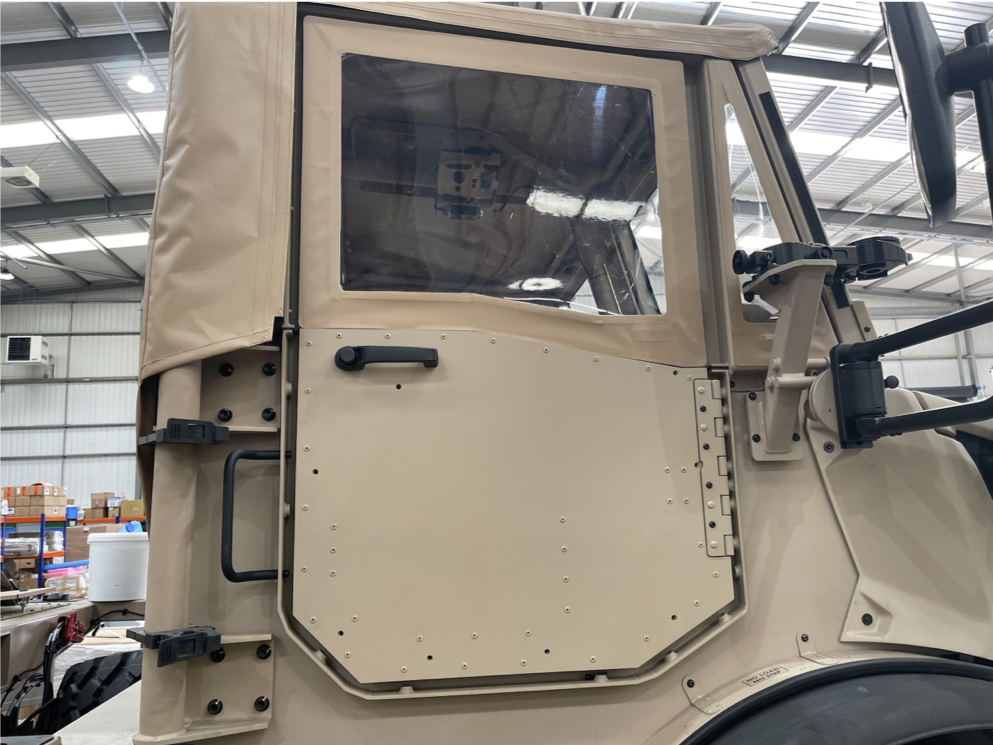
1/4 and Door windows
-
Check Quarter window and door window fitted and not damaged. door window has the extended section to cover the join between upper and lower door sections
-
Wing Mirrors
-
Wing mirrors Check fitment, security and condition movement and detents
-
Wheel Arch
-
Front Wheel arches and spray suppression fitment security, seal fitment, and damage
-
Front Right Hand Wheel
-
Wheel nut torques 600NM+/50
-
Front Right Hand Wheel
-
Wheel & tyre condition Check for wear, damage, run flat fitted and Paint damage
-
Cable Security
-
Cables in LH wheel arch check fitment, security and damage


Cab External
Front of windscreen upper
-
Instruction
-
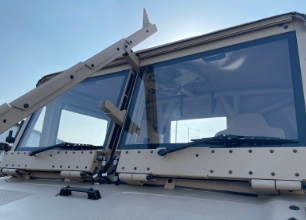
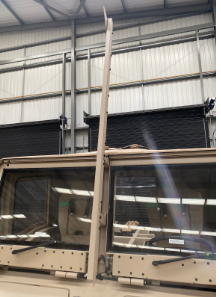
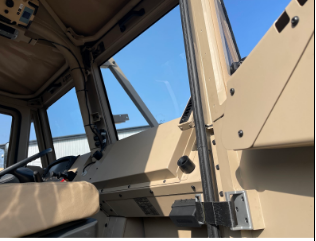
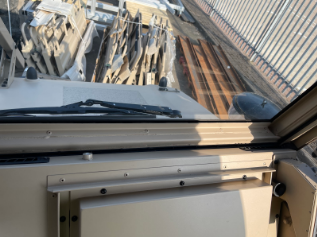
Windscreens Fitted, condition, security, correct Rev lower screen plates fitted
-
Instruction
-
Glass Check glass for fitment, damage and any issues
-
Instruction
-
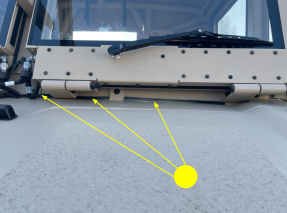
Bonnet fitted, condition, security, Grip patch's Present, hinge nuts tight, washer jet handle fitted
-
Instruction
-
Edging fitted at lower part of windscreens
-
Wipers ensure connectors are locked in position, earth cables fitted, not damaged and greased, wipers fitted, secure and in the park position
-
Instruction
-
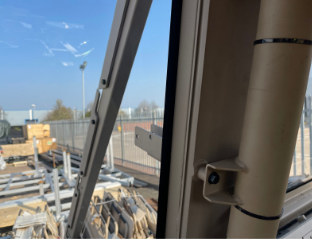
Wire cutter Ensure brackets are fitted. Secure and no damage. Check saftey edging is fitted
-
Instruction
-
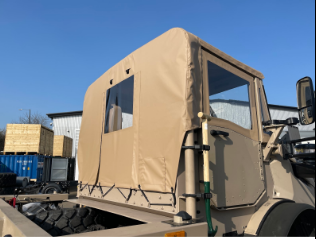
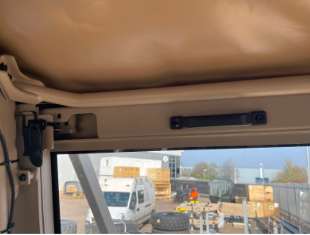
Canopy, Ensure canopy is fitted, seated correctly, free from dirt and damage, zips and bungie's secure
-
Instruction
-
Roof mounted spare wheel plate ensure spare wheel plate is fitted on the roof, its secure, free from damage and bolts are torqued up
-
Instruction
-
Windscreen socks present, stowed in bag and not damaged


RH Door
-
Instruction
-
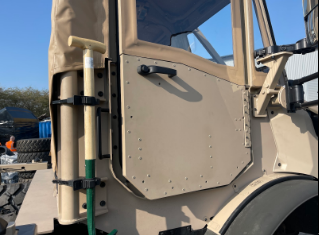
Door Operation Check the door function Front the outside ensuring the press button is not stiff
-
Instruction
-
Earth strap Check fitment, security, damage and grease applied
-
Instruction
-
Check strap check fitment, condition and security
-
Instruction
-
Door Seal check fitment, condition and security
-
Instruction
-
Door covers check fitment, condition and security
-
Instruction
-
Door latch check fitment, condition, security correct bolts fitted


LH Door
-
Instruction
-
Door Operation Check the door function Front the outside ensuring the press button is not stiff
-
Instruction
-
Earth strap Check fitment, security, damage and grease applied
-
Instruction
-
Check strap check fitment, condition and security
-
Instruction
-
Door Seal check fitment, condition and security
-
Instruction
-
Door covers check fitment, condition and security
-
Instruction
-
Door latch check fitment, condition, security correct bolts fitted


Cab Internal
Cab Internal LH
-
-
Check VIN label is fitted to cab wall LHS. ensure correct marking for month and year of build.
-
Clutch pedal Check Fitment, security and there are no leaks
-
correct
-
incorrect
-
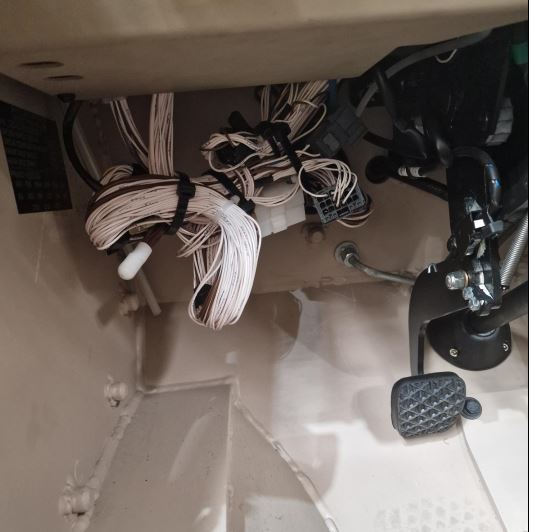
Check under dash harness for security and freedom from pedal
-
Instruction
-
Brake Pedal Check fitment, security, note that fixings are within the engine bay
-
Instruction
-
Accelerator pedal Check fitment and security. bolts should be torqed marked.
-
Instruction
-
Door Operation Check the door function From the inside ensuring the handle is not stiff in operation
-
Instruction
-
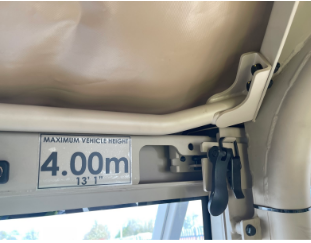
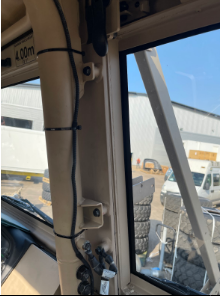
Shell bars ensure fitted, security, condition and bolts torque marked. 4.00M label on Driver's side .
-
Instruction
-
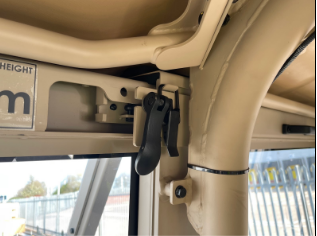
Windscreen inner handle fitted and secure, Latches fitted and over centre latch fitted and functions
-
Instruction
-
Windscreen ballistic plate, Fitment, security and condition
-
Instruction
-
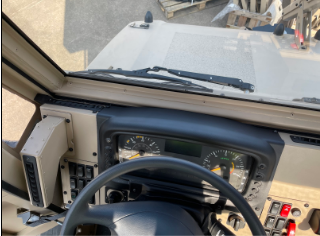
Dash vents check fitment, condition, security and operation X3
-
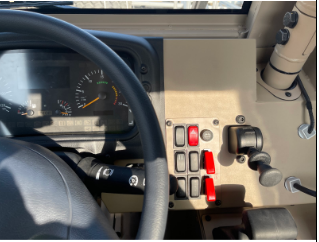
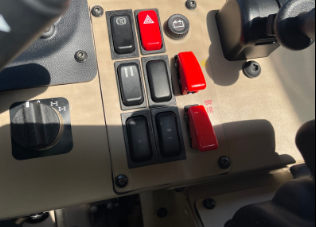
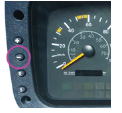
Check fitment, security and condition of the headlight leveling switch. pay attention to the alignment of the switch and label
-
Instruction
-
LH switch plates fitted and secure
-
Instruction
-
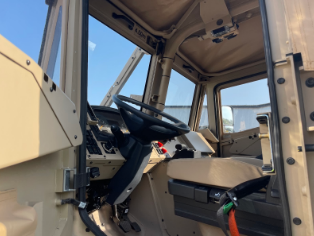
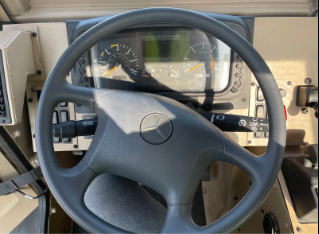
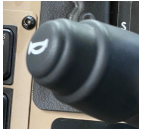
Steering wheel check fitment, condition and security. Ensuring the wheels are straight - is the steering wheel aligned correctly. Final Check during Roadtest.
-
IP ensure weather cover fitted and labels applied. Check for damage and security
-
Instruction
-
Diff switch check fitment, condition and security
-
Instruction
-
RH switch plates fitted and secure
-
Instruction
-
Protected switch's check fitment, condition and security. These switches should not rotate
-
Instruction
-
Handbrake check fitment, condition and security
-
Instruction
-
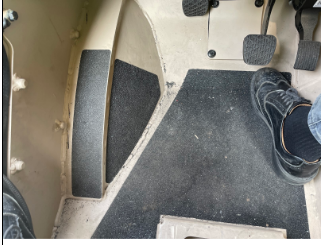
Floor matts check fitment, condition and security
-
Instruction
-
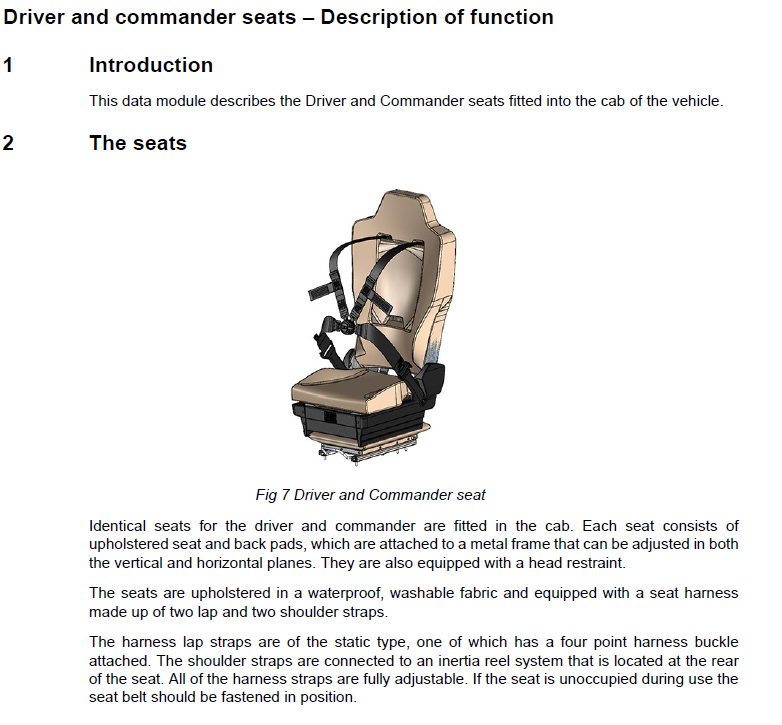
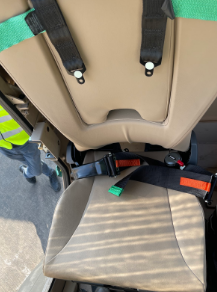
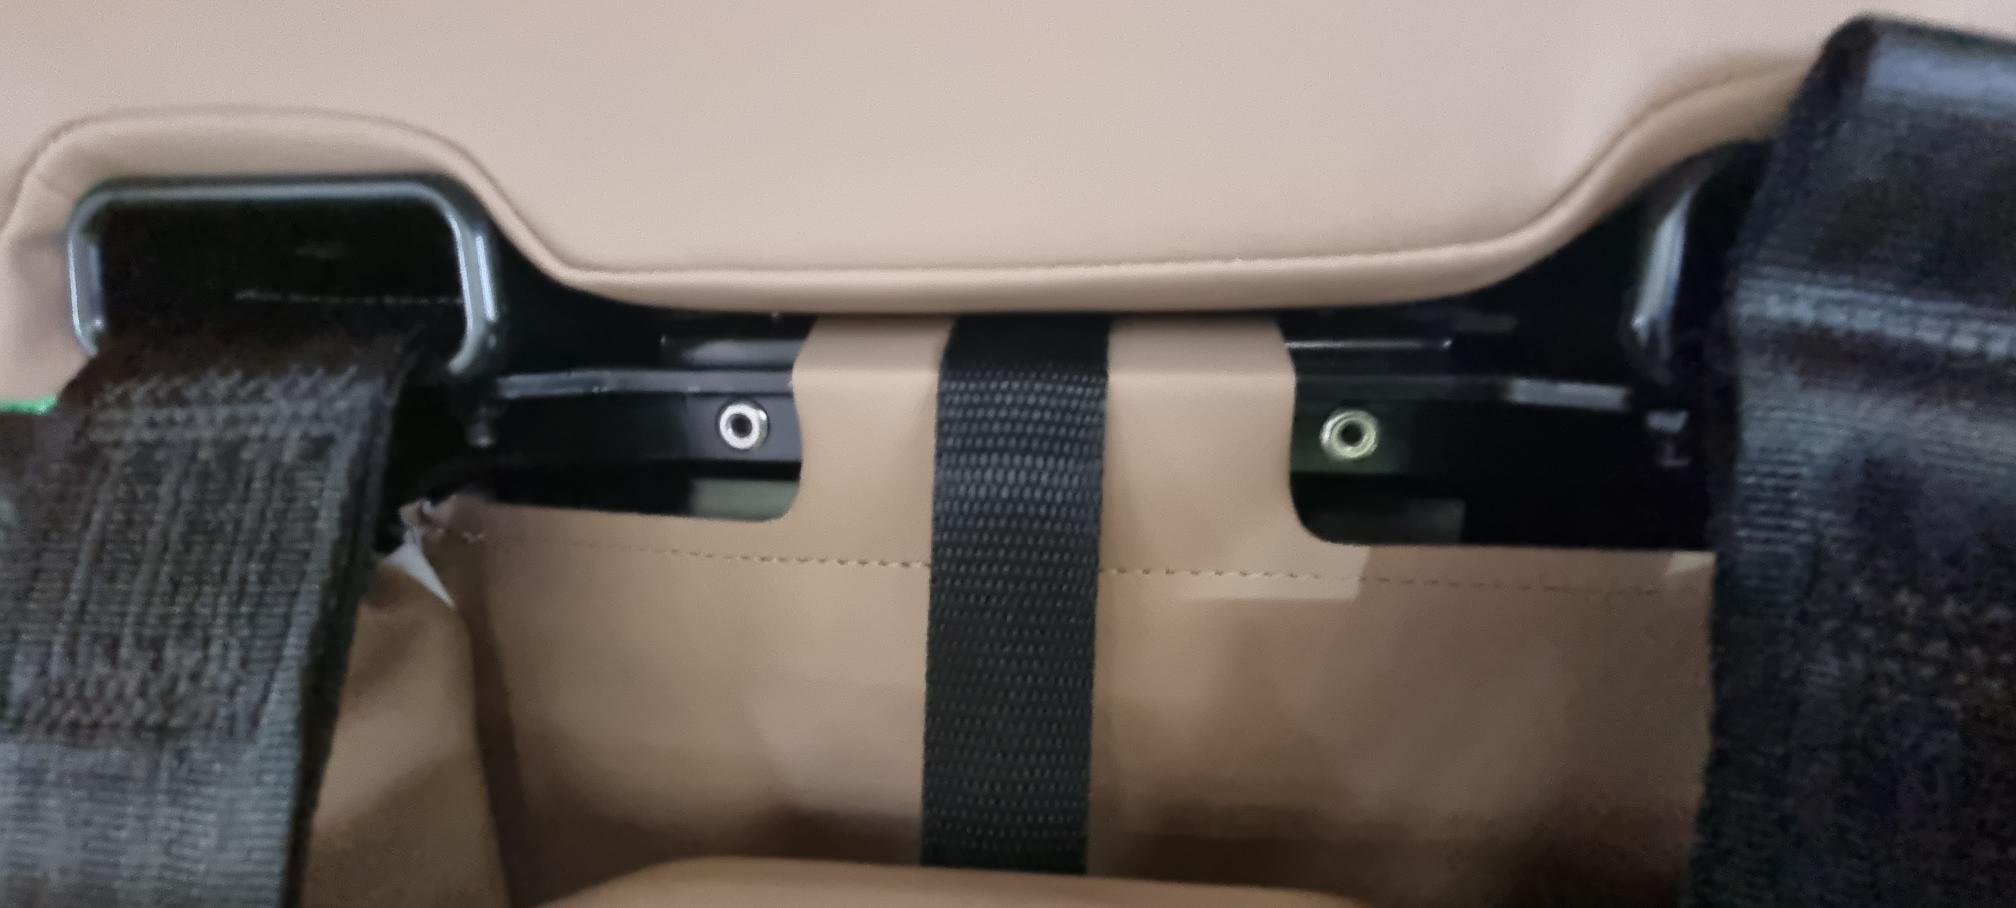
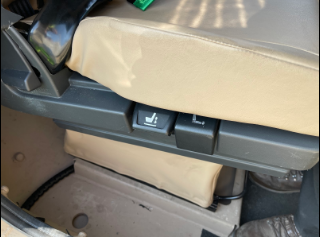
Seat Check fitment, security and condition
-
Instruction
-
Seat functions Test forward and aft movement, Base tilt and high adjust
-
Instruction
-
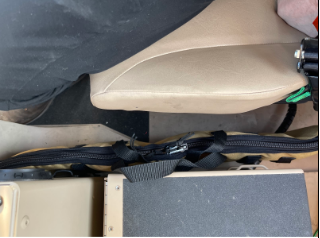
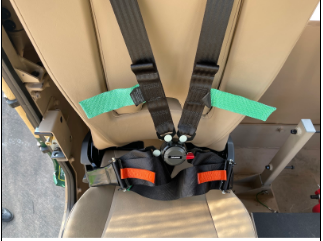
Seat belts check fitment, condition, security and operation
-
Instruction
-
Seat Elec harness Check fitment, security and condition


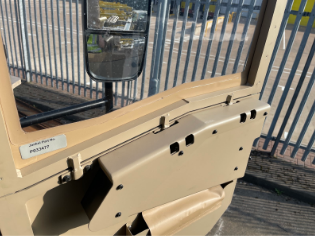
Cab Internal Center
-
Instruction
-
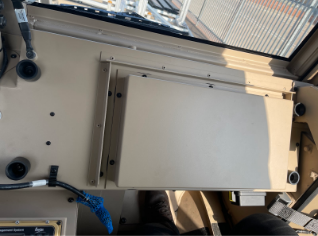
Coms box check fitment, condition and security
-
Instruction
-
Interior Light check fitment, condition and security
-
Instruction
-
Earth leads check fitment, condition, security and grease applied ROPS to Dash ROPS to windscreen ballistic plate
-
Instruction
-
Gear selector check fitment, condition and security
-
Instruction
-
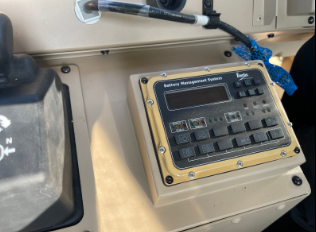
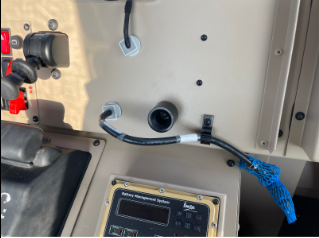
BMS check fitment, condition and security
-
Instruction
-
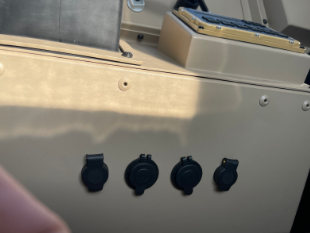
4X power sockets check fitment, condition and security
-
Instruction
-
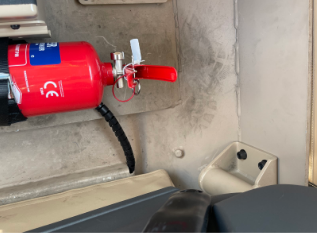
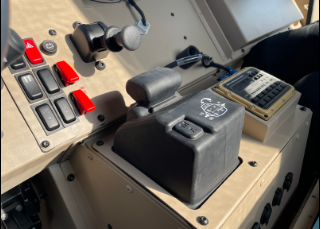
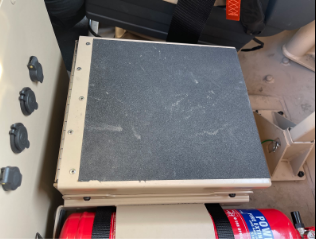
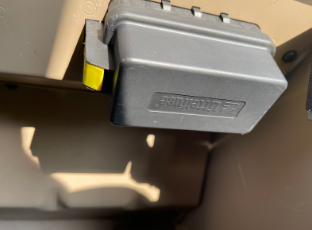
Fire Bottle check fitment, condition, security, tab secure, service sticker visible and gauge in green
-
Instruction
-
Ammo box check fitment, condition, security and the latch works and keeps the lid secure.
-
Instruction
-
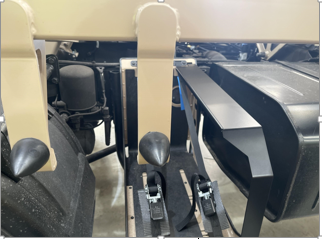
Weapon rack post check fitment, condition, security, lanyard fitted and bolts fitted
-
Instruction
-
Hot barrel bag check fitment, condition and security


Cab Internal RH
-
Instruction
-
Door Operation Check the door function From the inside ensuring the handle is not stiff in operation
-
Instruction
-
Shell bars ensure fitted, security, condition and bolts torqued
-
Instruction
-
Windscreen inner handle fitted and secure, Latches fitted and over centre latch fitted and functions
-
Instruction
-
Windscreen ballistic plate, Fitment, security and condition
-
Instruction
-
Dash vents check fitment, condition, security and operation X3
-
Instruction
-
Rubber mounts check fitment, condition and security X4
-
Instruction
-
Rosy cable check fitment, condition and security. 2 Labels Visible Indicates Cable is Correct Way Round.
-
Instruction
-
Fuse box cover upper check fitment, condition and security
-
Instruction
-
Fuse box cover lower check fitment, condition and security check contents are as per label
-
Instruction
-
Floor matts check fitment, condition and security
-
Instruction
-
Seat Check fitment, security and condition
-
-
Check Seat Belt Rivets Are Secure
-
Instruction
-
Seat functions Test fore and aft movement, Base tilt and high adjust
-
Instruction
-
Seat belts check fitment, condition, security and operation
-
Instruction
-
Seat Elec harness Check fitment, security and condition
-
Instruction
-
Cable cover RH floor Check fitment, security and condition
-
Instruction
-
Earth cables on ROPS fitted, secure and greased. across three joints. one on each upper B Pillar and one on the centre top of the ROPS


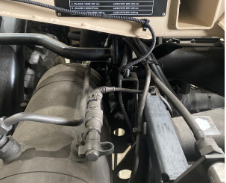
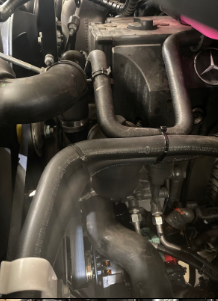
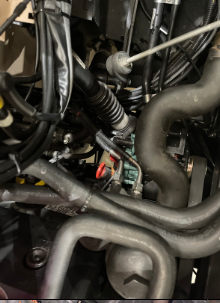
Engine Bay
Engine Bay
-
Instruction
-
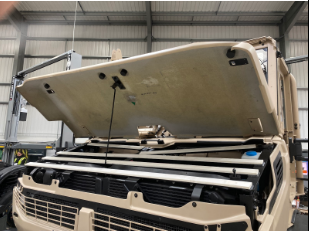
Bonnet Check bonnet Operation And security
-
Instruction
-
LH bonnet latch Check condition and security
-
Instruction
-
Air valve LH wing Check fitment, condition and security
-
Instruction
-
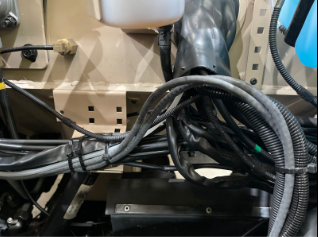
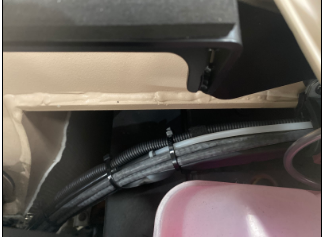
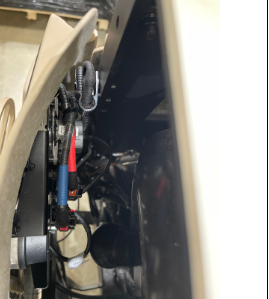
LH harness (wing area) Check condition and security of harness and routing ready for cab tilt procedure.
-
Instruction
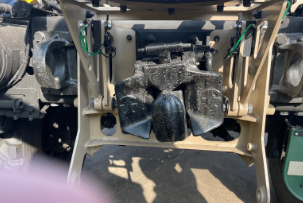
-
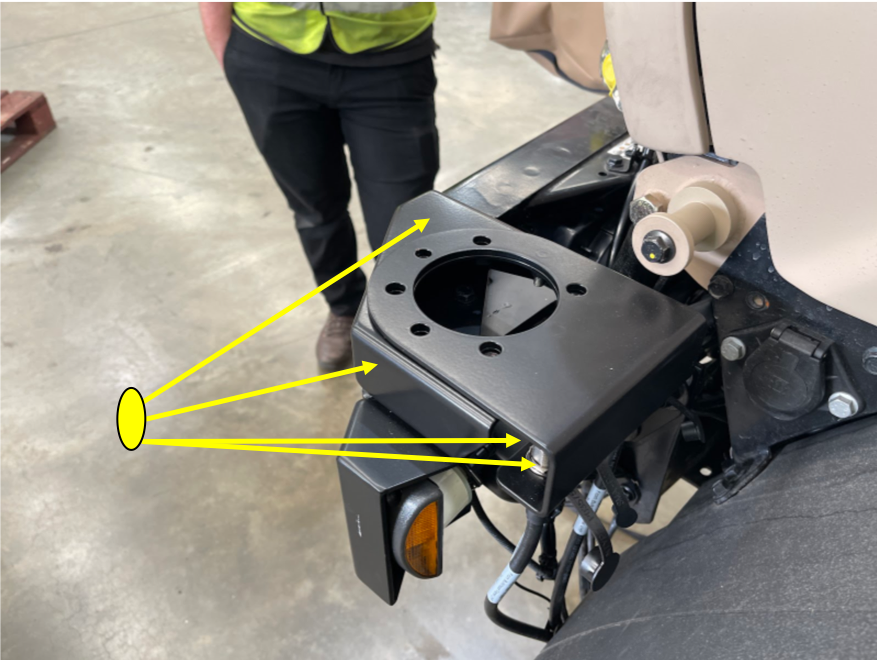
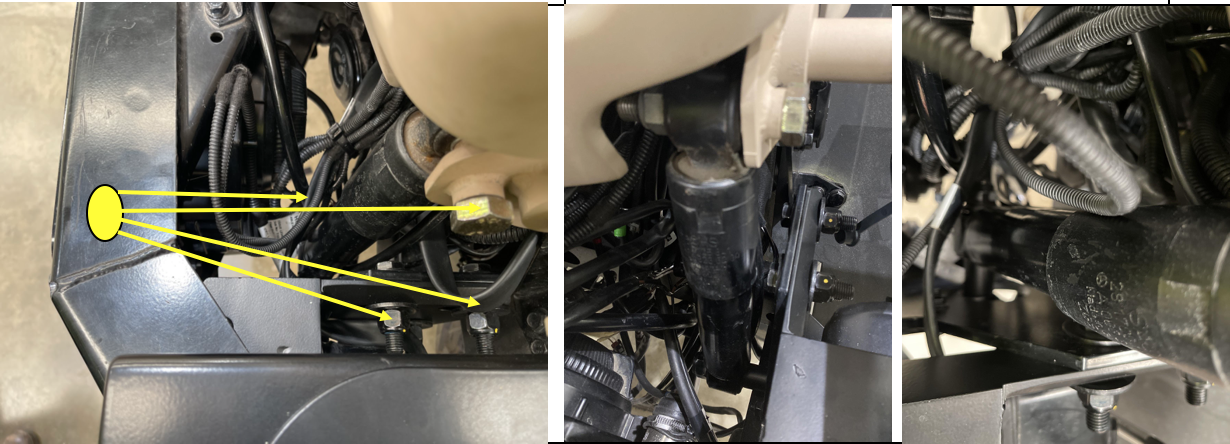
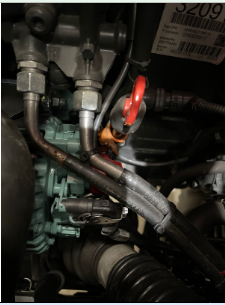
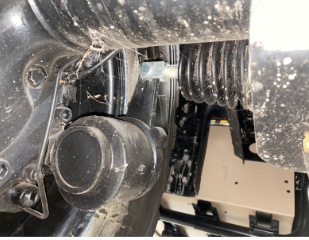
Power steering (PAS) Check bottle fitted, security, level and all PAS pipes for damage, routing and clashing
-
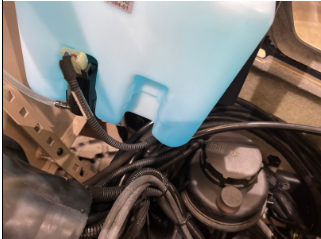
Washer bottle Check fitment, security, Level and condition
-
Instruction
-
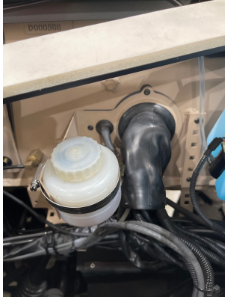
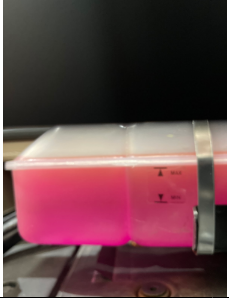
Clutch Res Check bottle fitted, security and level
-
Instruction
-
Electric harness below Clutch Res Check fitment, security and condition
-
Instruction
-
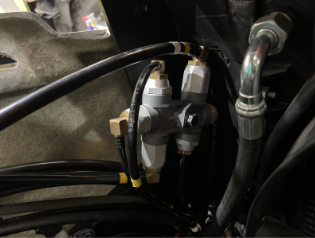
Brake valve Check fitment, security, condition and pipes
-
Instruction
-
Handbrake pipes Check fitment, security and condition
-
Instruction
-
Washer pipe Check fitment, security and condition
-
Instruction
-
Coolant bottle Check fitment, security, Level, condition and cap fitted
-
Instruction
-
Rain gutters Check fitment, security and condition
-
Instruction
-
Elec harness RH of coolant bottle Check fitment, security and condition
-
Instruction
-
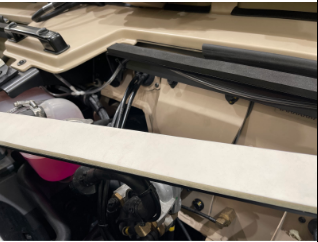
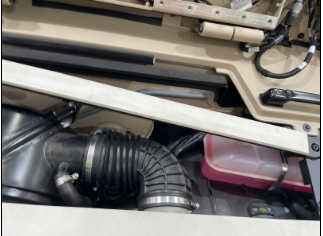
Heat shielding As per WI
-
Instruction
-
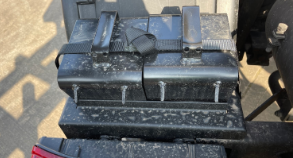
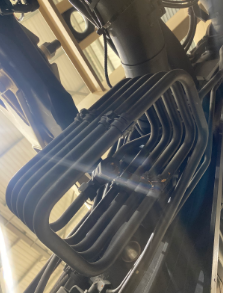
Air filter, Pipes, housing, Cyclone filter and clips Check fitment, security and condition
-
Instruction
-
RH bonnet latch Check condition and security
-
Instruction
-
RH lights Check fitment, security and condition
-
Instruction
-
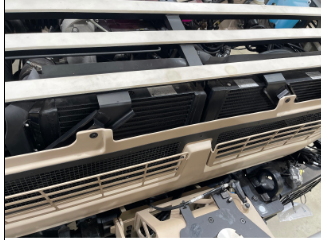
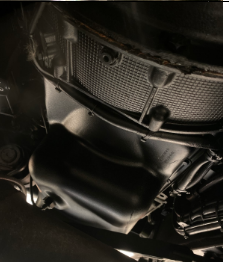
Radiator and intercooler housing Check fitment, security and condition
-
Instruction
-
Cooling fans Check fitment, security, condition and freely rotate
-
Instruction
-
Aux belts Check fitment, security, routing and condition
-
Instruction
-
Coolant pipes Check fitment, security, condition and pipes
-
Instruction
-
Engine oil Check the Level
-
Instruction
-
Alternator X 2 Check fitment condition, security air pipe routing
-
Instruction
-
Space frame Check fitment, security and condition
-
Instruction
-
Bonnet seal Check fitment, security and condition
-
Instruction
-
General overview for oil leaks


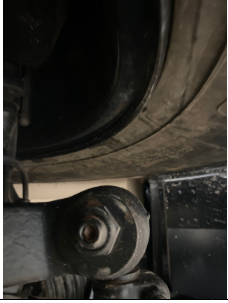
Underneath of Vehicle
-
Instruction
-
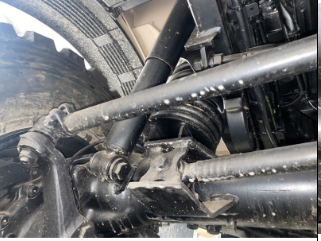
Steering system Check fitment, security and condition
-
Instruction
-
front left earth point. cables secure and greased
-
Instruction
-
Front axle Check fitment, security and condition
-
Instruction
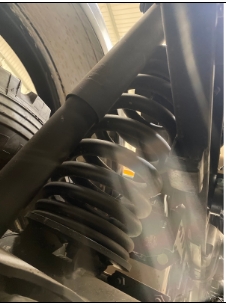
-
Front suspension system Check fitment, security and condition
-
Instruction
-
Front axle brake pipe Check fitment, security and condition
-
Instruction
-
Track rod clearance to wheel rim Check fitment, security and condition
-
Instruction
-
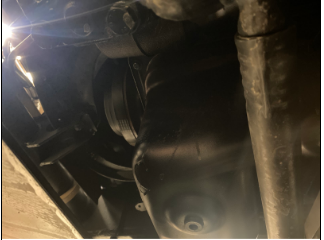
Engine Visual inspection for any leaks
-
Instruction
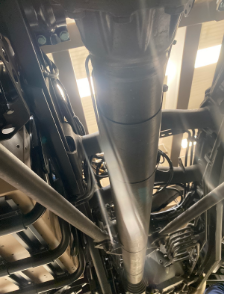
-
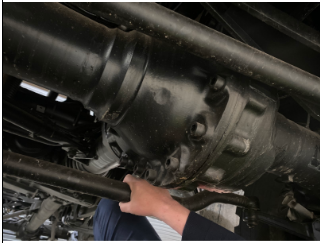
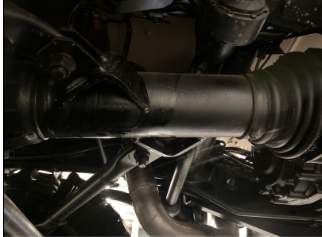
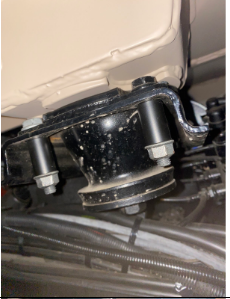
Front propshaft Check fitment, security and condition
-
Instruction
-
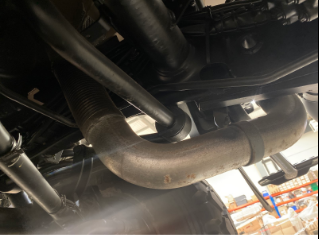
Exhaust system Check fitment, security and condition
-
Instruction
-
Fuel pipes Check fitment, security and condition
-
Instruction
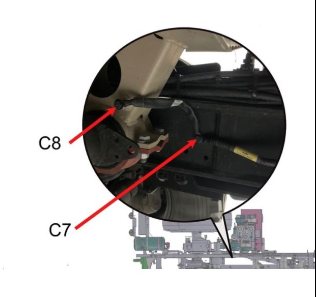
-
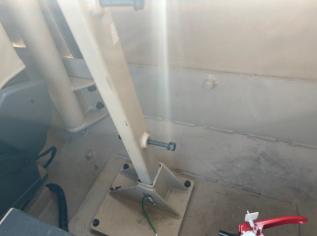
Ensure earth braid is fitted, secure and greased. between interface frame and chassis
-
Instruction
-
Rear axle Visual inspection for any leaks
-
Instruction
-
Rear suspension Check fitment, security and condition
-
Instruction
-
Rear Prop shaft Check fitment, security and condition
-
Instruction
-
Rear axle brake pipe Check fitment, security, condition and any signs of leaking
-
Instruction
-
Body Mounts Check fitment, security and condition
-
Instruction
-
Antiroll bars (including drop links) Check fitment, security and condition
-
Instruction
-
Oil/coolant leaks
-
Any Other Issues Under the Vehicle


Function Testing
Function Test
System Checks must be completed in the inspection question order
-
Instruction
-
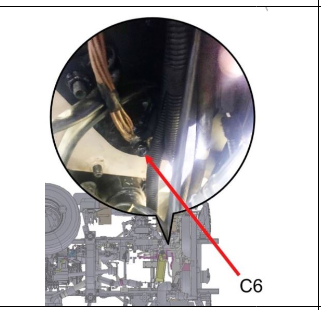
Fit test box to MM 8 way power socket, hand set to be left in cab
-
Instruction
-
Release air from both air tanks at rear to evacuate brake system
-
Instruction
-
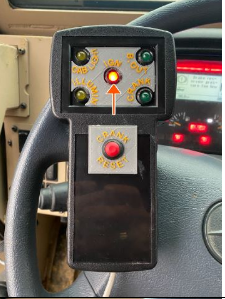
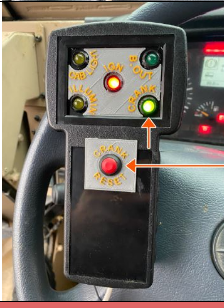
Turn ignition on ensuring all dash light illuminate. Check that the centre LED has illuminated on the MM test box
-
Instruction
-
Start vehicle up ensuring the air pressure build back up, dash lights go out and there are no leaks from the lubs or air systems when cranking the engine, the relevant indicator light will illuminate on the MM test box
-
record image of air pressure reading once fully charged.
-
Instruction
-
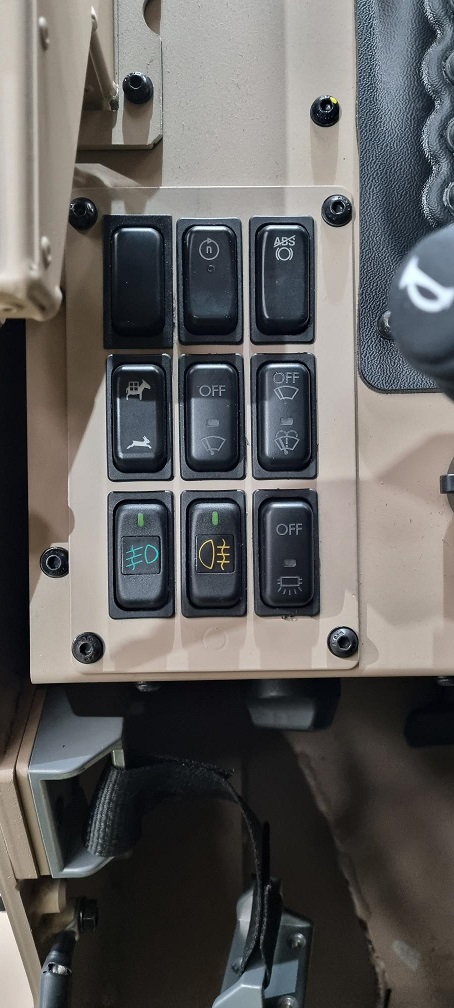
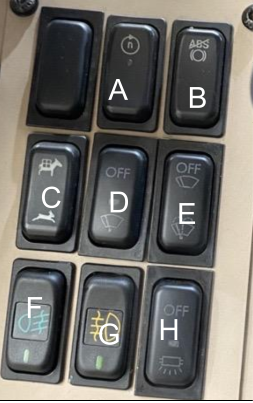
Switch A is a two position switch, centre off, top on. Working speed governor ensure it fitted and works
-
Instruction
-
Switch B is a two position momentary switch. The centre position is off and the top on. ABS shut off ensure it works and displays on the dash
-
Instruction
-
Switch C is a three position momentary switch. the centre position is off. working gear/ road should display on dash when operated and solenoid activating should be heard
-
Instruction
-
Switch D is a two position switch, centre off, down position on. wiper speed first push normal speed, double tap switch to adjust wiper speed. Both speeds should be tested with the washers going. the wipers must not leave the glass area
-
Instruction
-
Switch E is a two position momentary switch, centre off, down position on. the washer pump is active when the switch is held on
-
Instruction
-
Switch F is a two position switch, centre off, down position on. Front fog lamp ensure tail tell is working and Front fogs operate. note that lighting switch needs to be in position 2 for this to operate
-
Instruction
-
Switch G is a two position switch, centre off, down position on. Rear fog lamp ensure tail tell is working and rear fogs. note that lighting switch needs to be in position 2 for this to operate
-
Instruction
-
Switch H is a two position switch, centre off, down position on. internal lights ensure tail tell is working and light in centre of cab roof
-
Instruction
-
Brake lights Depress brake pedal and ensure the rear brake lights work
-
Instruction
-
Reverse Select reverse and ensure the rear reversing lights work. check handbrake applied before conducting this test to avoid unexpected vehicle movement.
-
Instruction
-
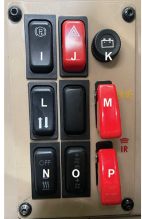
Switch I is a two position momentary switch, centre off, top position on. 4 wheel handbrake ensure switch works (confirmation on road test)
-
Instruction
-
switch J is a two position switch, centre off, top position on. Hazard's ensure hazard switch works and all indicators work
-
Instruction
-
Switch K Alternator warning light ensure this goes out once started. check orientation of switch
-
Instruction
-
Switch L is a two position momentary switch, centre off, top position on. Rock and roll switch (confirm on road test)
-
Instruction
-
Switch M Drl Cut out Ensure this works when operated. ensure orientation of switch and check that it does not rotate
-
Instruction
-
Switch N is a two position switch, bottom position on, centre off. Heater hot/ cold Ensure heater get hot and cold record temperature acheived at both extremes
-
Instruction
-
Switch O three position switch, centre off, top low speed, bottom position high speed. Fan speed switch two operation switch high speed and low speed
-
Instruction
-
Switch P IR lighting switch operation check IR lights front and rear. ensure orientation of switch and check that it does not rotate
-
Instruction
-
lighting switch Pos 1 following should work Side lights, rear lights, stop lights, Indicators, number plate lamps, Side marker lights, IP & switch illumination, IR lights and interior lights. check that the Illumin LED is on, on the MM test box
-
Instruction
-
Lighting switch Pos 2 the following should work Headlights (Dip beam and main beam), Side lights, Rear lights, Stop lights, Indicators, Number Plate lights, Side markers, Rear fog, front fog, Switch illumination, IR lights, Interior lights
-
Instruction
-
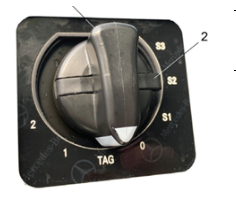
Lighting switch Tag the following should work Stop lights, Indicators, IR lights, DRL, Interior lights
-
Instruction
-
Lighting switch 0 the following should work IR Lights. to get to positon O, you must check that the gate is moved to the left and the switch pressed in
-
Instruction
-
Lighting switch S1 the following should work Convoy light, Black out light Brake and IR
-
Instruction
-
Lighting switch S2 the following should work Black out lights front and IR lights
-
Instruction
-
Lighting switch S3 the following should work Convoy light,Blackout light front, Blackout light rear, Blackout Brake, IR lights
-
Instruction
-
Full black out With the Switch in S3 press the button on the IP to turn off the LCD display. the switch should return by itself the neutral position. Return the rotary lighting switch to the TAG position
-
Instruction
-
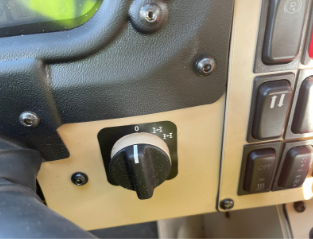
Diff lock switch check operation: select and check dash lights indicate function both to engage and disengage (check on-road test disengagement is functioning)
-
Instruction
-
Check horn function should not work in blackout, but should function in all other lighting modes
-
Instruction
-
test 12 and 24 vdc power sockets on dash
-
Winch bag fitted
-
Instruction
-
Headlight alignment check
-
check operation of headlight height adjustment switch
-
Check air pressure reading on guages. has the system lost any pressure?


BMS
-
Is BMS Functioning
BMS Readings
-
B1 - Engine Volts
-
B1 - Engine Temp
-
B1 - Engine SOH
-
B1 - Engine AHR
-
B1 - Engine Time
-
B1 - Engine Amps
-
B1 - Engine SOC (90%+)
-
B2 - Engine Volts
-
B2 - Engine Temp
-
B2 - Engine SOH
-
B2 - Engine AHR
-
B2 - Engine Time
-
B2 - Engine Amps
-
B2 - Engine SOC (90%+)
Final Checks - Torque - Road Test - Paint -Water Test
Quality Assurance
-
OEM fasteners to be visually checked to ensure that they have not been disturbed. Brakes, steering and suspension
-
Drivers and passengers seat securing fasteners to be torque marked
-
Drivers and passengers seat belt fixings to be torque marked
-
Brake pedal fasteners to be torque marked
-
Tie down point fixings to be torqe marked
-
interface to chassis fixings to be torque marked
-
Front and rear winch fixings to be torque marked
-
Quality Assurance Torque Check Reference Torque Map table
Road Test
-
Instruction
-
Has the road test been completed and the inpsection report completed?
-
Are there any defects reported?
Paint Inspection
-
Have you conducted a full paint inspection and completed the report?
-
Are there any defects reported?
Water Test
-
Complete the water test as per the instructions
-
Question
Conclusion
Conclusion
-
Inspector Name
-
Signature
-
Date
Reworks
-
were there any reworks required?
-
Have all reworks been completed satisfactorialy?
-
Inspector Name
-
Signature
-
Date
-