


Title Page
-
Conducted on:
-
Prepared by:
-
Crew members
-
PMI Start Time:
Tasks
Instructions
-
Please take 'before' and 'after' photographs if appropriate to show work completed.
Safety
-
Lock out/tag out in place?
-
Why was lock out/tag out not carried out?
-
Ensure all personnel are wearing the appropriate PPE (gloves, masks, glasses, protective overalls etc).
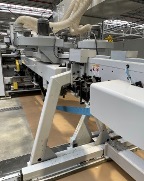
1) Pre Feeder
-
1.1) Clean area & remove all waste. Frequency: 1W
-
1.2) Clean chains & lubricate. Lubricate with chain oil. Frequency: 1W
-
1.3) Clean all sensors with a dry cloth. Frequency: 1W
-
1.4) Apply grease to all grease nipples. Use EP2 grease. Frequency: 2W
-
1.5) Check all belts for damage or wear. Frequency: 1W
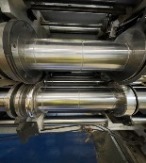
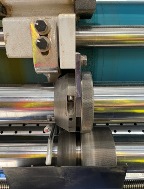
2) Feed End
-
Feed (infeed)
-
2.1) Grease all shafts & bearings. Use EP1 grease only. Frequency: 1W
-
2.2) (Inside the feed unit) Remove any dust from the brushes that clean the board before it enters the print unit & clean vacuum extraction unit. Frequency: 1W
-
Lateral shafts & guides
-
2.3) Spray all lateral shafts & guides with LPS spray & clean off with a cloth. Frequency: 1W
-
2.4) Check condition of all feed wheels, replace if needed. Frequency: 2W
-
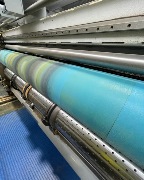
Feed (exit)
-
2.5) Remove all waste and debris from the feed rollers. Frequency: 1W
-
2.6) Apply grease to all greasing points. Use EP1 grease only. Frequency: 1W
-
2.7) Check condition of the top & bottom feed rollers, reporting any defects. Frequency: 1W
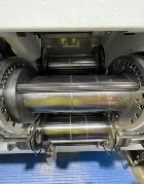
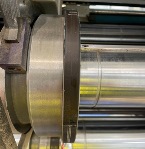
3) Print Units - PU1
-
3.1) PU1 - Clean outer print unit cover. Frequency: 1W
-
3.2) PU1 - Clean print cylinder & spill tray. Frequency: 1W
-
3.3) PU1 - Check condition of doctor blades & end seals. Replace if necessary. Frequency: 1W
-
3.4) PU1 - Clean print chamber. Frequency: 1W
4) Print Units - PU2
-
4.1) PU2 - Clean outer print unit cover. Frequency: 1W
-
4.2) PU2 - Clean print cylinder & spill tray. Frequency: 1W
-
4.3) PU2 - Check condition of doctor blades & end seals. Replace if necessary. Frequency: 1W
-
4.4) PU2 - Clean print chamber. Frequency: 1W
5) Print Units - PU3
-
5.1) PU3 - Clean outer print unit cover. Frequency: 1W
-
5.2) PU3 - Clean print cylinder & spill tray. Frequency: 1W
-
5.3) PU3 - Check condition of doctor blades & end seals. Replace if necessary. Frequency: 1W
-
5.4) PU3 - Clean print chamber. Frequency: 1W
6) Print Units - PU4
-
6.1) PU4 - Clean outer print unit cover. Frequency: 1W
-
6.2) PU4 - Clean print cylinder & spill tray. Frequency: 1W
-
6.3) PU4 - Check condition of doctor blades & end seals. Replace if necessary. Frequency: 1W
-
6.4) PU4 - Clean print chamber. Frequency: 1W
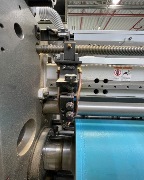
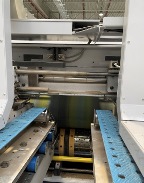
7) Slotting Unit
-
Bronze gear
-
7.1) Clean and grease the bronze gear. Frequency: Twice weekly
-
7.2) Clean and grease the in/out gear. Use EP1 grease only. Frequency: Twice weekly
-
Slotter spline shaft
-
7.3) Clean and lubricate the spline shaft. Use LPS lubrication spray. Frequency: Twice weekly.
-
Creasing anvils/profiles
-
7.4) Check condition of all creasing anvils and profiles. Frequency: 1M
-
Slotting section shafts
-
7.5) Clean all Slotting section shafts and lubricate. Use LPS lubrication spray. Frequency: 1W
-
7.6) Clean all sensors with a dry cloth. Frequency: 1W
-
Waste belt
-
7.7) Clean all waste from the waste conveyor and check condition of waste belt. Report any defects found. Frequency: 1W
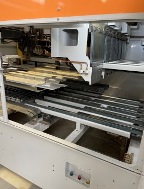
8) Die Cut Unit
-
Shaft & pull rollers
-
8.1) Clean all shafts and pull rollers. Use LPS lubrication spray. Frequency: 1W
-
Anvil covers
-
8.2) Check condition of anvil covers. Rotate or skim. Refer to list at machine. Frequency: 1W
-
Grinding tool
-
8.3) Check condition of grinding tool. Remove any dust or debris and check cutter. Frequency: 1W
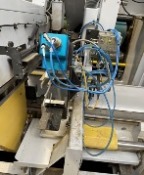
9) Glue Section
-
Glue gun unit
-
9.1) Clean glue guns and remove all dry glue. Clean the waste glue tray. Frequency: 1W
-
9.2) Clean camera lens with a dry cloth. Frequency: 1W
10) Folding Section
-
Folding rails & tracks
-
10.1) Blow all waste and debris from inside the folding rails. Frequency: 1W<br>Clean all sensors with a dry cloth. Frequency: 1W<br>Remove all waste from folding rail tracks. Frequency: 1W
-
Entrance & exit shafts
-
10.2) Clean all shafts at the entrance and exit of the folding section, then lubricate. Use LPS lubrication spray. Frequency: 1W
-
Folding belts
-
10.3) Check condition of ALL folding belts and report any defects found. if needed/possible change the belts. Frequency: 1W<br>Clean all sensors with a dry cloth. Frequency: 1W
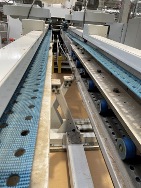
11) Counter Ejector
-
Counter ejector
-
11.1) Remove all dust, debris & waste from the counter/ejector. Frequency: 1W
-
11.2) Check condition of belts & conveyors. Report any defects. Frequency: 1W
-
11.3) Check all front stop cushions and replace if necessary. Frequency: 1M
12) Corrpal Stacker
-
12.1) Remove all dust, debris & waste from the Corrpal stacker. Frequency: 1W
-
12.2) Check condition of belts and rollers. Frequency: 1W
-
12.3) Check slip sheet dispensers and tie grabber. Frequency: 1W
13) General
-
13.1) Grease all greasing nipples throughout the machine. Frequency: 1W<br>Starting at the feed end and working your way down the machine.
-
13.2) Clean and sweep all the machine surrounding area. Frequency: 1W<br>This includes the drive side of the machine.
-
13.3) Check all slotting knives male/female. Replace if necessary. Frequency: 1M
14) Additional tasks done
-
Additional task or corrective completed (attach picture if needed).
15) Correctives to do
-
Brief description of corrective and area on machine (create action to be done here using 'Action' button). Attach picture if needed.
-
Can this corrective be done whilst machine is running?
16) Safety Issues noted
-
Detail of any safety issues noted whilst performing maintenance (create actions to be done here using 'Action' button and attach picture if needed.
17) Hand Back Check List
-
Housekeeping - Ensure that all tools and equipment have been removed and/or replaced onto shadow boards and the area is clean & tidy.
-
Safety Guards - Ensure that all guards are refitted and secured correctly.
-
Machine Start Up - Removal of lock out/tag out devices and carry out power up procedure.
-
Safety Systems - Test operation of all emergency stop buttons, light barriers etc.
18) PMI Sign Off (end of maintenance slot)
-
PMI End Time:
-
Sign Off - Machine Team Leader - (print name & signature):
-
Sign Off - Shift/Cell Leader - (print name & signature):
