


Information
-
Equipment Type & ID #
-
Conducted on
-
Prepared by
Complete Machine
-
Clean and inspect condition of entire machine
-
Inspect all screws and nuts (tighten or replace if necessary)
-
Check fuel level (refill if necessary)
-
Gasoline and 2-Stroke Oil mixed at 50:1 ratio
-
Check chain lubricant (top off with appropriate bar and chain oil when refuelling)
-
• Use bar and chain oil of the following grades:
SAE No. 30 ...... in summer
SAE No. 10 ...... in winter or when cutting resin-
ous trees.
Operating Elememts
-
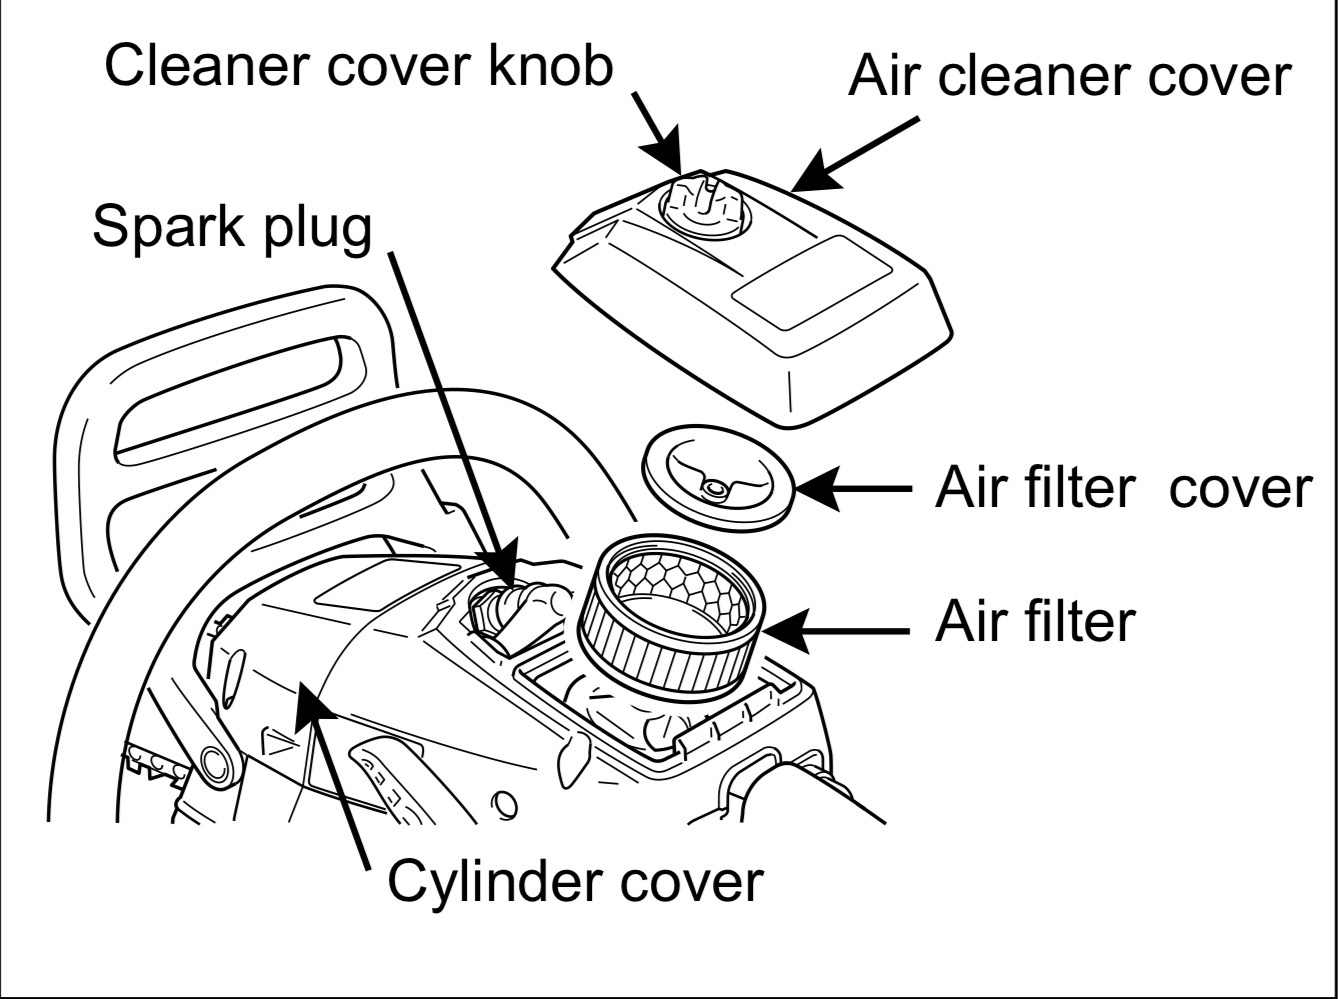
Clean and inspect air filter
-
-
• Check before every use.
• Loosen cleaner cover knob and remove air cleaner cover and filter.
• Brush off dust lightly, or clean with compressed air, or replace the air filter.
• Reinstall air filter and cover. -
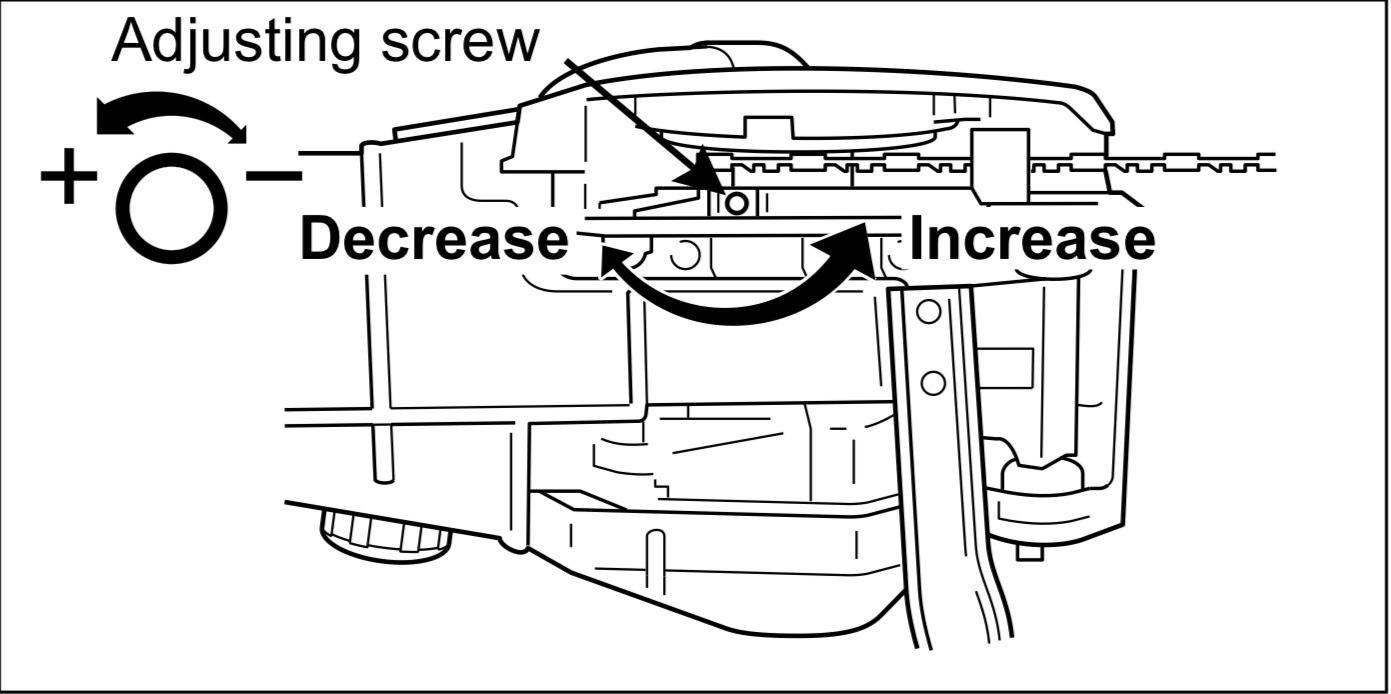
Inspect adjust automatic oiler
-
-
• The discharge volume of the automatic oiler is adjusted to 4 mL/min approximately at 7000 r/min, prior to shipment from factory.
• To increase the delivery volume, turn the adjusting screw counterclockwise. When the screw touches stopper and stops, this position indicates maximum discharge volume. (13 to 14 mL/min at 7000 r/min)
• Do not turn the adjusting screw beyond the maximum or minimum limit of volume adjustment. -
Inspect oil filter (replace if necessary)
-
-
• Check periodically.
• Do not allow dust to enter into oil tank.
• A clogged oil filter will affect the normal lubricating system.
• Pull it out through oil filling hole with a piece of steel wire or the like.
• If the filter is dirty, wash it in gasoline or replace it.
• When the inside of the tank gets dirty, rinsing the tank out with gasoline can clean it. -
Inspect fuel system
-
-
• Check before every use.
• After refueling, make sure fuel does not leak from around fuel pipe, fuel grommet or fuel tank cap.
• In case of fuel leakage there is a danger of fire. Stop using the machine immediately and request your dealer to inspect or replace. -
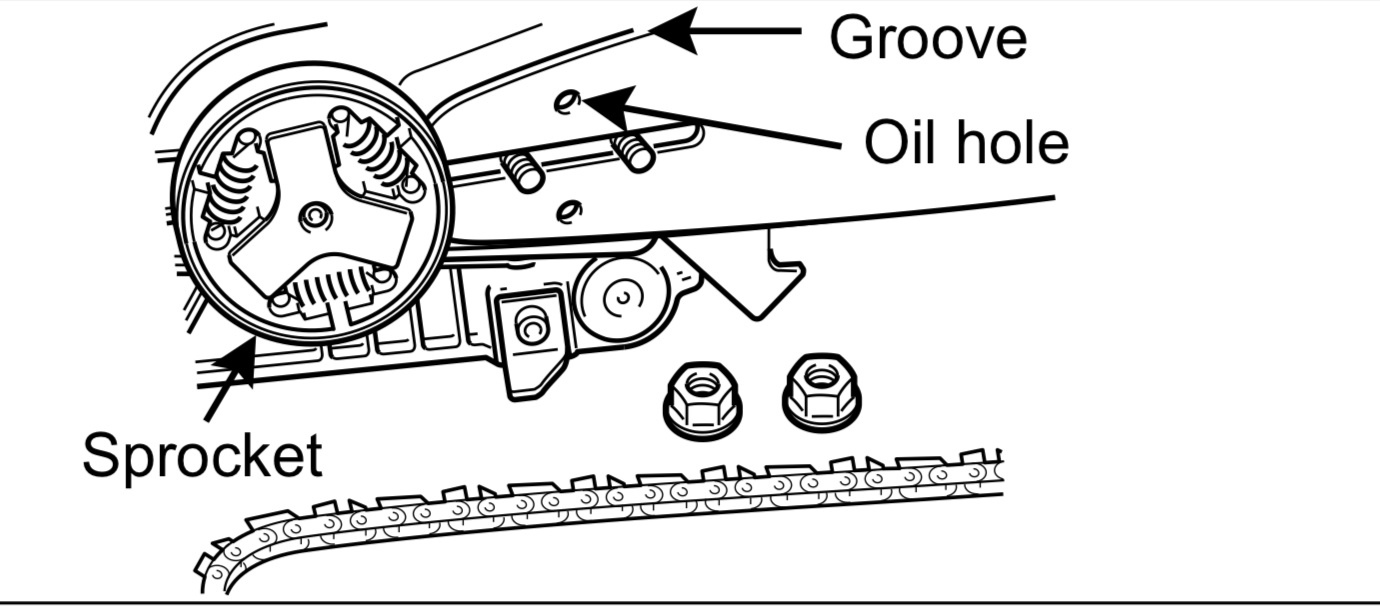
Inspect clean and lubricate guide bar and sprocket nose
-
-
• Clean before using.
• Clean the groove of the guide bar with a small screw-driver.
• Clean oil holes with a wire.
• Reverse guide bar periodically.
• Check sprocket and the clutch and clean the bar mount area before installation of the bar. Replace either or both if worn. -
Inspect saw chain
-
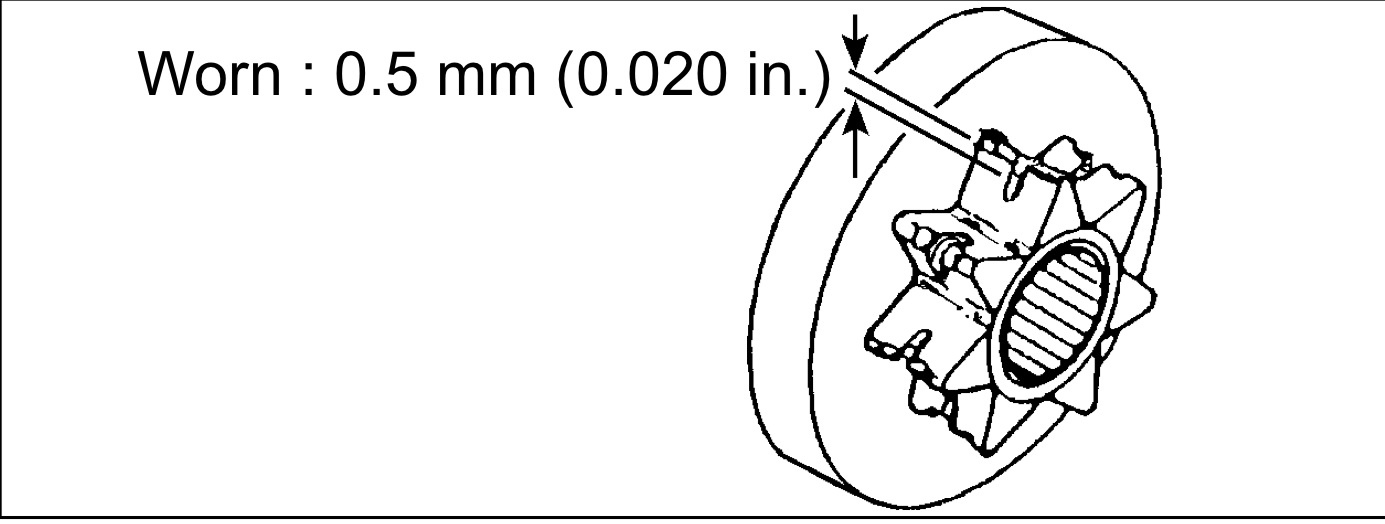
Inspect sprocket
-
-
• A damaged sprocket will cause premature damage or wear of saw chain.
• When the sprocket has worn out 0.5 mm (0.020 in.) or more, replace it.
• Check sprocket when you install new chain. Replace it if worn. -
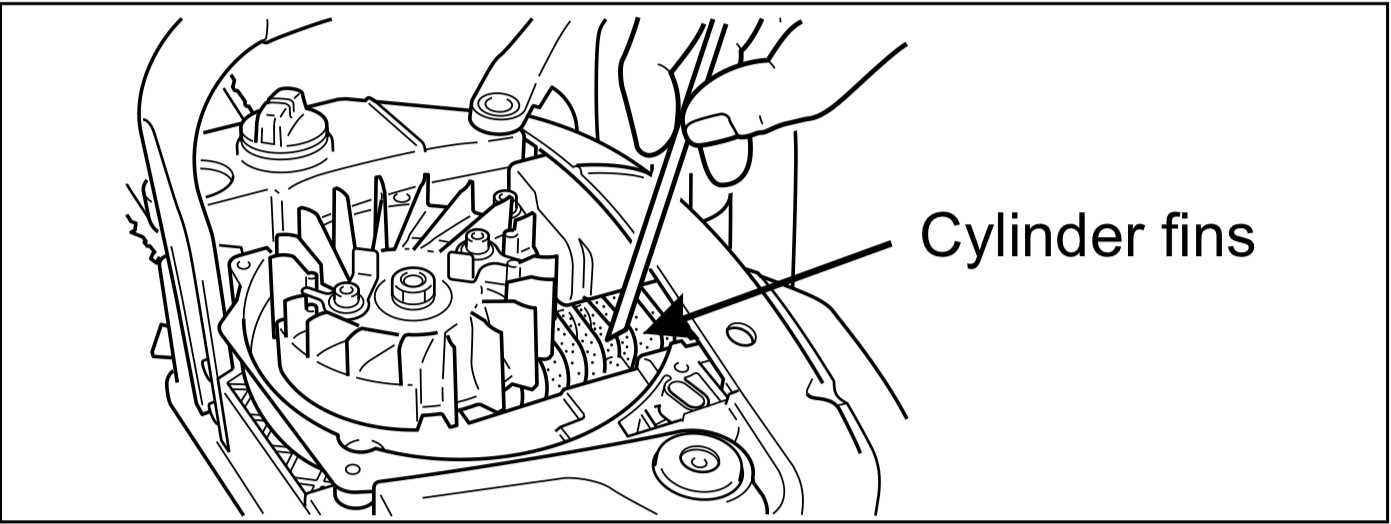
Clean and inspect cooling system
-
-
• Check periodically.
• Clogged fins will result in poor engine cooling.
• Remove dirt and dust from between fins to let cooling air pass easily. -
Inspect recoil starter rope. (Clean if necessary)
-
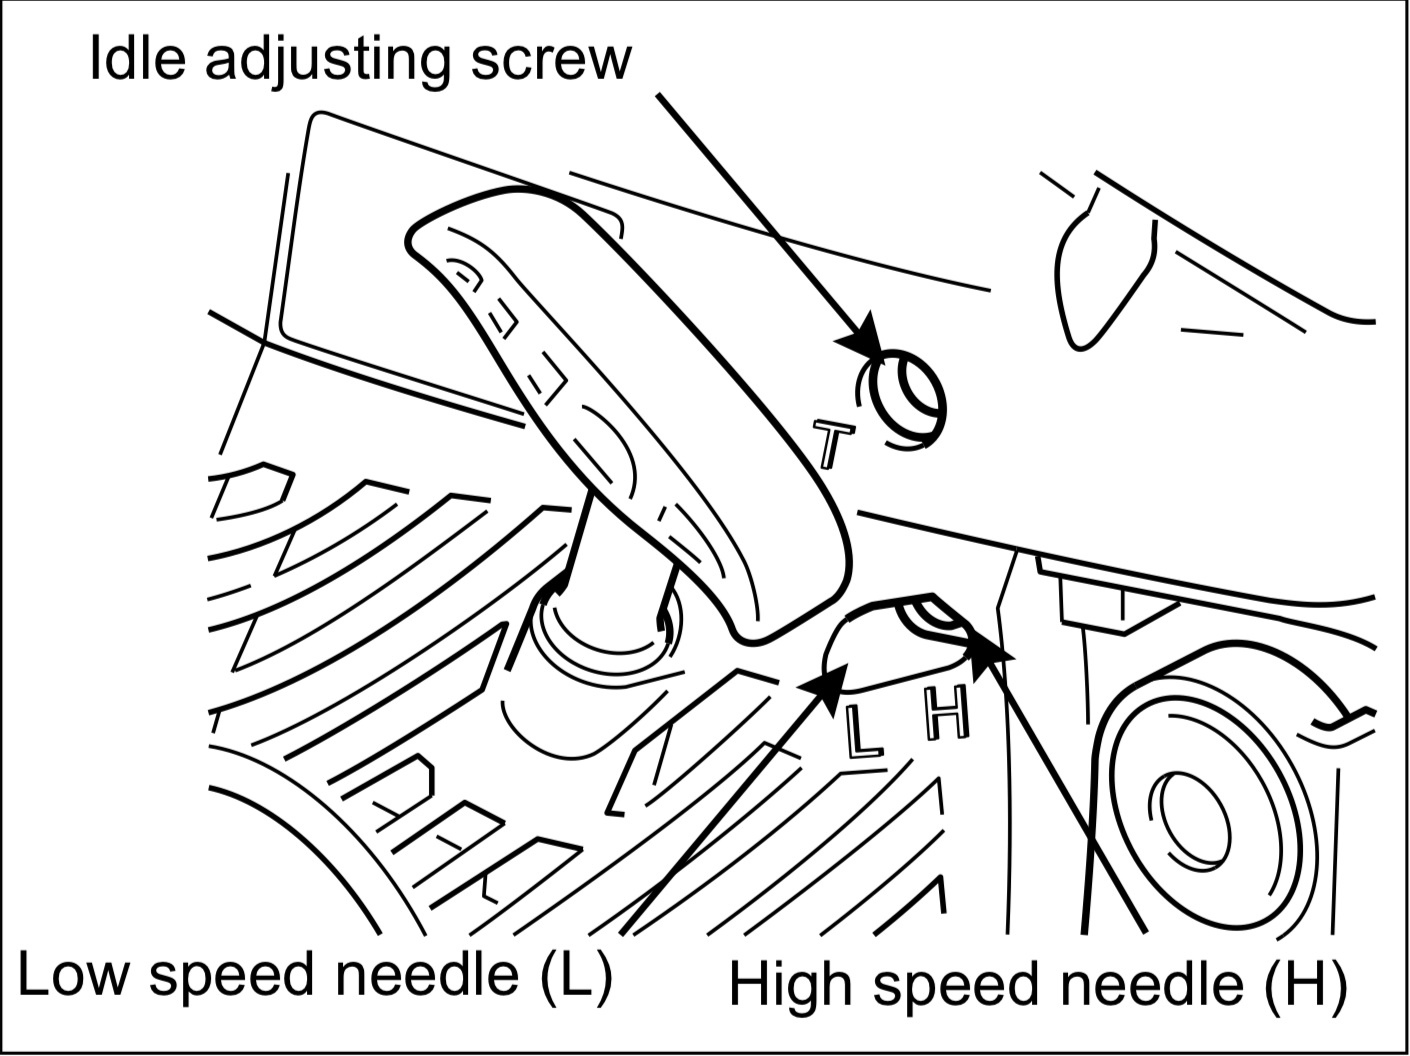
Check carburetor adjustment, tool must not move when idling. (Adjust if necessary)
-
-
1. Before adjusting carburetor clean or replace air filter and muffler “Spark Arrestor Screen”.
2. Make sure the bar and chain are properly adjusted.
3. Start engine and run several minutes to bring to operating temperature. Flash choke twice during warm-up to clear any air from the fuel system.
4. Stop engine.
Turn “H” speed needle counterclockwise (CCW) to stop. Turn “L” speed needle midway between full clockwise (CW) stop and CCW stop.
5. Idle Speed Adjustment:
• Start engine, turn “Idle” speed adjustment screw CW until the saw chain begins to turn, then turn screw out CCW until the saw chain stops turning. Turn screw out, CCW, an additional 1/4 turn.
6. Accelerate to full throttle for 2 - 3 seconds to clear any excess fuel in the engine, then return to idle. Accelerate engine to full throttle to check for smooth transition from idle to high speed. If engine hesitates turn “L” needle CCW 1/8 turn and repeat acceleration. Continue adjustment until smooth acceleration results.
7. Check idle speed and reset if necessary as described in item 5. If a tachometer is available idle speed should be set to 2,650 r/min.
Quarterly maintenance (every 3 months)
-
Is quarterly maintenance required?
-
Replace air filter
-
-
• Check before every use.
• Loosen cleaner cover knob and remove air cleaner cover and filter.
• Brush off dust lightly, or clean with compressed air, or replace the air filter.
• Reinstall air filter and cover. -
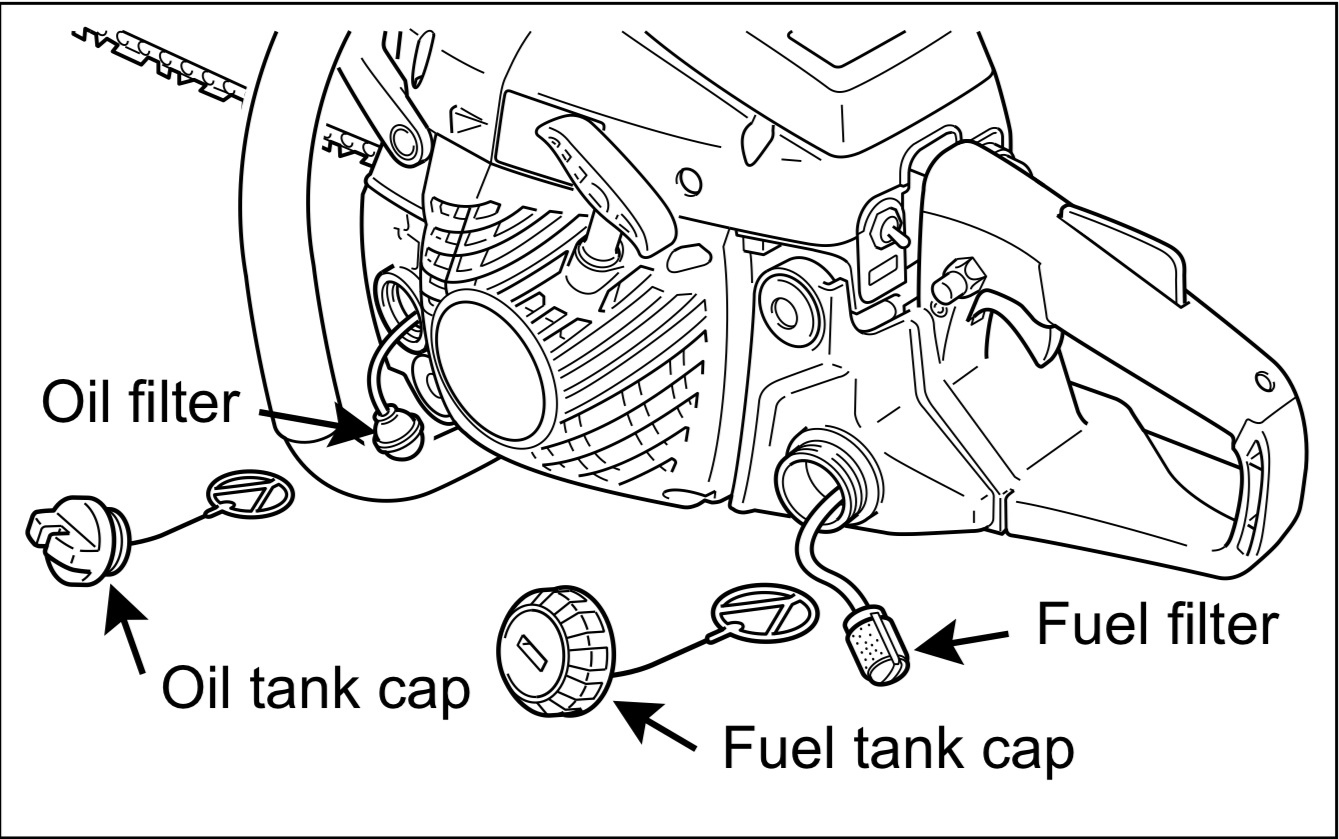
Inspect fuel filter
-
-
• Check periodically.
• Do not allow dust to enter fuel tank.
• A clogged filter will cause difficulty in starting engine or abnormalities in engine performance.
• Pull the fuel filter out through fuel inlet port with a piece of steel wire or the like.
• When the filter is dirty, replace it.
• When the inside of the fuel tank is dirty, rinsing the tank out with gasoline can clean it. -
Inspect fuel cap gasket
-
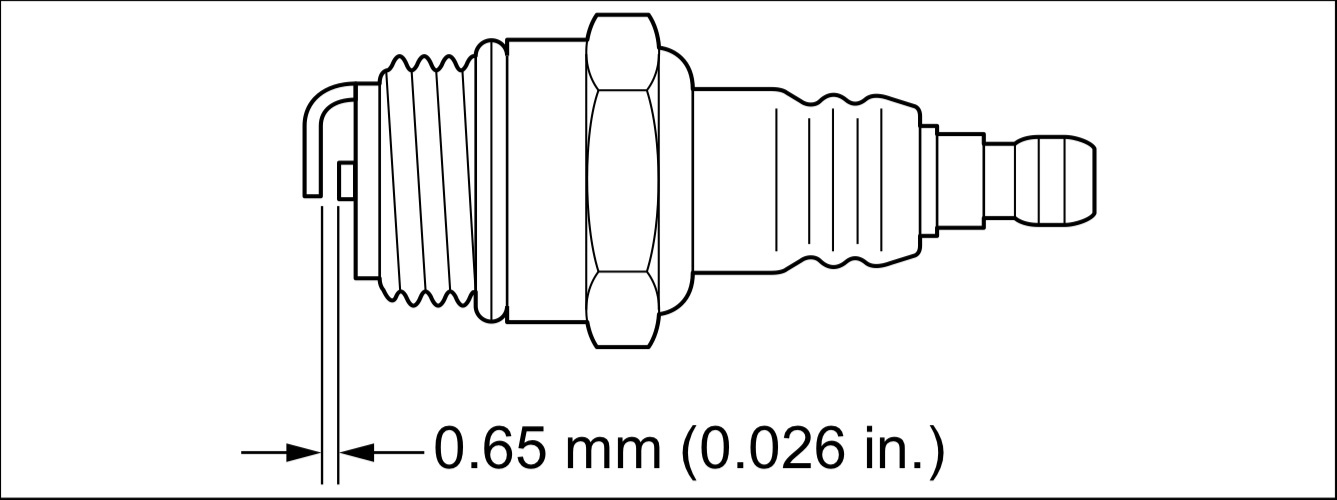
Clean and inspect spark plug (replace if necessary)
-
-
• Check periodically.
• The standard spark gap is 0.65 mm (0.026 in.).
• Correct the spark gap if it is wider or narrower than the standard gap.
• Fastening torque: 150 to 170 Kgf • cm (130 to 145 in • lbf). -
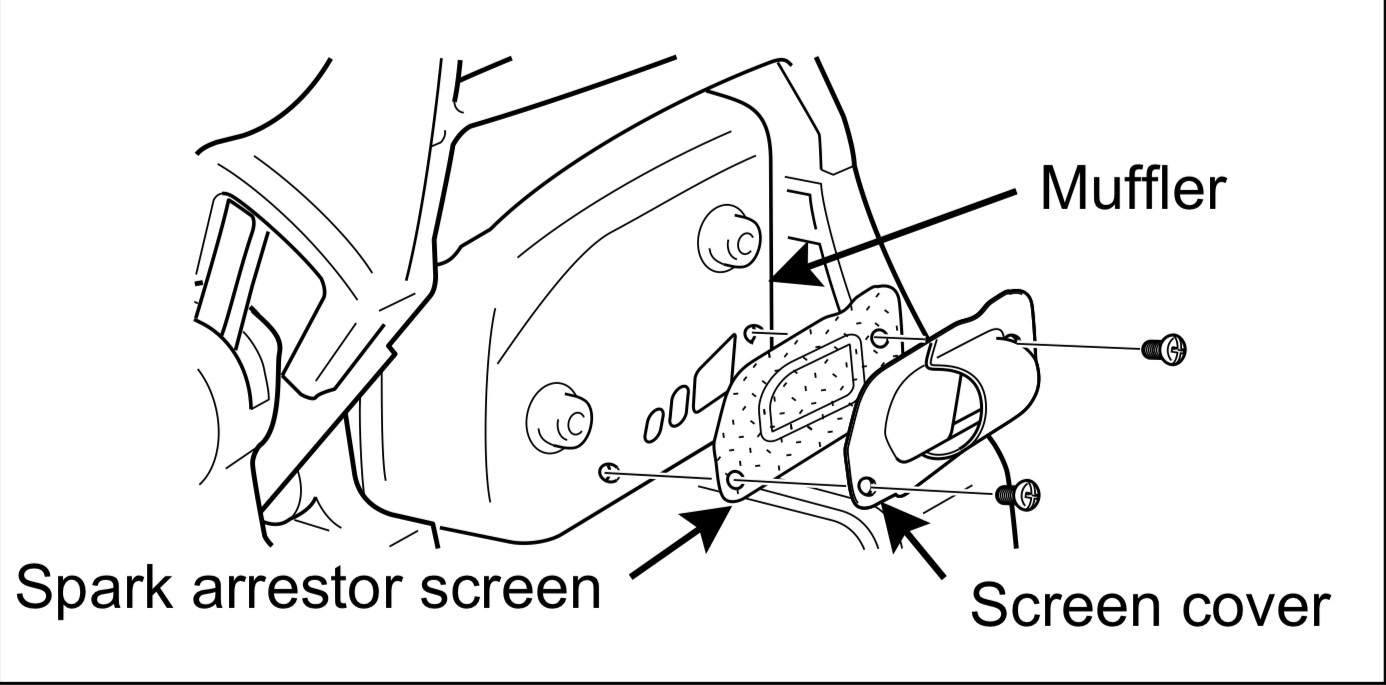
Clean and inspect muffler spark arresters (replace if necessary)
-
-
• Remove air cleaner cover and remove spark plug lead.
• Remove spark arrestor screen cover and screen from muffler body.
• Clean carbon deposits from muffler components.
• Replace screen if it is cracked, or has holes burned through.
• Assemble components in reverse order. -
Inspect and clean (remove carbon) cylinder exhaust port
-
Inspect fuel filter (replace if necessary)
-
-
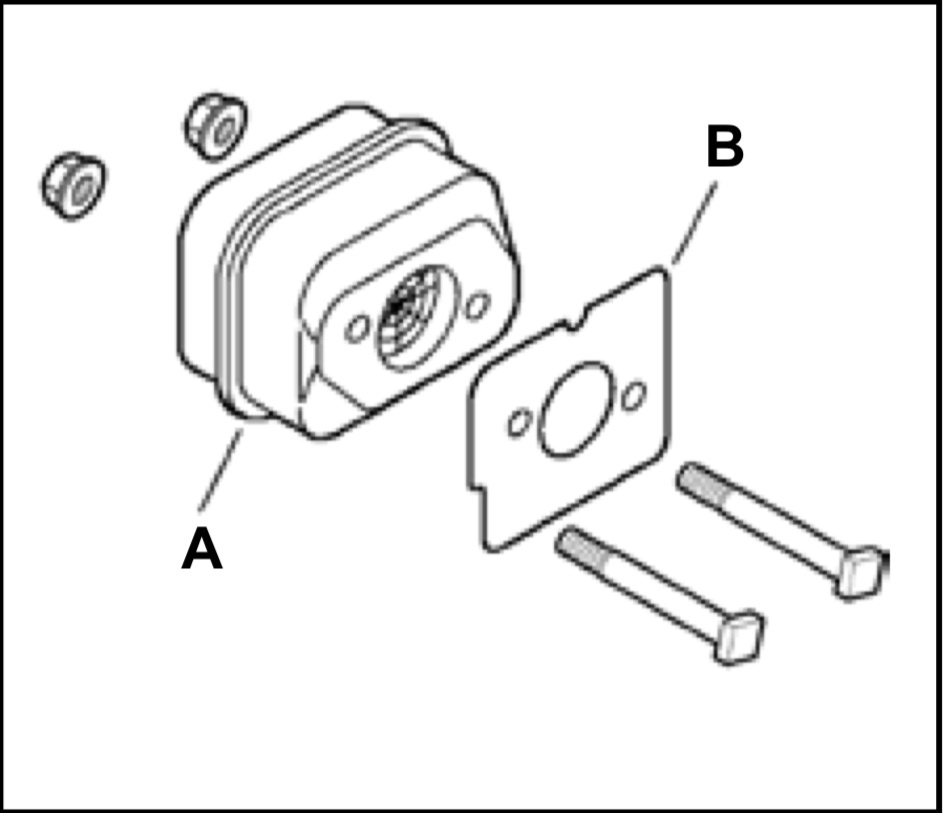
Parts Required: As needed: Muffler gasket
1. Remove air filter cover and remove spark plug lead.
2. Remove engine cover (3 screws).
3. Place piston at top dead center. Remove muffler (A) and muffler gasket (B ).
4. Use a wood or plastic scraping tool to clean deposits from cylin-der exhaust port.
IMPORTANT: Never use a metal tool to scrape carbon from the exhaust port. Do not scratch the cylinder or piston when cleaning the exhaust port. Do not allow carbon particles to enter the cylinder.
5. Inspect muffler gasket, and replace if damaged.
6. Install muffler gasket and muffler.
7. Tighten muffler mounting bolts (or nuts) to 70-95 in • lbf (80-110kgf • cm).
8. Install engine cover and attach spark plug lead.
9. Replace air filter cover.
10. Start engine, and warm to operating temperature.
11. Stop engine, and re-tighten mounting bolts (or nuts) to specifica-tions.
Annual maintenance (every 12 months)
-
Is annual maintenance required?
-
Replace fuel filter
-
-
• Check periodically.
• Do not allow dust to enter fuel tank.
• A clogged filter will cause difficulty in starting engine or abnormalities in engine performance.
• Pull the fuel filter out through fuel inlet port with a piece of steel wire or the like.
• When the filter is dirty, replace it.
• When the inside of the fuel tank is dirty, rinsing the tank out with gasoline can clean it. -
Replace fuel cap gasket