Information
-
Equipment Type / ID #
-
Conducted on
-
Prepared by
-
Location
-
-
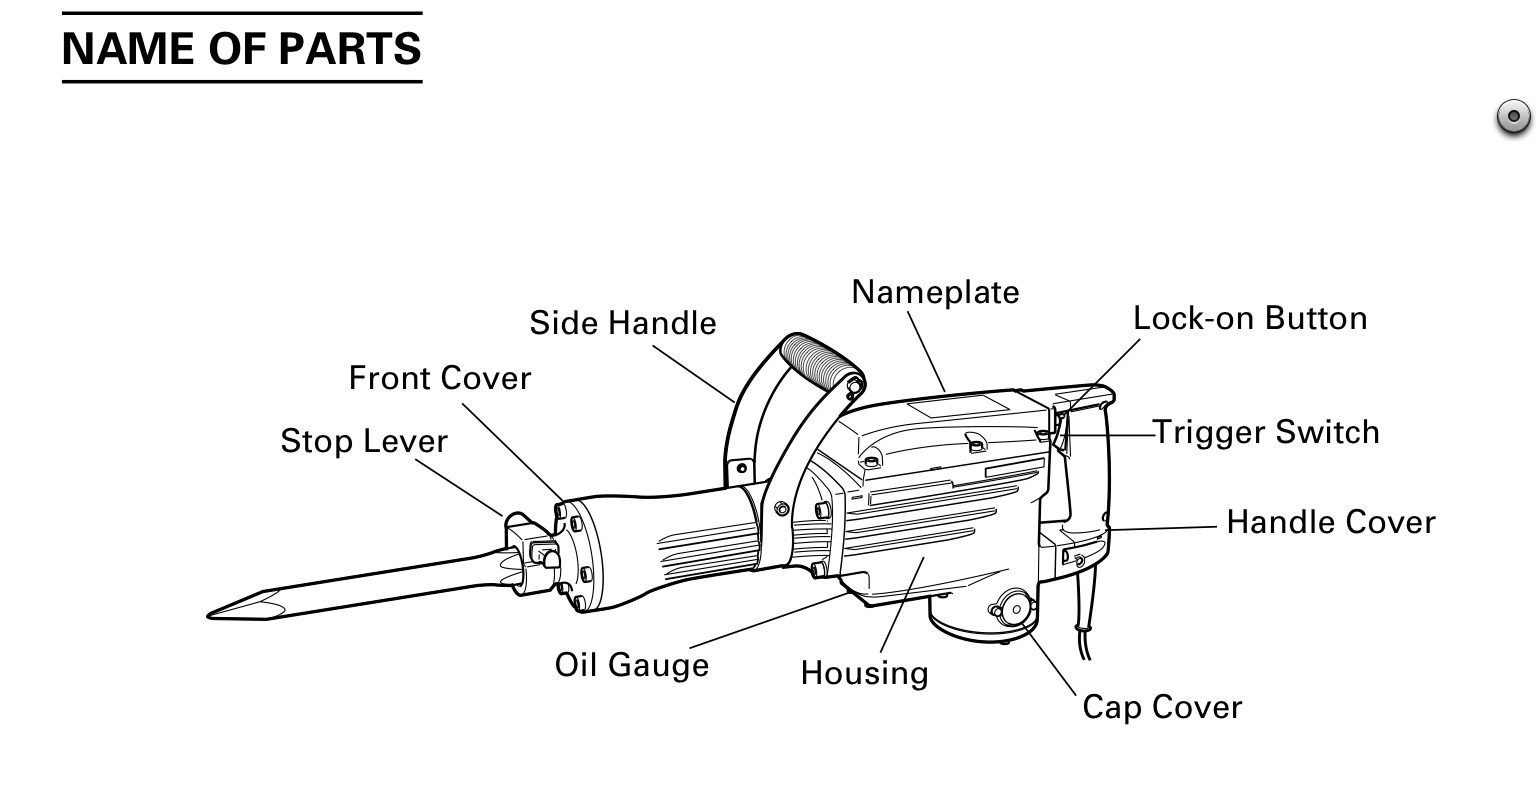
Inspect complete machine for wear and tear
-
Inspect power cord
-
Inspect mounting screws
-
Instructions
-
Inspecting the mounting screws
1. Regularly inspect all mounting screws and ensure that they are properly tightened.
Should any of the screws be loosened, retighten them immediately. -
Inspect carbon brushes
-
Instructions
-
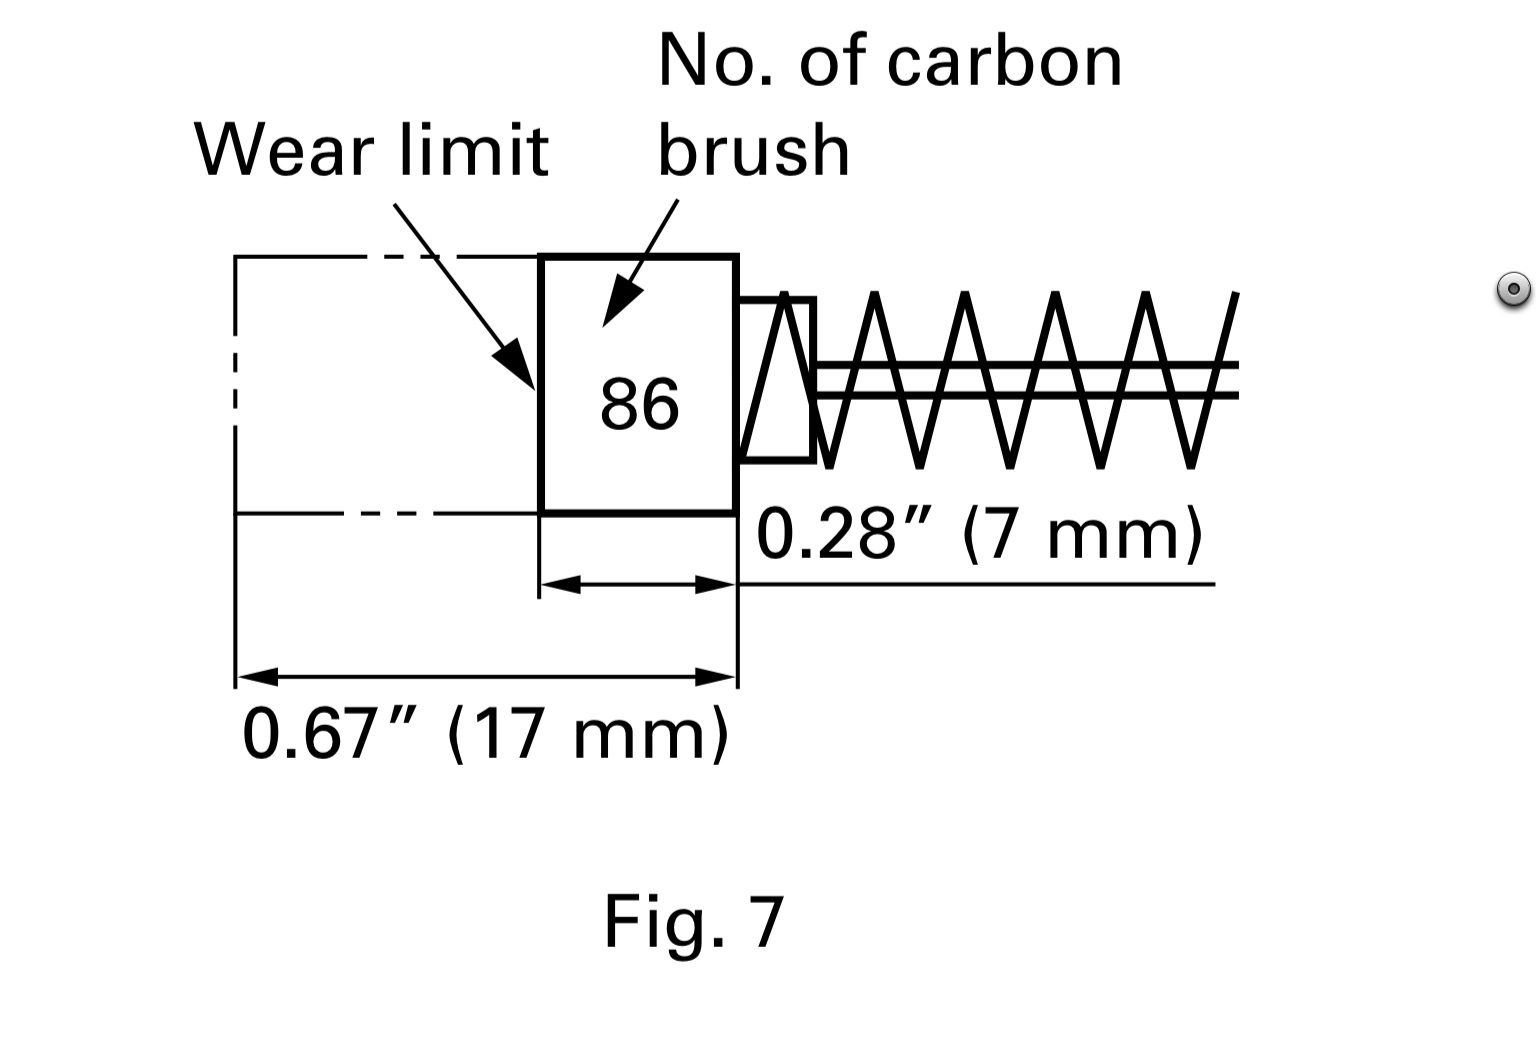
Inspecting the carbon brushes (Fig. 7)
The Motor employs carbon brushes which are consumable parts. When they become worn to or near the “wear limit”, it could result in motor trouble. When an auto-stop carbon brush is equipped, the motor will stop automatically. At that time, replace both carbon brushes with new ones which have the same carbon brush Numbers shown in the figure. n addition, always keep carbon brushes clean and ensure that they slide freely within the brush holders. -
Inspect tool
-
Instructions
-
Inspecting the tool
1. Since use of a dull tool will degrade efficiency and cause possible motor malfunction, sharpen or replace the tool as soon as abrasion is noted.
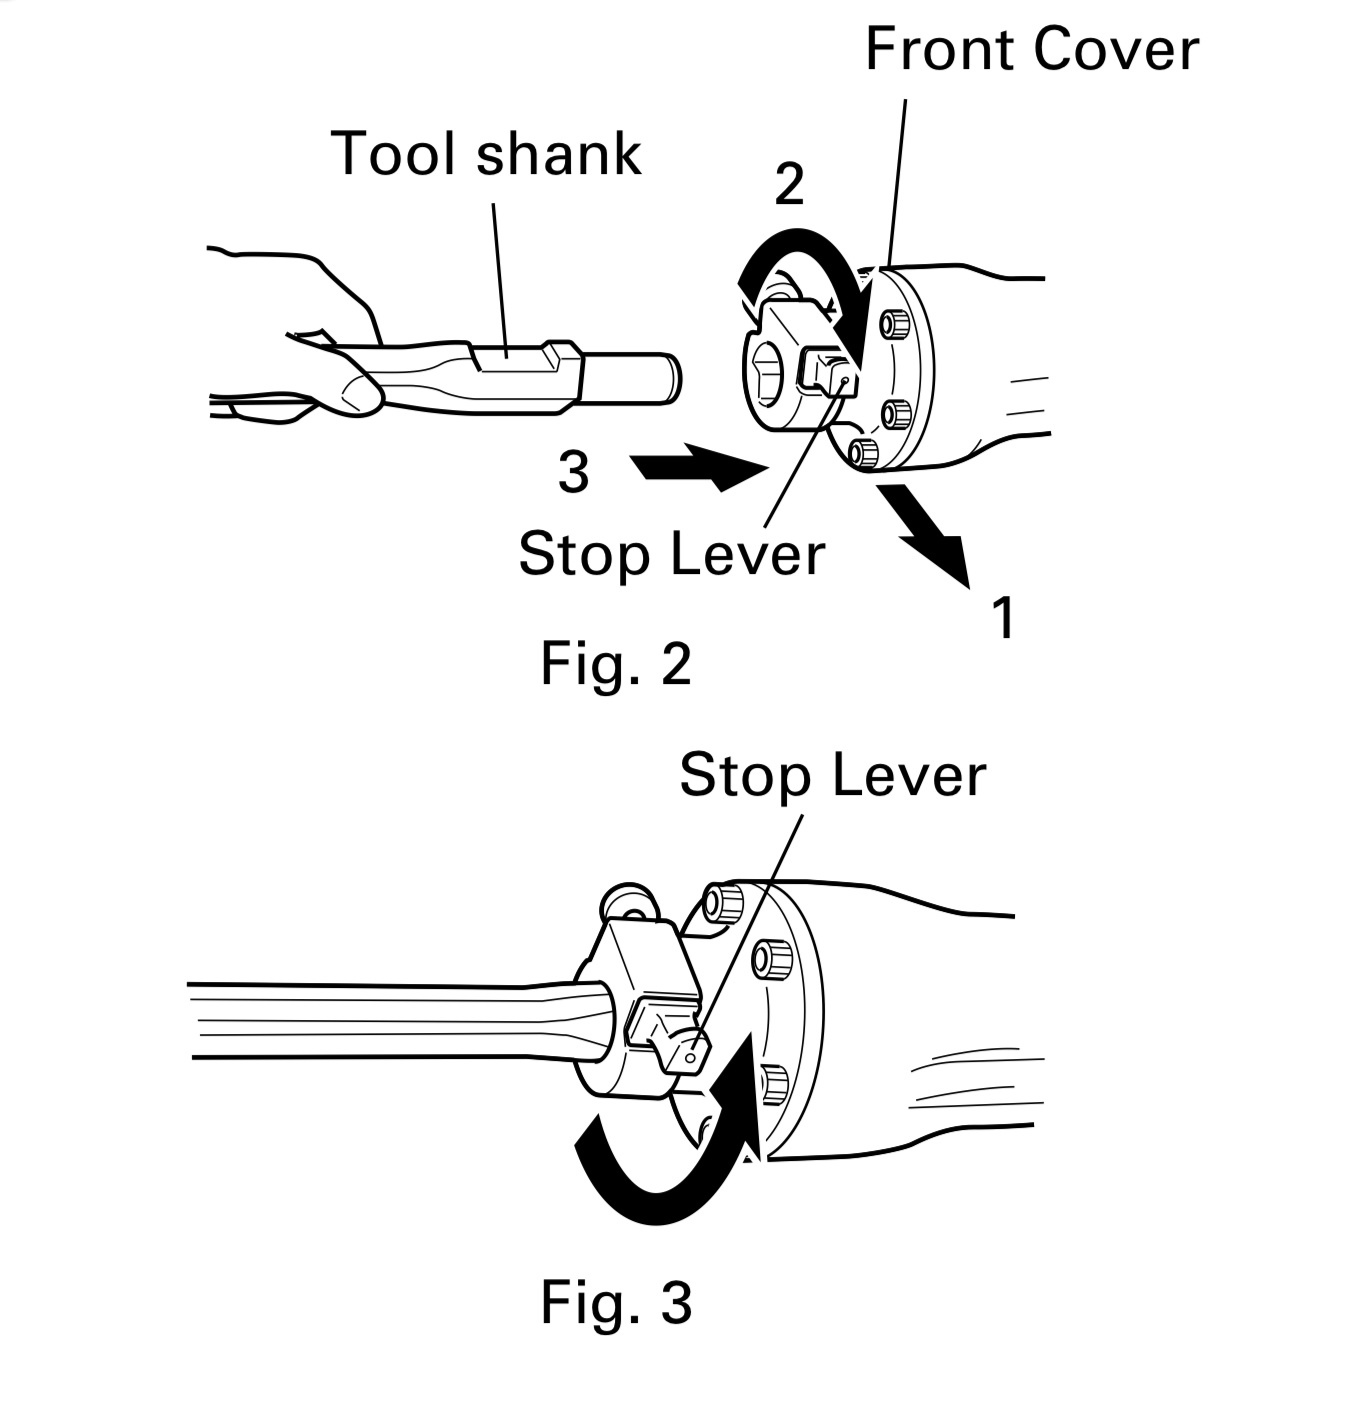
2. Clean, then smear the tool shank with grease or machine oil. (Fig. 2)
3. Rotate the stop ever 180° in a clockwise direction while pulling it toward you. Next, insert the tool shank into the hexagonal hole on the front cover. (Fig.2)
4. Clamp the tool by turning the stop lever by half a turn in the opposite direction. (Fig. 3) -
Check oil level
-
Instructions
-
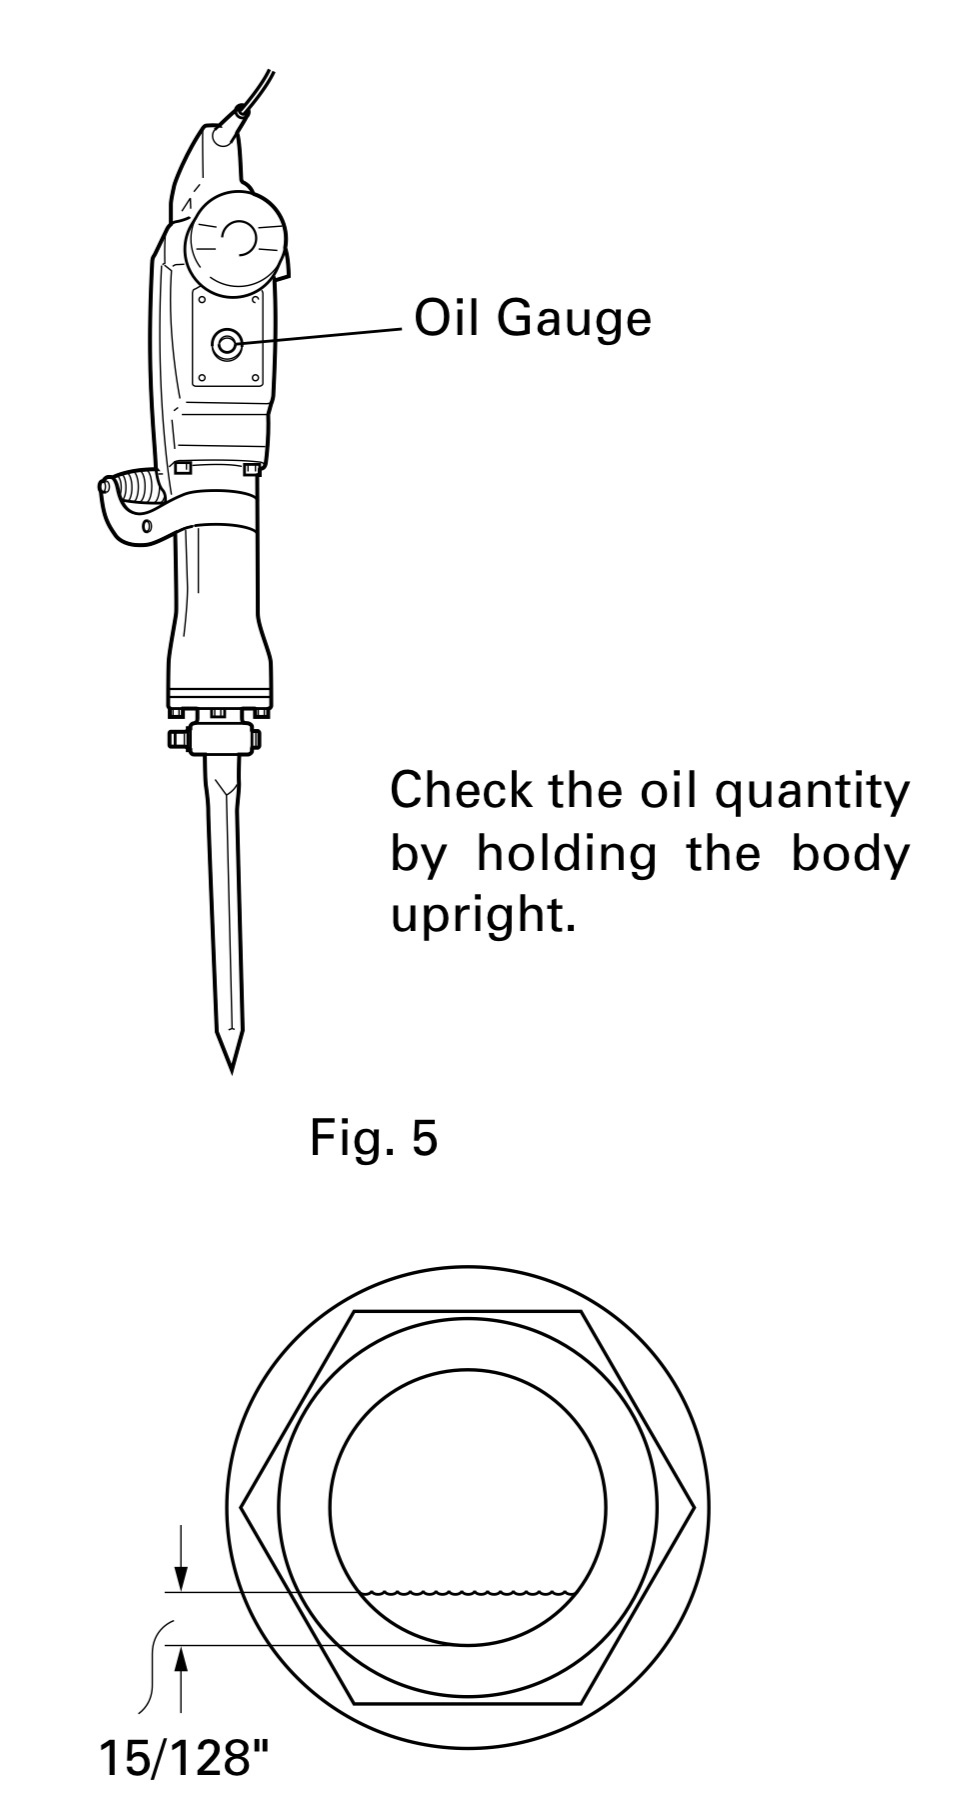
Fill oil into the oil tank as described below before using this Hammer. (See Figs. 5 and 6)
1. Just before no oil is visible in the oil gauge window when the power tool is held upright, fill oil without fail.
2. Before filling oil, use the provided wrench to remove the oil gauge. Be careful not to lose the rubber packing attached below the oil gauge.
3. Check the oil level once a day, confirming that oil is filled.
4. After filling with oil, securely clamp the oil gauge.
