Information
Pre-operation Checklist Plate Packer
-
Equipment Type / ID#
-
Conducted on
-
Prepared by
Complete Machine
-
Check that the machine is in good condition & free from debris (Clean as needed)
-
Instructions
-
Clean plate after use to remove dirt, stones, and mud caught under the engine console. If plate is being used in a dusty area, check engine cylinder cooling fins for heavy dirt accumulation. Keep engine cylinder fins clean to prevent engine from overheating.
-
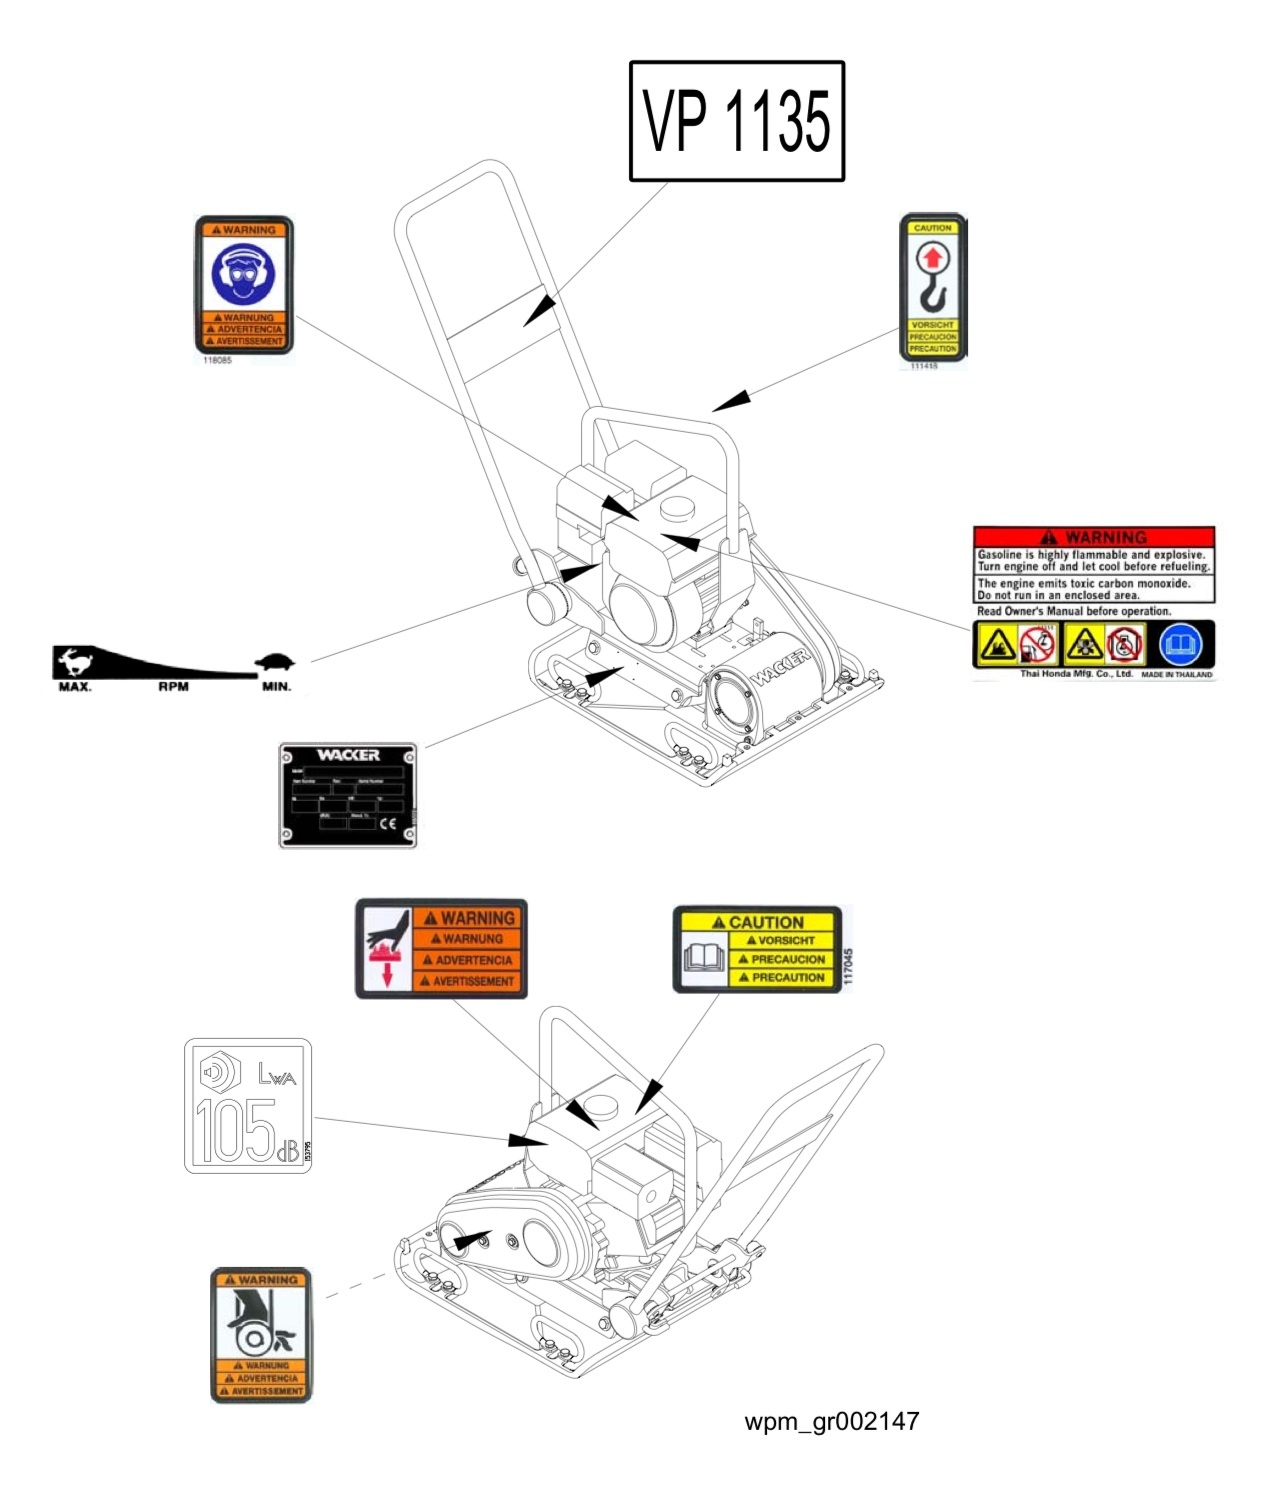
Inspect all safety labels are still attaches
-
Instructions
-
-
Never attempt to modify the controls or safety devices
-
Keep the handles dry and clean - free from oil and dirt - for safe control of the machine
Inspect Components
-
Clean out air filter
-
Instructions
-
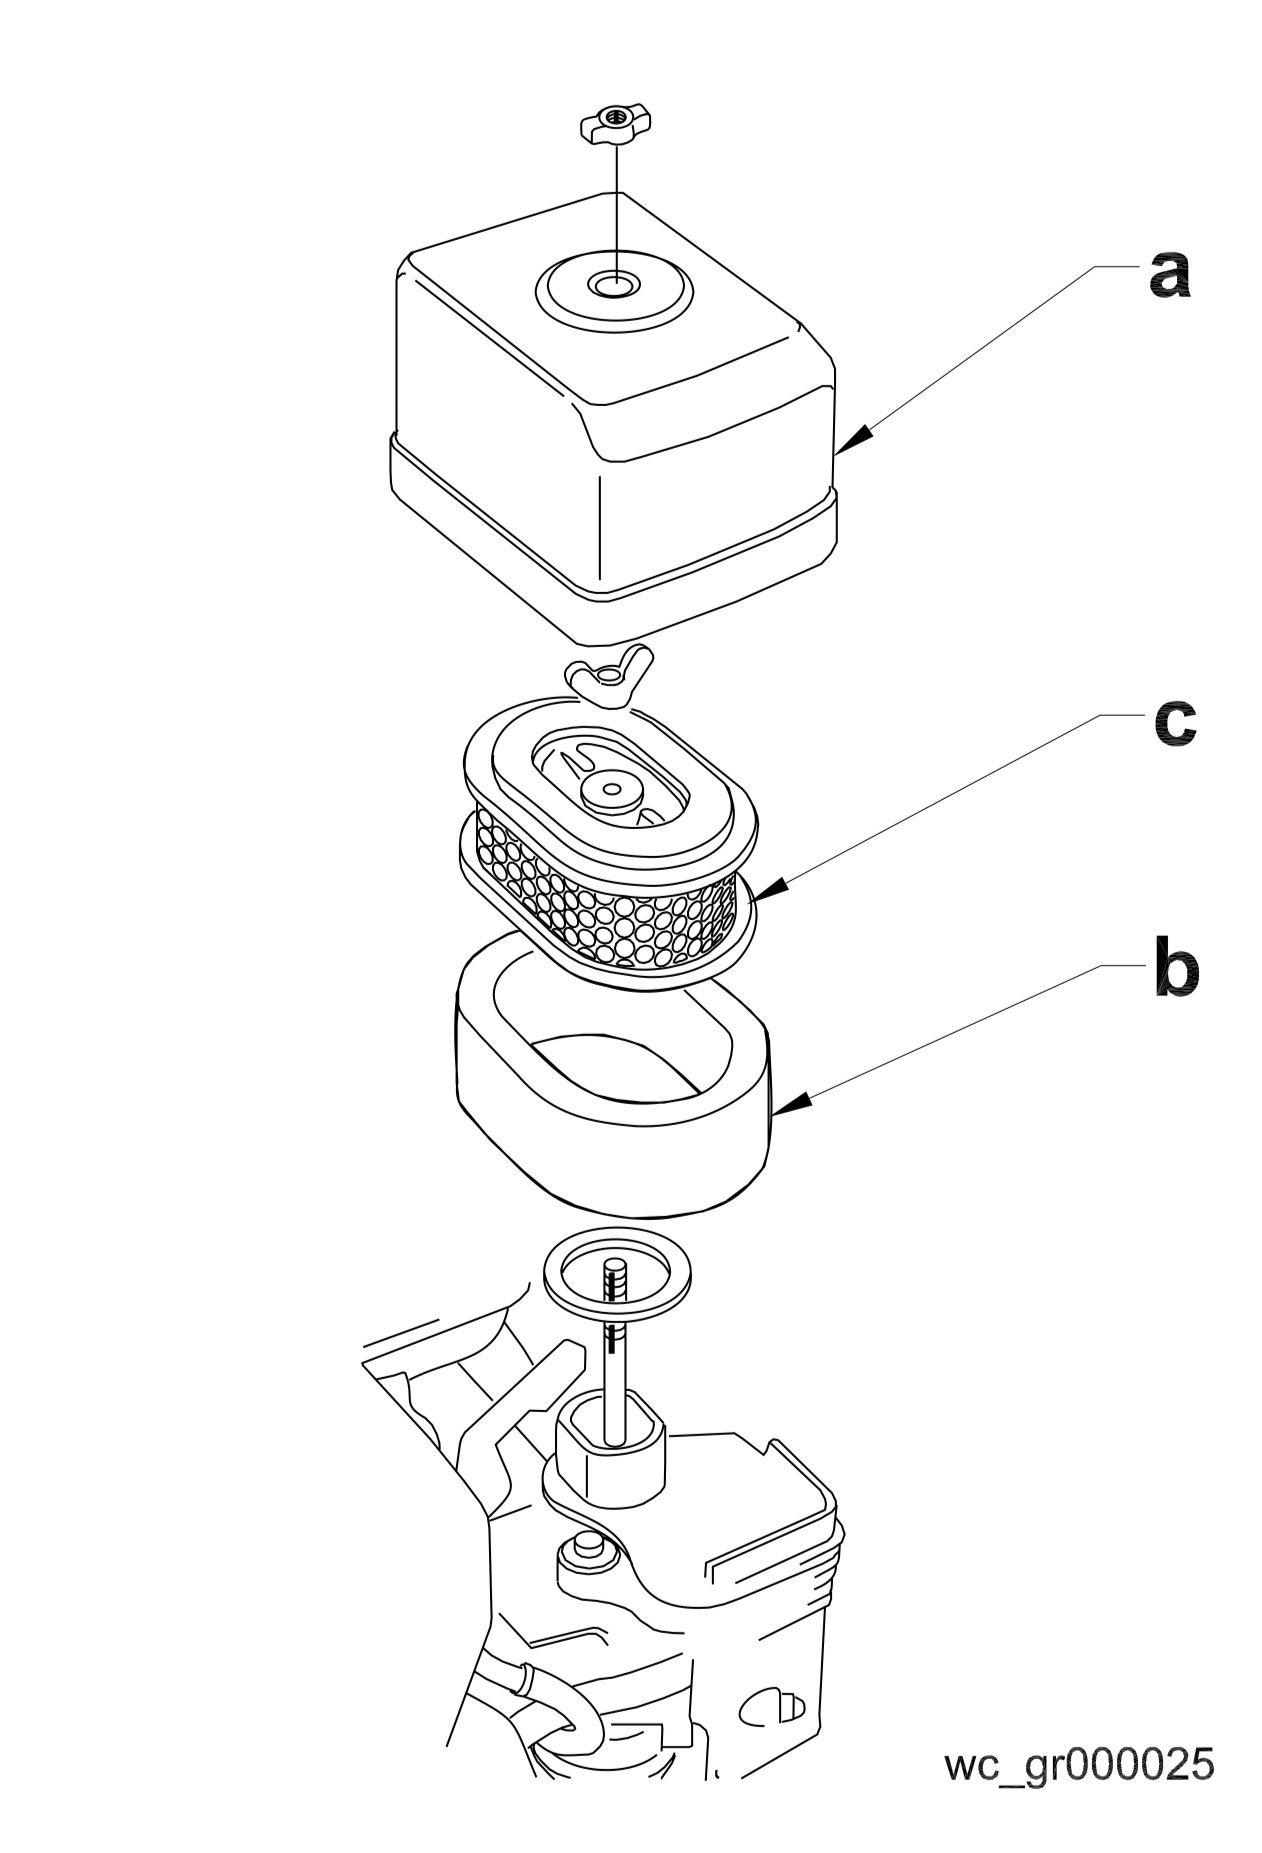
1. Remove air cleaner cover (a). Remove both elements and inspect them for holes or tears. Replace damaged elements.
2. Wash foam element (b) in solution of mild detergent and warm water. Rinse thoroughly in clean water. Allow element to dry thoroughly. Soak element in clean engine oil and squeeze out excess oil.
3. Tap paper element (c) lightly to remove excess dirt. Replace paper element if it appears heavily soiled. -
Check engine oil level
-
Instructions
-
1. Remove the oil filler plug (a)
2. Fill the engine crankcase with the recommended oil up to the level of the plug opening (c). See Technical Data for oil quantity and type.
5. Install the oil filler plug.
Bi-Weekly Maintenance
-
To be completed on the first workday of the month and the first workday on or after the 15th of each month(check maintenance log)
-
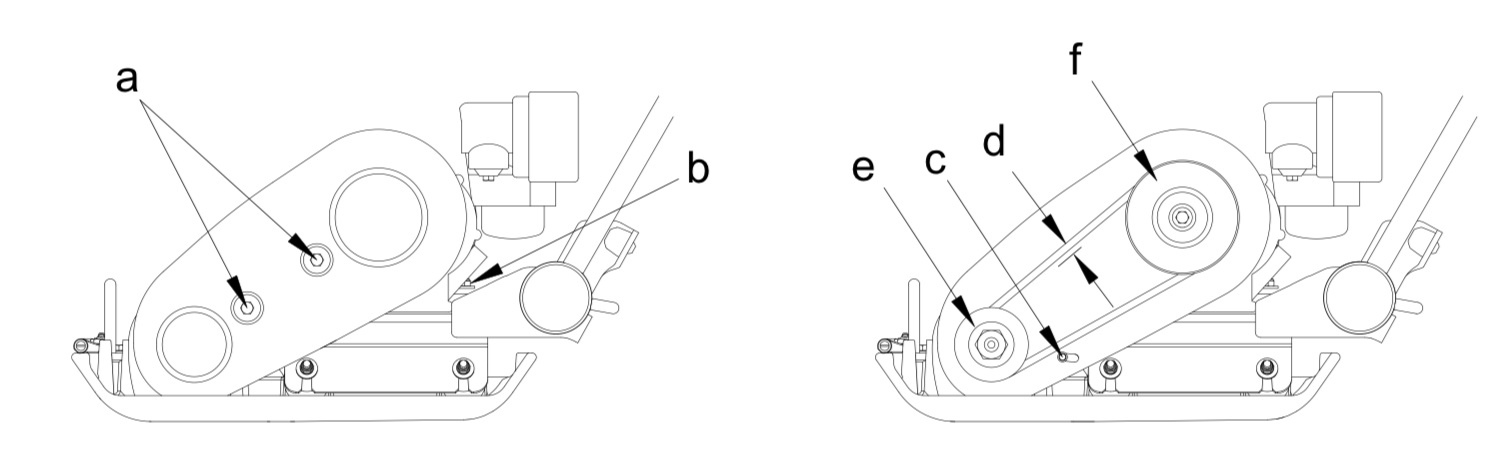
Check and adjust drive belt
-
Instructions
-
1. Loosen the two screws (a) on the beltguard, then remove the beltguard, keeping the screw assemblies captured on the beltguard.
2. Loosen the four nuts (b) which hold the engine to the console, and the screw (c) which holds the beltguard back to the console.
3. Slide the engine backward (towards the handle) to tighten the belt, forward to loosen the belt.
4. Adjust the belt so that it deflects 10-13 mm (3/8in–1/2in) (d) when pressed midway between the belt pulleys.
5. Make sure that the clutch pulley (f) and the exciter pulley (e) are in alignment. Place a straight edge against the exciter pulley (e) and move the engine so that the two pulleys are parallel.
6. Torque all nuts and screws to 20.5 Nm (15 ft.lbs.) as you reassemble the machine. -
Check shock mounts for damage
-
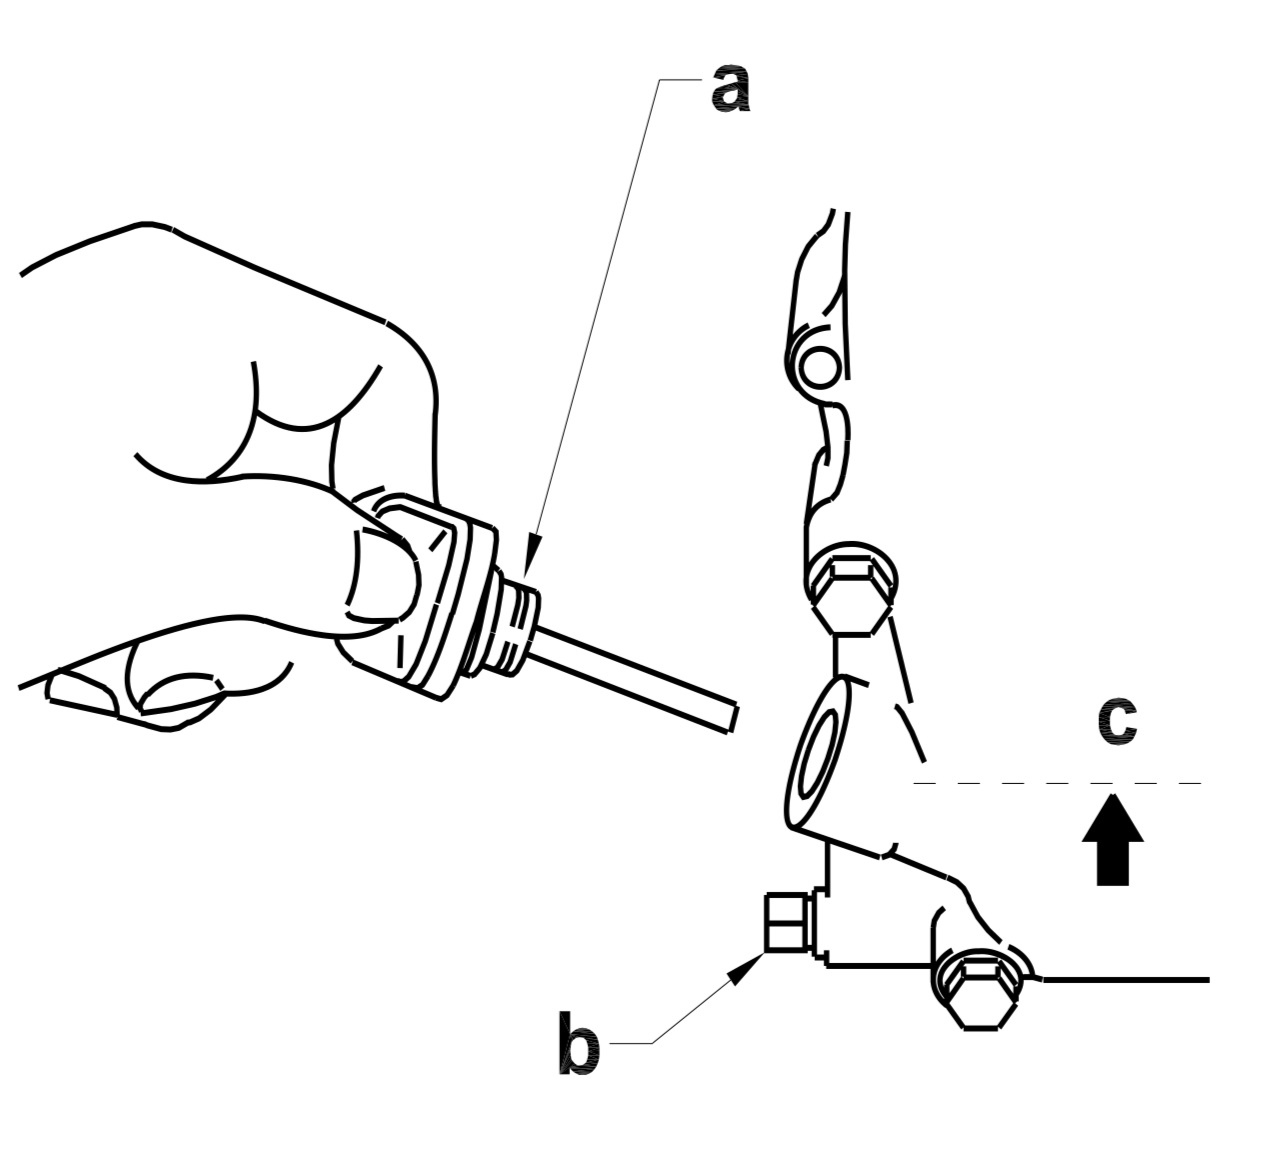
Check exciter oil level
-
Instructions
-
To check oil level, place plate on a flat, level surface. Remove the drain plug (a) with seal ring (b). Oil level should be at drain plug threads. Add oil as required.
Monthly Maintenance
-
To be completed on the first workday of the month (check maintenance log)
-
Change engine oil (SAE 10W30)
-
Instructions
-
1. Drain the oil while the engine is still warm.
2. Remove the oil filler plug (a) and the drain plug (b) to drain the oil.
Note: In the interests of environmental protection, place a plastic sheet and a container under the machine to collect any liquid that drains off. Dispose of this liquid in accordance with environmental protection legislation.
3. Install the drain plug.
4. Fill the engine crankcase with the recommended oil up to the level of the plug opening (c). See Technical Data for oil quantity and type.
5. Install the oil filler plug. -
Check and clean spark plug
-
Instructions
-
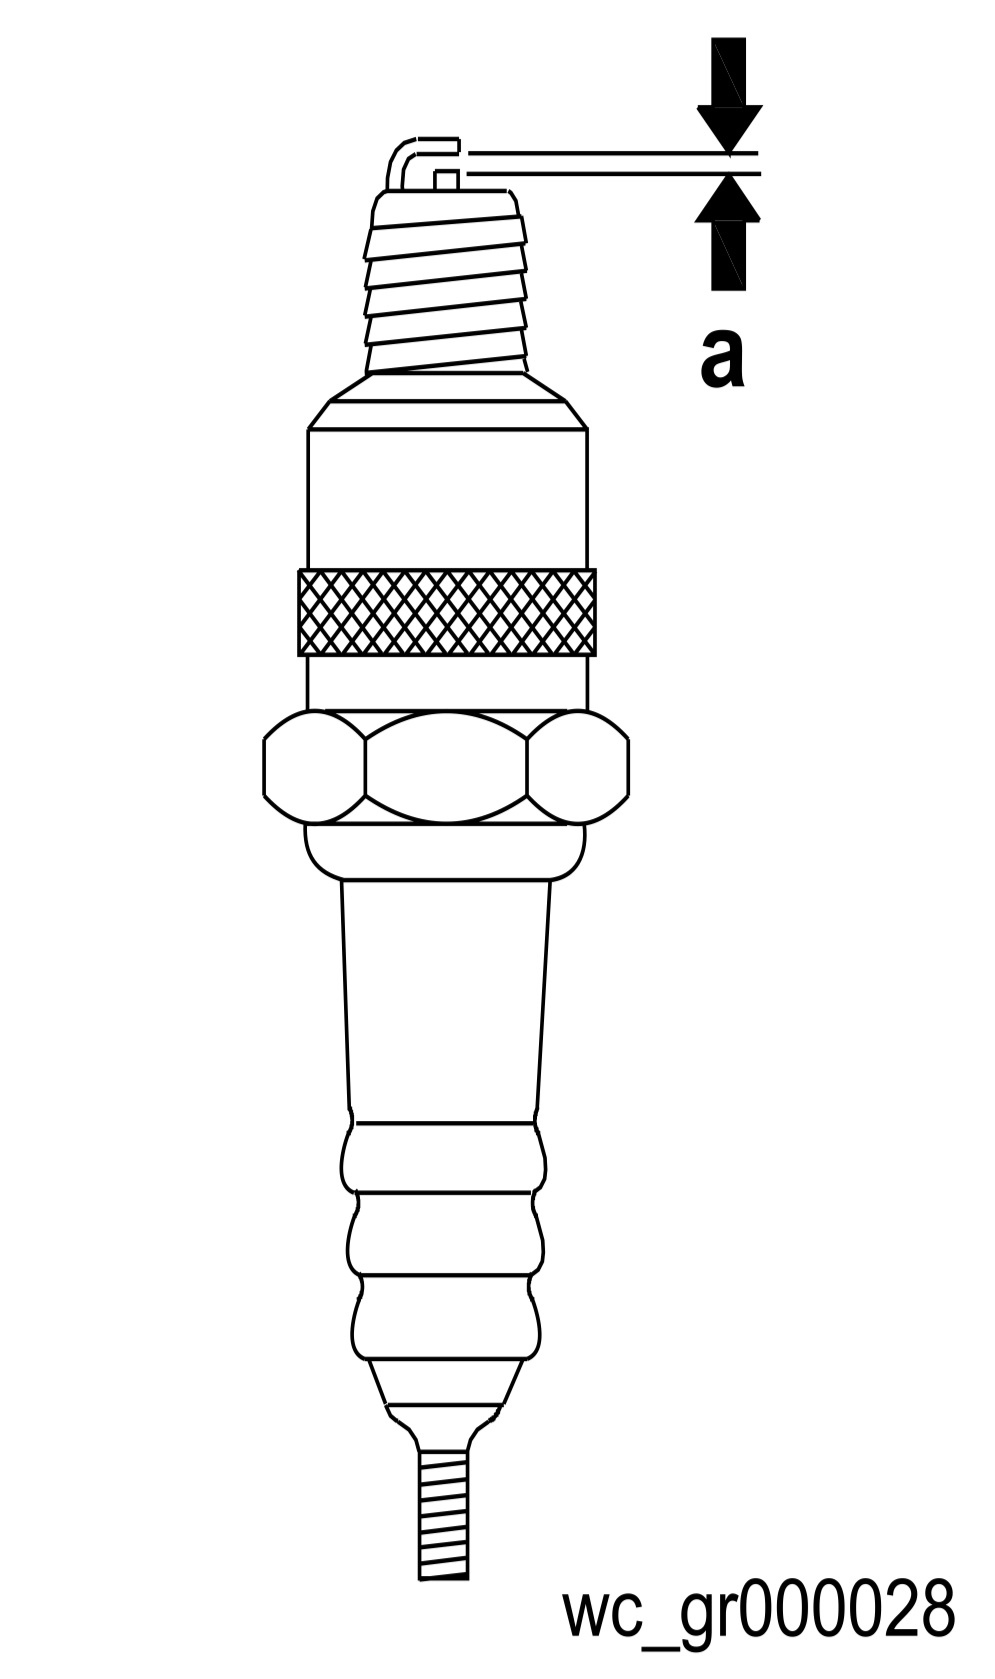
1. Remove the spark plug and inspect it.
2. Replace the spark plug if the insulator is cracked or chipped.
3. Clean the spark plug electrodes with a wire brush.
4. Set the electrode gap (a).
5. Tighten the spark plug securely. -
Clean cooling system
-
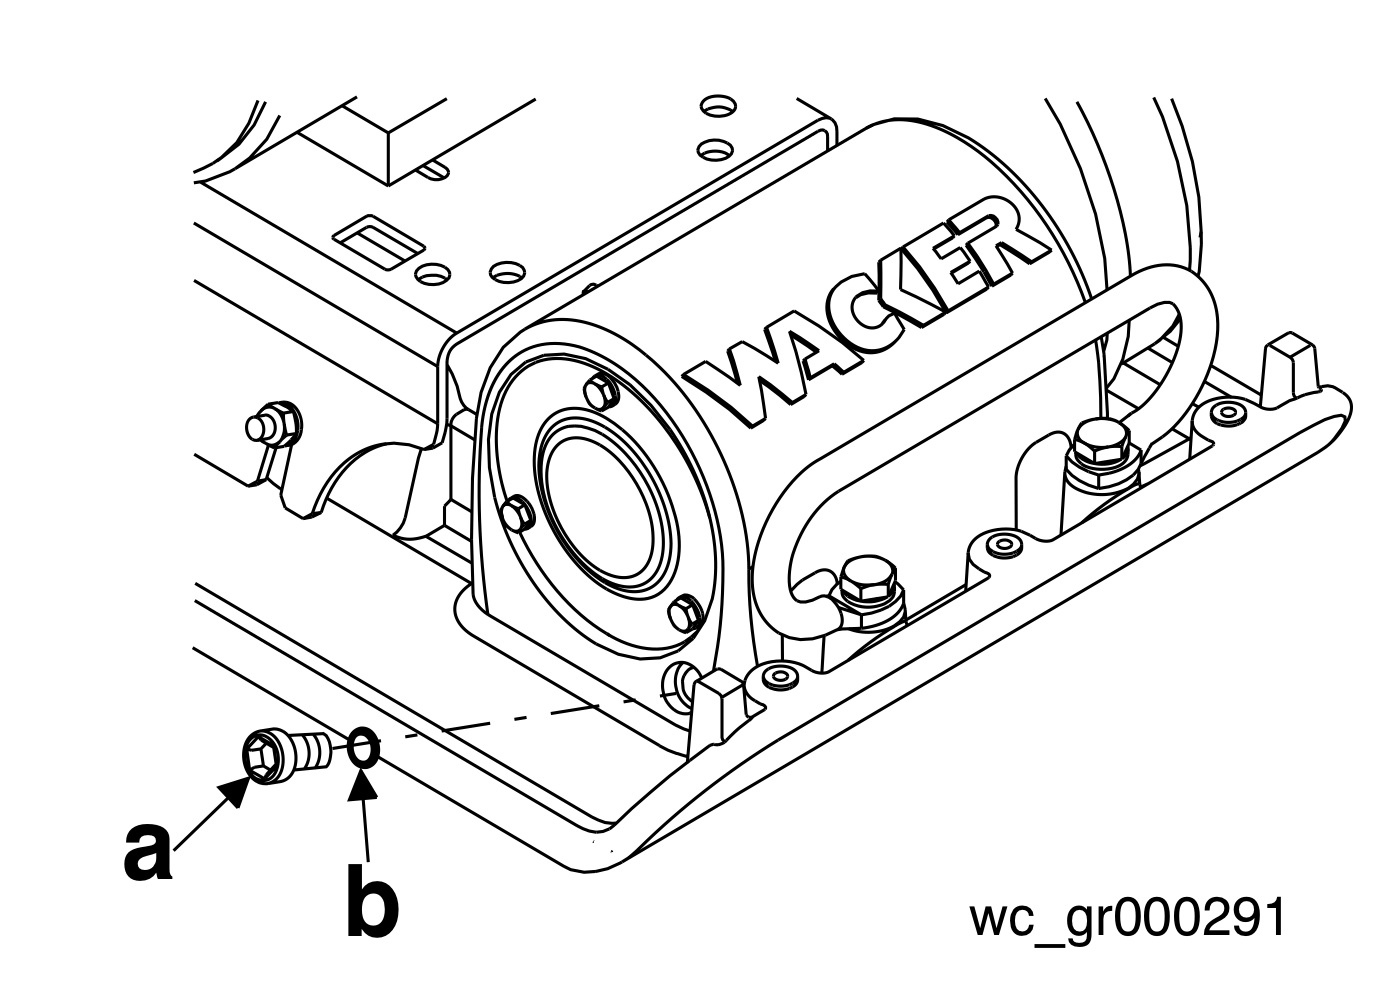
Clean sediment cup
-
Instructions
-
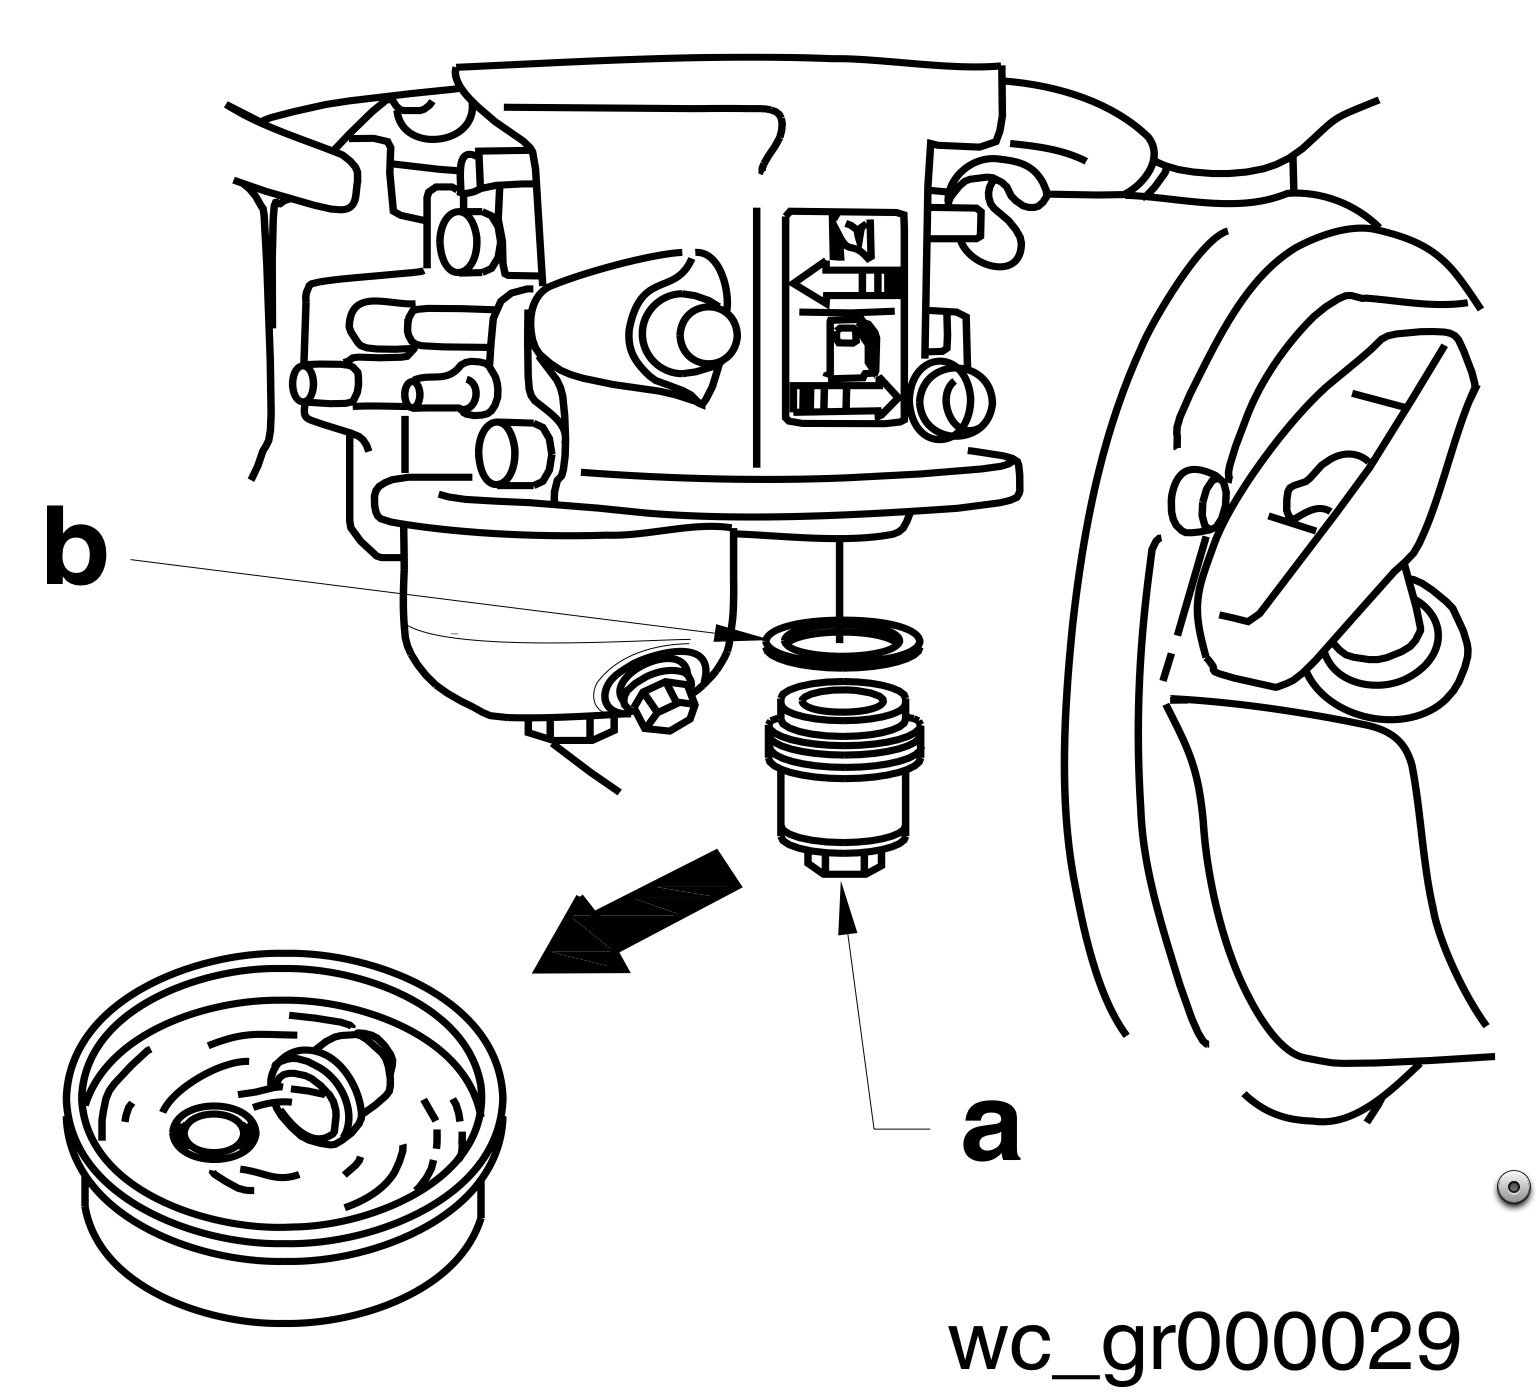
1. Turn the fuel valve off.
2. Remove the sediment cup (a) and the O-ring (b).
3. Wash both thoroughly in a nonflammable solvent. Dry and reinstallthem.
4. Turn the fuel valve on and check for leaks.