Information
-
Pre-Operation Checklist - Cut-Off Saw
-
Equipment Type / ID #
-
Conducted on
-
Prepared by
Complete Machine
-
Visual inspection(condition, leaks)
-
Clean (dust, dirt)
Operating Elements
-
Throttle trigger and throttle trigger interlock must move easily - throttle trigger must return automatically to the idle position when released
-
Instructions
-
-
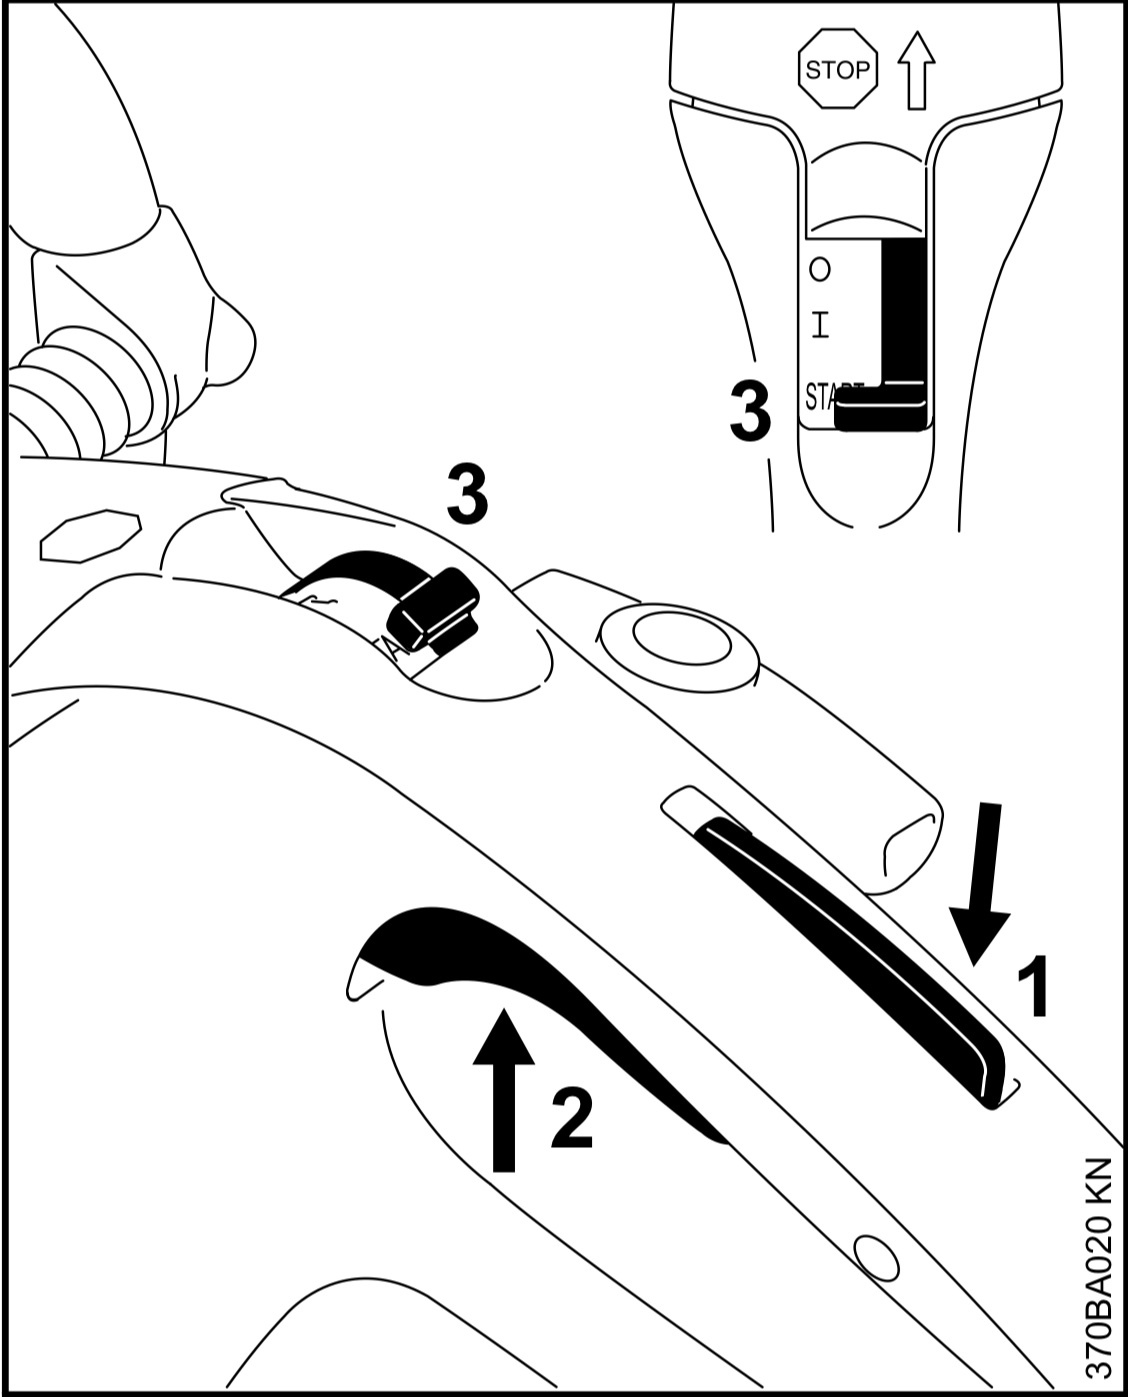
Slide control/master control/stop switch must move easily to STOP or 0
-
Instructions
-
-
Never attempt to modify the controls or safety devices
Inspect components
-
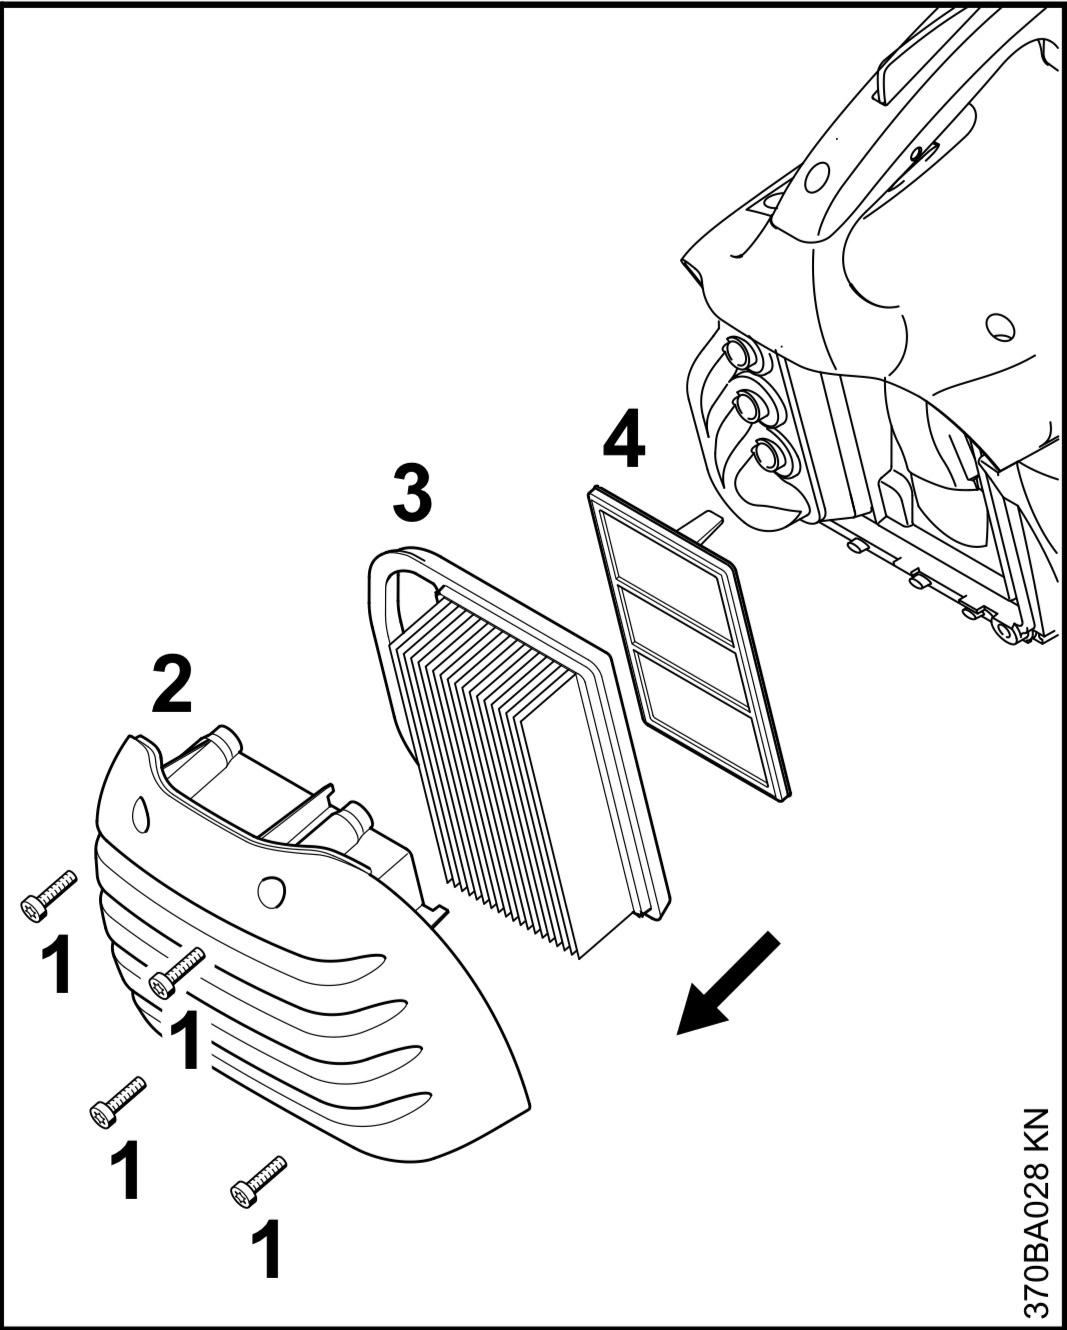
Clean air filter
-
Instructions
-
1. Choke lever to choke.
2. Undo the screws (1).
3. Remove the filter cover (2) and clean it
4. Remove the main filter (3)
5. Remove the auxiliary filter (4) – ensuring that dirt does not enter the intake area
6. Clean the filter area
7. Insert auxiliary filter and main filter
8. Refit the filter cover
9. Tighten down the screws -
Clean cooling air Intake slits
-
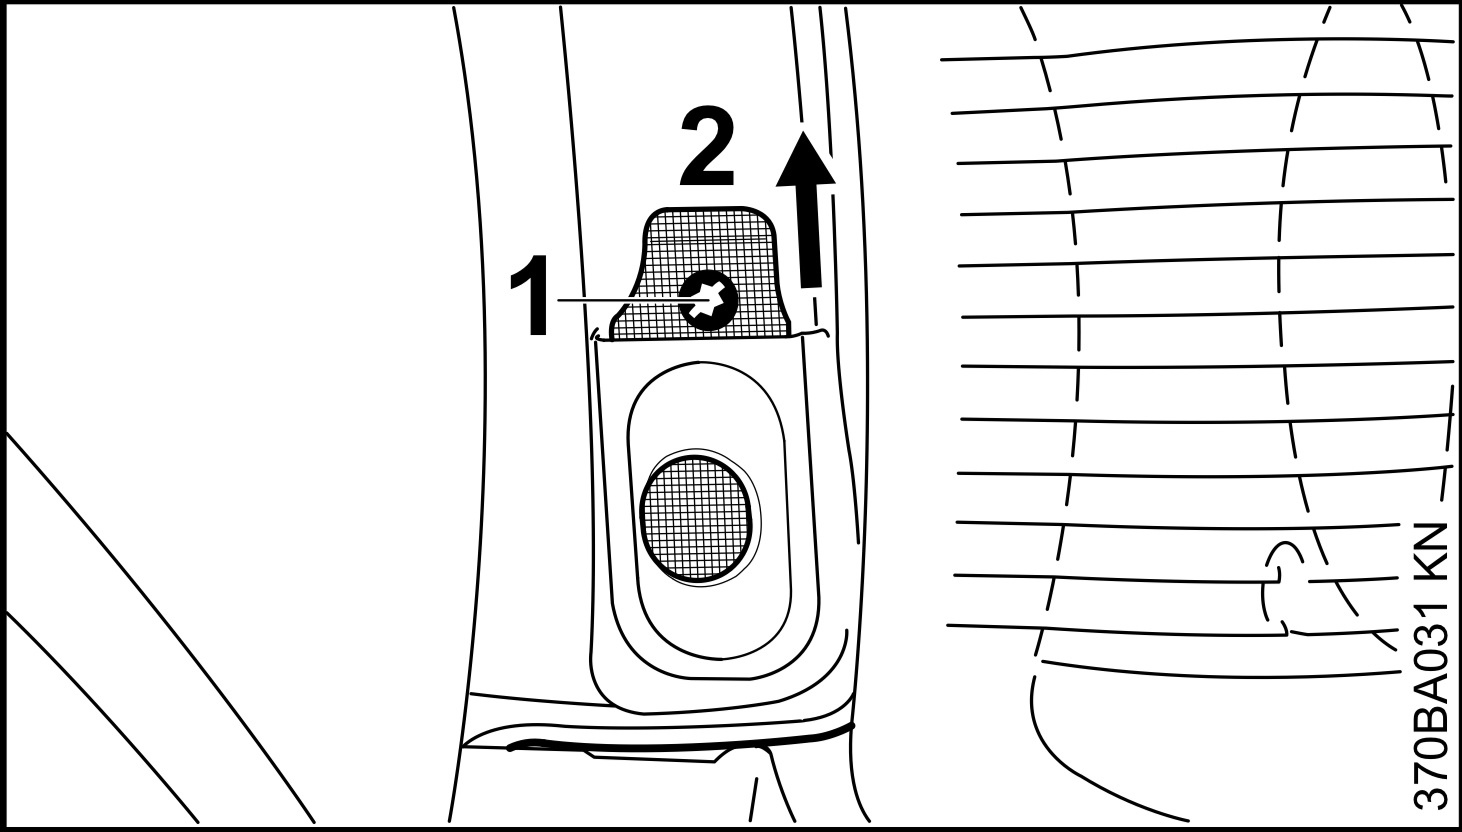
Check spark arresting screen in muffler
-
Instructions
-
1. Remove screw (1)
2. Pull the spark arresting screen (2) upwards out of the muffler
3. Clean the soiled spark arresting screen
4. If the screen is damaged or heavily carbonized, fit a new one
5. Refit the spark arresting screen in reverse order of steps -
Test water attachment
-
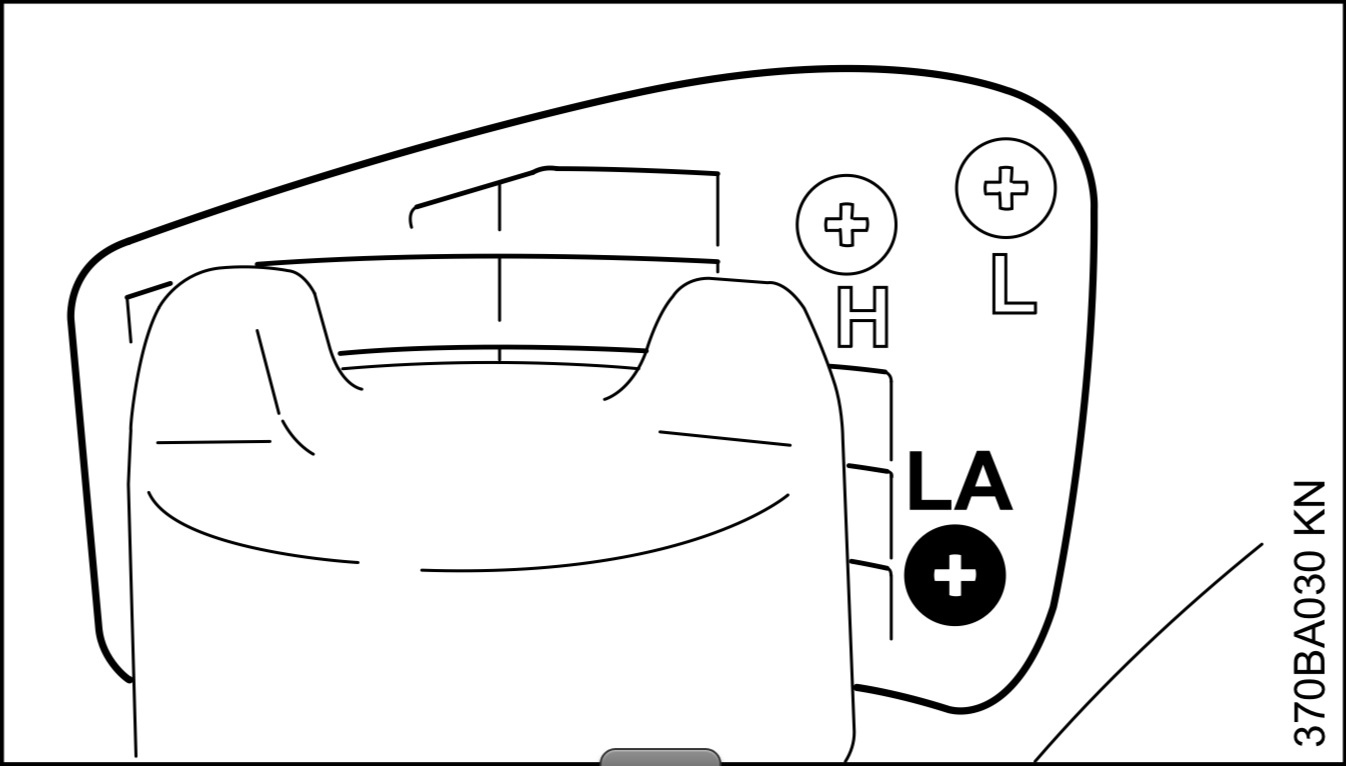
Check carburetor idle adjustment (abrasive wheel must not rotate)
-
Instructions
-
Engine stops when idling
1. Make standard setting!
2. Turn the idle speed adjusting screw (LA) clockwise until the saw chain begins to run – then turn it back 1 turn
Abrasive wheel runs when idling
1. Make standard setting!
2. Turn the idle speed screw (LA) counterclockwise until the chain stops running – then turn another full turn in the same direction. -
Retighten all accessible screws, nuts and bolts (non adjusting screw)
-
Check anti-vibration elements
-
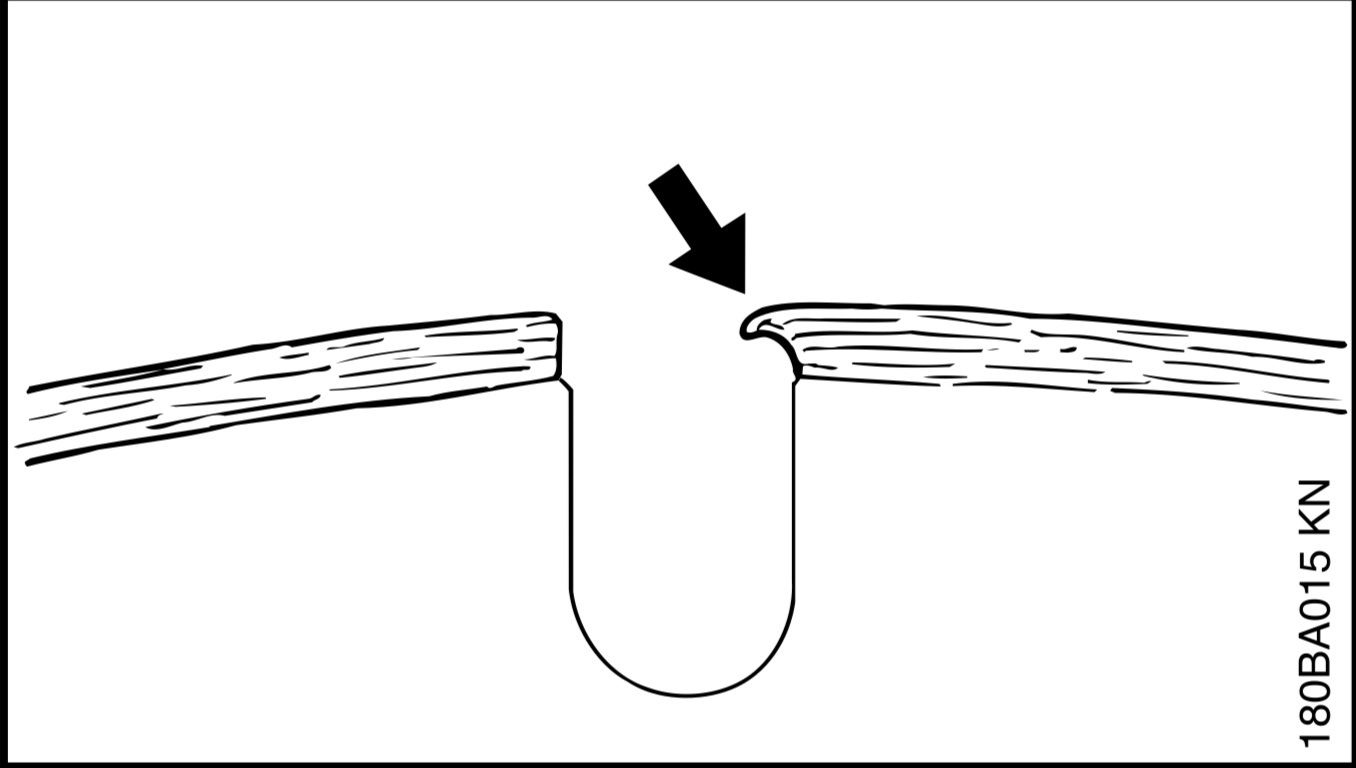
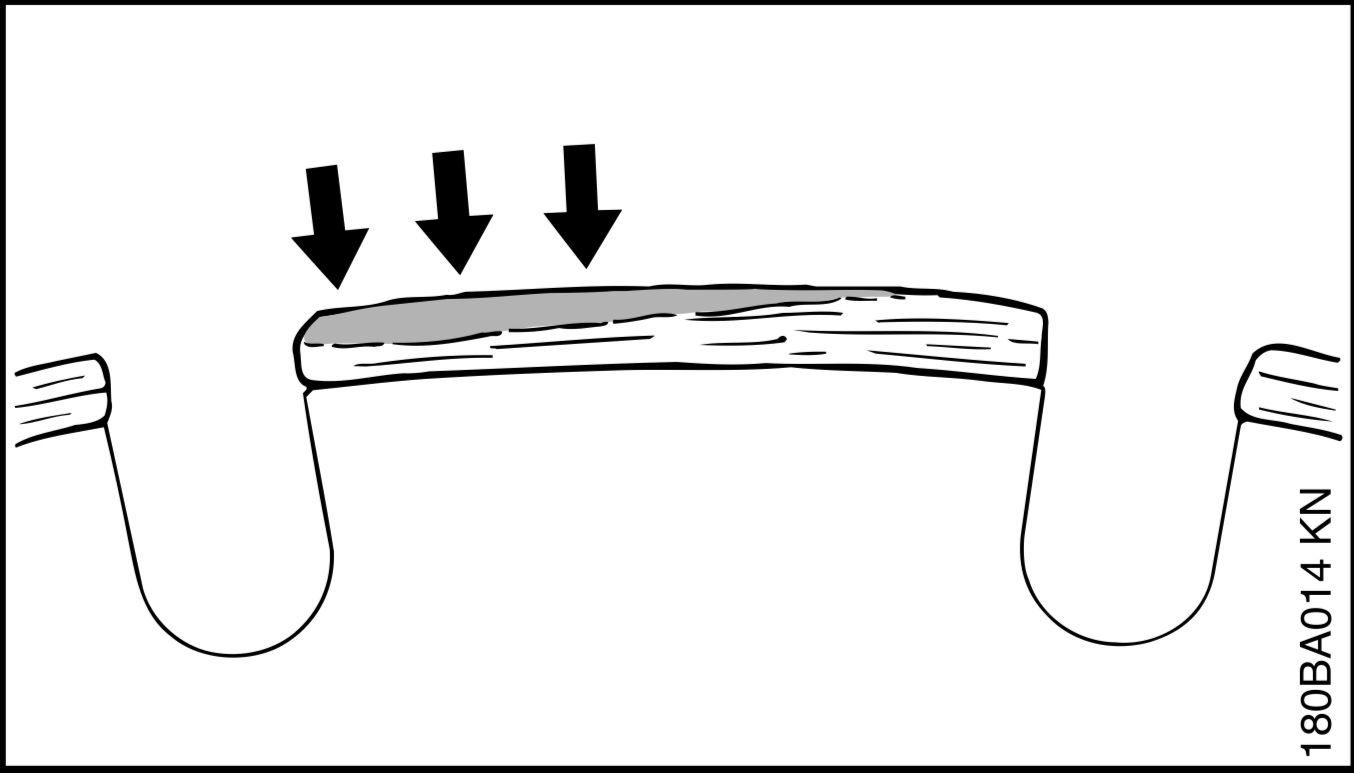
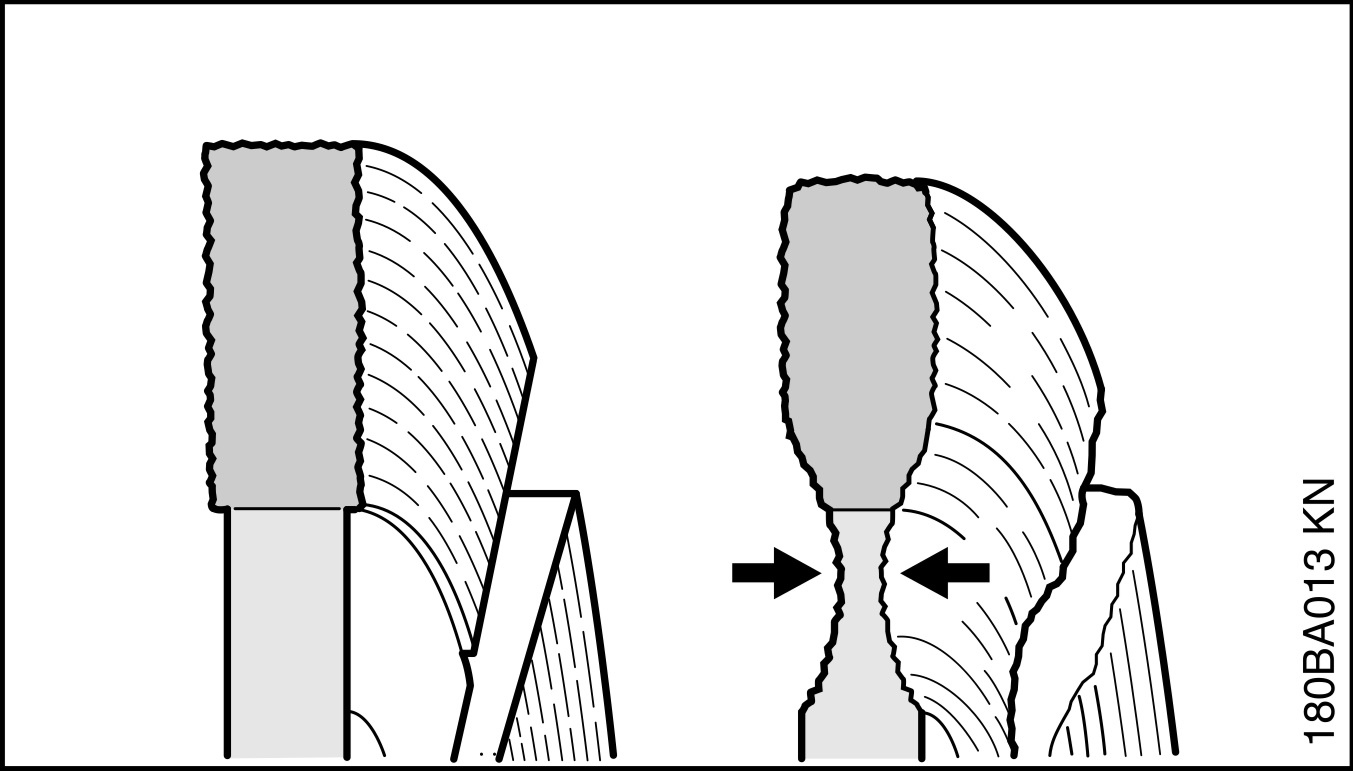
Check abrasive wheel
-
Instructions
-
Burs
-
Built-Up edges
-
Undercut
-
Check supports, rubber buffers (underneath the machine)
-
Instructions
-
Check the rubber buffers underneath the machine - the housing must not rub against the ground - risk of damage!
Monthly Maintenance
-
To complete on the first workday of every month (check maintenance log)
-
Clean fuel tank
-
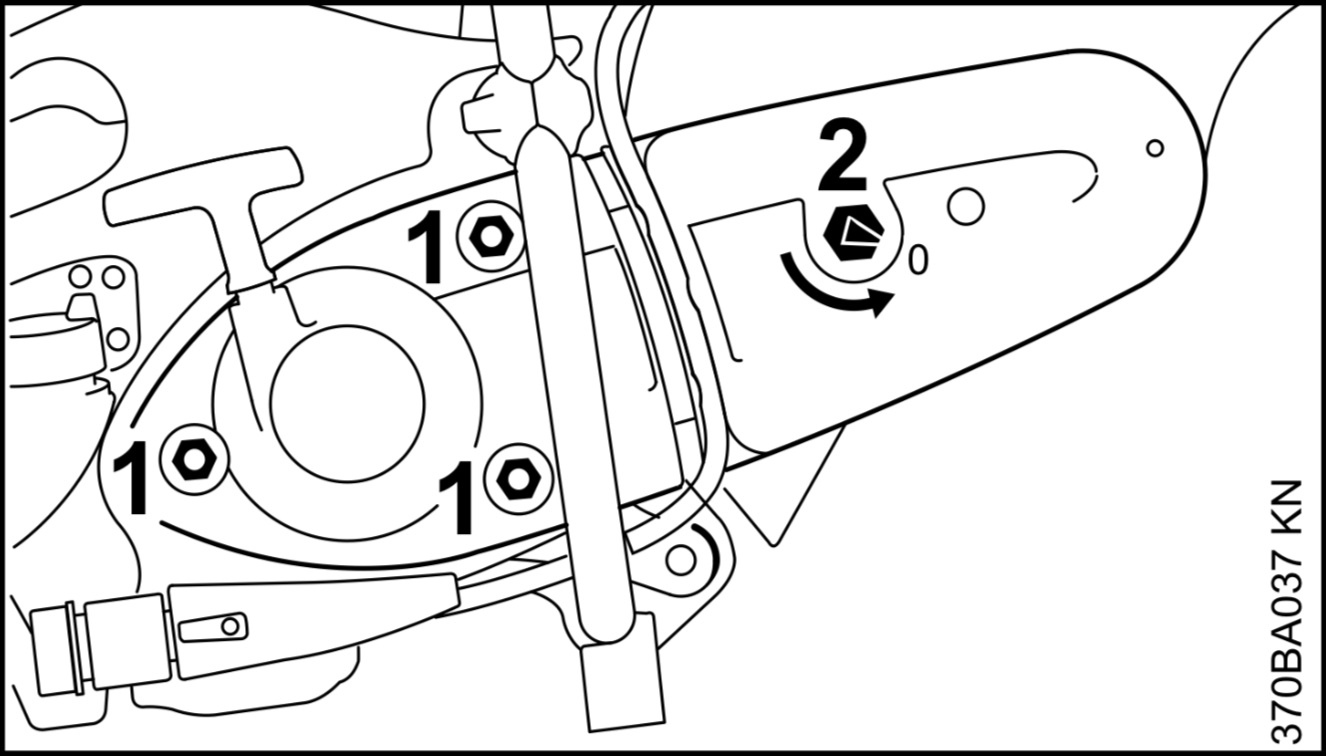
Clean & retention the ribbed V-belt
-
Instructions
-
1. Prior to tensioning of the ribbed v-belt, the nuts (1) must be loosened and the arrow on the tensioning nut (2) must point to 0.
2. Otherwise loosen the nuts (1) and the tensioning nut (2) with the combination wrench counterclockwise – approx. 1/4 turn, as far as possible = 0
3. To tighten the ribbed v-belt, fit the combination wrench over the tensioning nut as illustrated
! The tensioning nut is spring-loaded – hold the combination wrench securely.
4. Turn the tensioning nut clockwise approx. 1/8 turn – the tensioning nut will be engaged by the spring
5. Continue turning approx. 1/8 turn – up to the stop
6. Remove the combination wrench from the tensioning nut
7. Tighten up the nuts (1)