


Information
-
Pre-Operation Checklist - Cut-Off Saw
-
Equipment Type / ID #
-
Conducted on
-
Prepared by
Complete Machine
-
Clean (after work is finished)<br>1. rinse with clean water<br>2. Place the machine with the rear handle upwards. Rinse the air intakes at the rear handle with clean water. The water will run out through the front air outlets. <br>3. Connect plug and run dry for 30 seconds in order to speed up the drying of the engine. <br>* do not use high pressure washer when rinsing the inside of the machine.
-
Check all screws and nuts (present and tightened)
-
Check electrical feed (do not use if cord is damaged in any way)
-
Test GFCI
-
Clean cooling air Intake
-
Check the blade guard (condition)
-
Check abrasive wheel
-
Instructions
-
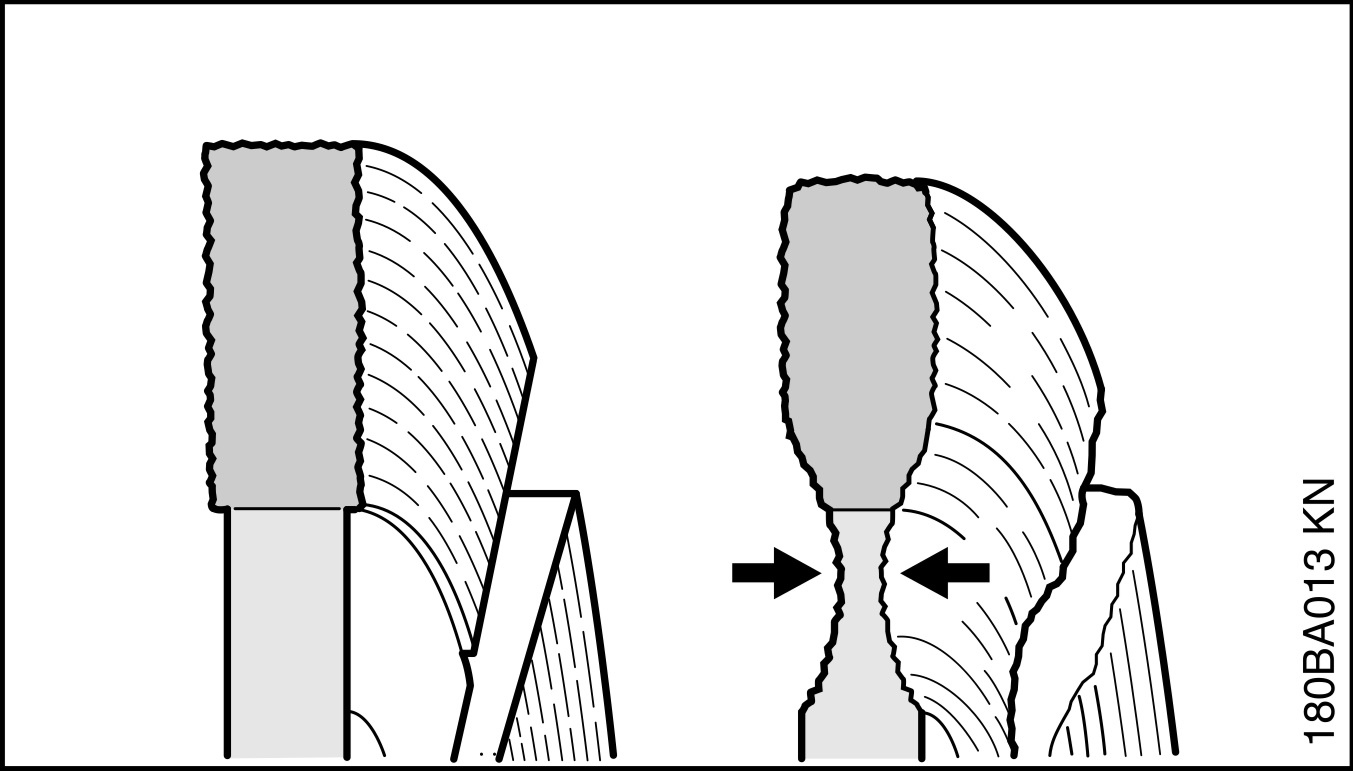
Burs
-
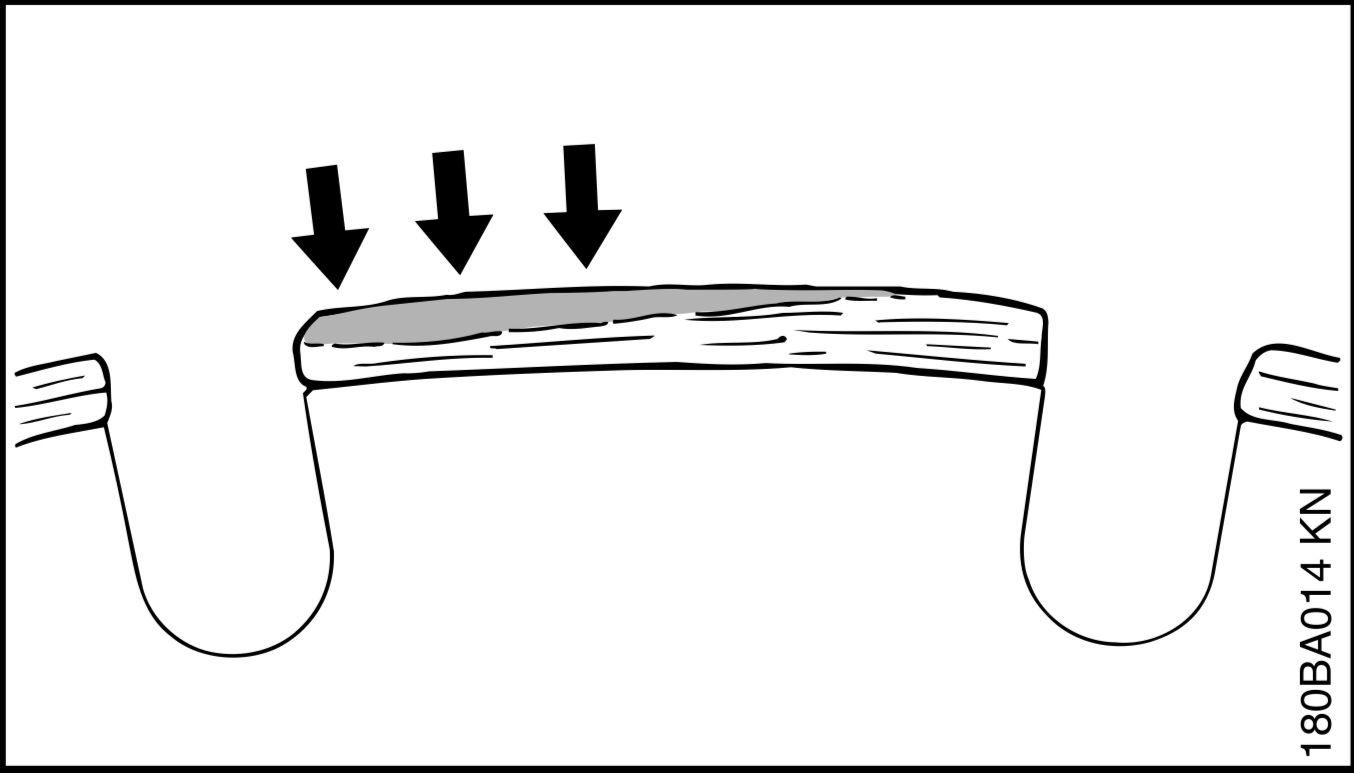
Built-Up edges
-
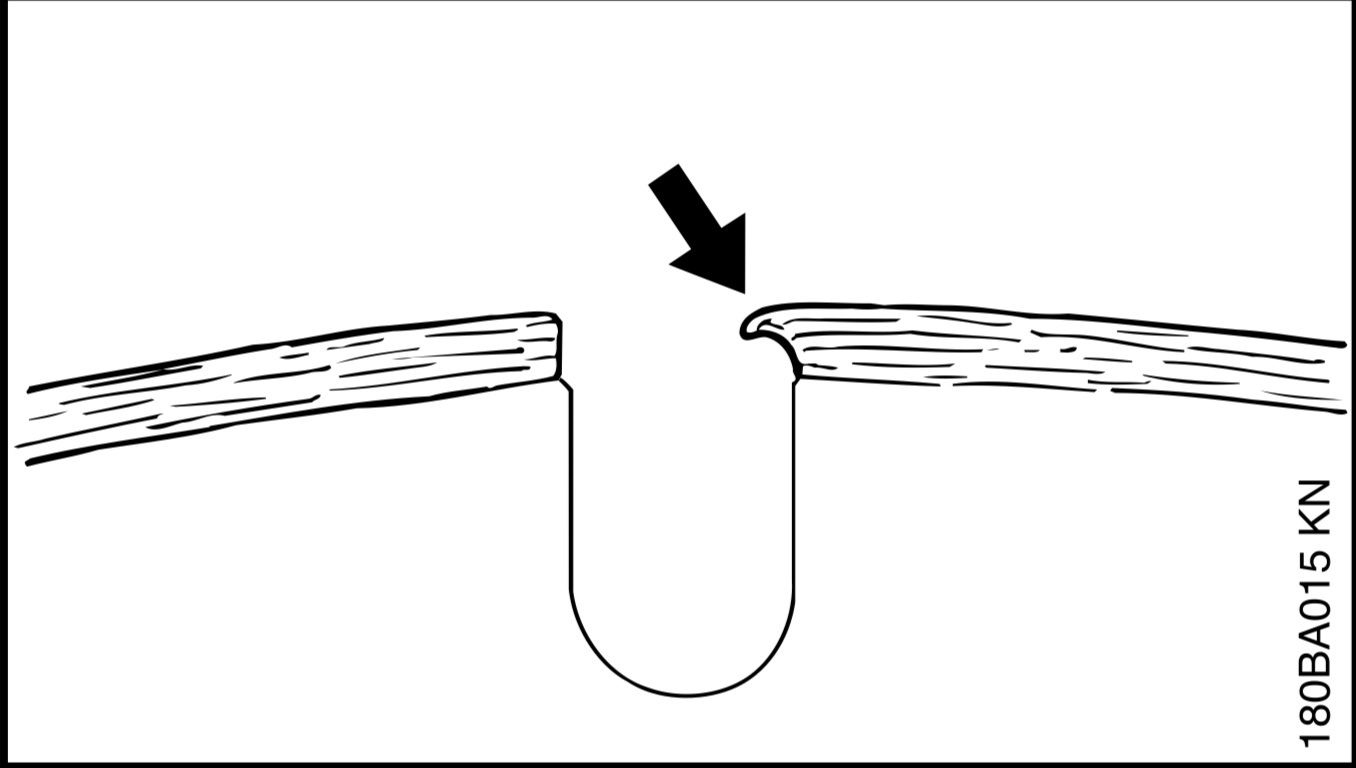
Undercut
-
Test water attachment
-
Check that unit power switch works smoothly (safety switch must be in place, and switch must not stick)
-
Never attempt to modify the controls or safety devices
Weekly Maintenance
-
To complete on the first workday of each week (check maintenance log)
-
Checking the drive shaft and flange washers
-
Check that the threads on the drive shaft are undamaged. Check that the contact surfaces on the blade and the flange washers are undamaged, of the correct dimension, clean, and that they run properly on the drive axle.
*Do not use warped, notched, indented or dirty flange washers. Do not use different dimensions of flange washers. -
Check water connection with flow limiter
-
Check and clean the filter in the connection regularly and change it when needed.
1. Unscrew the connector
2. Press out the filter (A) using a screwdriver or the like
3. Clean or change the filter
4. When refitting - make sure that the flow limiter (B) is correctly adjusted, with the concave face turned towards the clutch connection.
Monthly Maintenance
-
To complete on the first workday of every month (check maintenance log)
-
Check the carbon brushes
-
1. Remove both inspection covers by loosening both screws.
2. Unscrew the cable holding the carbon brush. Lift up the spring and then lift out the carbon brush from the brush retainer.
3. Clean the brush retainers with dry brush.
4. Carefully blow away the dust.
5. Fit the new carbon brushes and, at the same time, check that they slide easily in the brush retainers.
6. Fold down the springs and tighten the cable.
7. New carbon brushes must be run in for approximately 40 minutes while idling.
Quarterly Maintenance
-
To complete on the first workday of every quarter (march, june, september, check maintenance log)
-
Change Bevel Gear Grease
-
The gear housing must nor be filled completely with grease. The grease expands as the machine heats up during operation. If the gear housing was completely filled with grease it could damage the seals and lead to leakage of grease.
CHANGING THE GREASE
1. Remove the flange washers holding the cutting blade.
2. Remove the sealing ring
3. Remove the support flange for the guard
4. Remove the blade guard
5. Remove the four screws holding the shield. Lift the shield together with the drive wheel unit out of the gear housing.
6. Wipe out the grease, and fill with new, good quality gear grease. The gear housing should contain 90g of grease in total.