


Title Page
-
Site conducted
-
Conducted on
-
Prepared by
-
Location
Have you linked existing Asset
General Inspection Guidelines
-
• In addition to routine checks for each use, PPE should regularly undergo a detailed inspection by a competent person. Petzl recommends an inspection every 12 months and after any exceptional event in the life of the product.
• PPE inspection should be conducted with the manufacturer’s Instructions for Use: download the instructions at PETZL.COM.
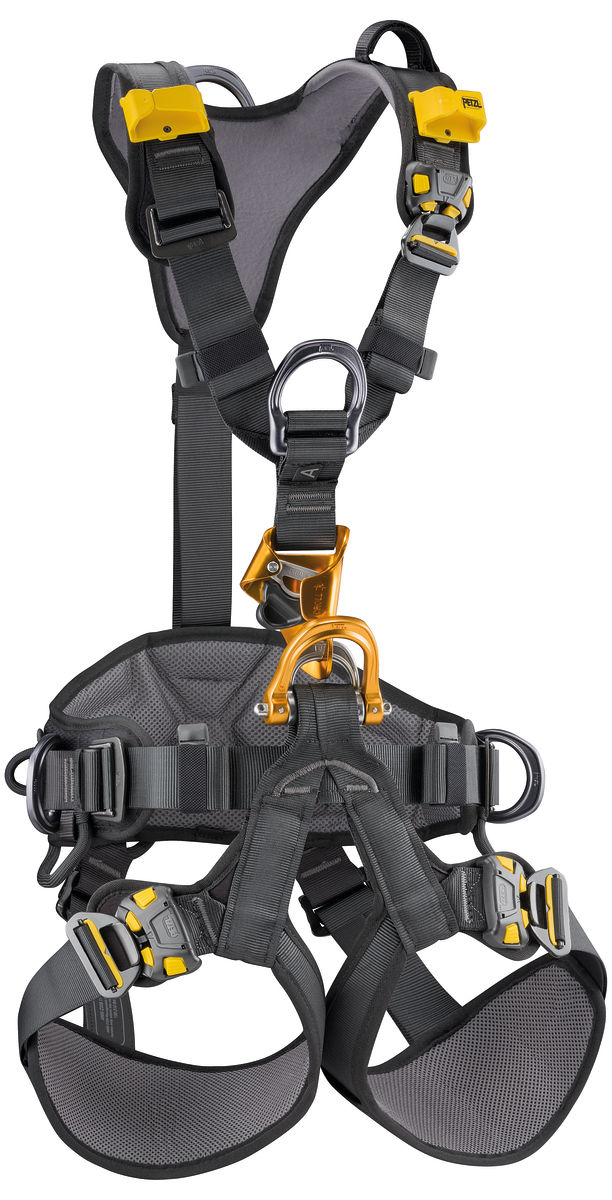
Harness Inspection
Known product history
-
Is there known history of usage conditions or exceptional event/s during use (e.g., fall or fall arrest, use or storage at extreme temperatures, contamination or modification outside manufacturer's facilities..etc)
-
Refer to the attached Harness Inspection Procedure and examples before commencing physical inspection. Refer back to this document to assist with rulings regarding particular elements/components of the harness.
1. Preliminary observations
-
Possible answer types:
Good condition (GC) = Harness is fit for continued use.
To monitor (TM) = Scheduled inspection frequency/interval must be increased/shortened.
To repair (TR) = Harness to be submitted to an approved repair agent to assessment for repairability.
Do not use/retire (R) = Harness is not fit for use it must be removed from service, destroyed & disposed of responsibly.
Not applicable (NA) = Specific question is not relevant. -
Verify the presence and legibility of the serial number
-
Verify that the product lifetime has not been exceeded (10 years from date of manufacture)
-
Compare with a new product to verify there are no modifications or missing parts.
-
Refer to picture, ONLY if a physical harness is not immediately available. (Always preference checking against a physical example of a new, matching harness).
2. Physical inspection Guidelines
-
Refer to examples of worn or damaged webbing that should be retired, monitored or repaired. (Repairs can ONLY be carried out by an manuafcturer approved repair agent).
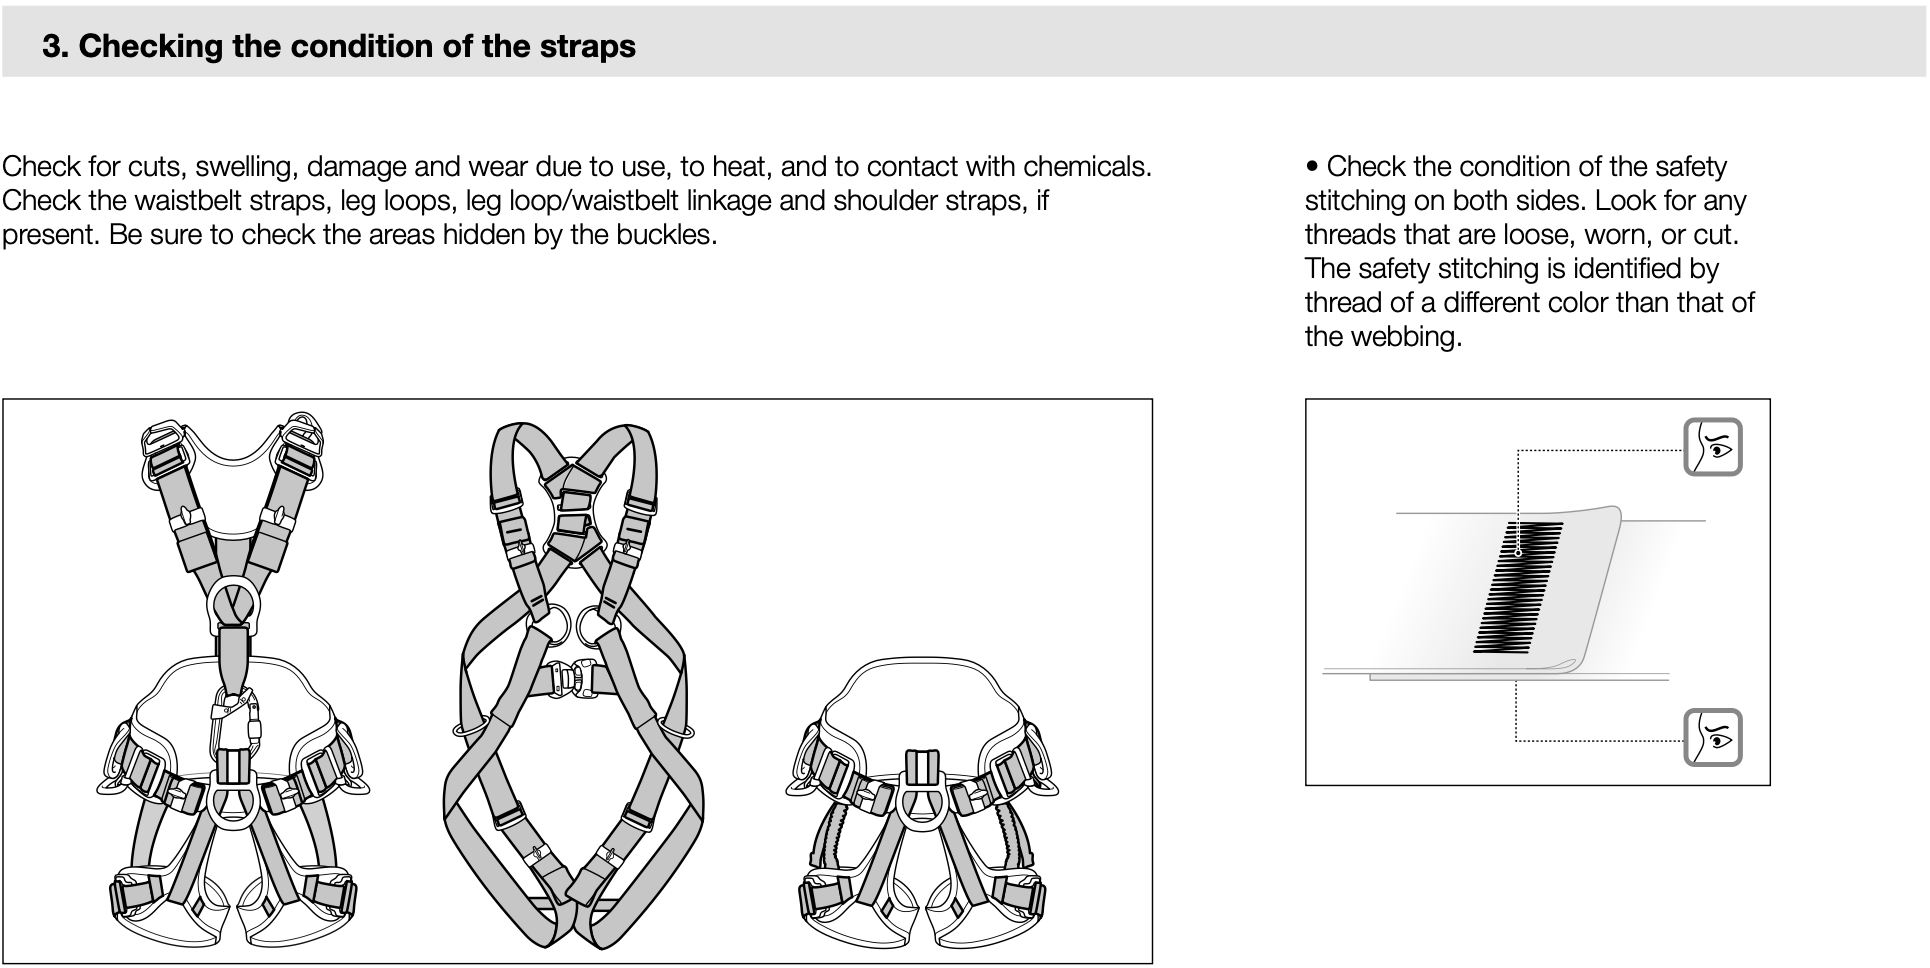
3. Checking the condition of the straps (webbing)
-
-
Check for cuts, swelling, damage and wear due to use, to heat, and to contact with chemicals. Check the waistbelt straps, leg loops, leg loop/waistbelt linkage and shoulder straps, if present. Be sure to check the areas hidden by the buckles.
-
Check the condition of the safety stitching on both sides. Look for any threads that are loose, worn, or cut. The safety stitching is identified by thread of a different colour than that of the webbing.
-
Verify that hems are present on the strap ends.
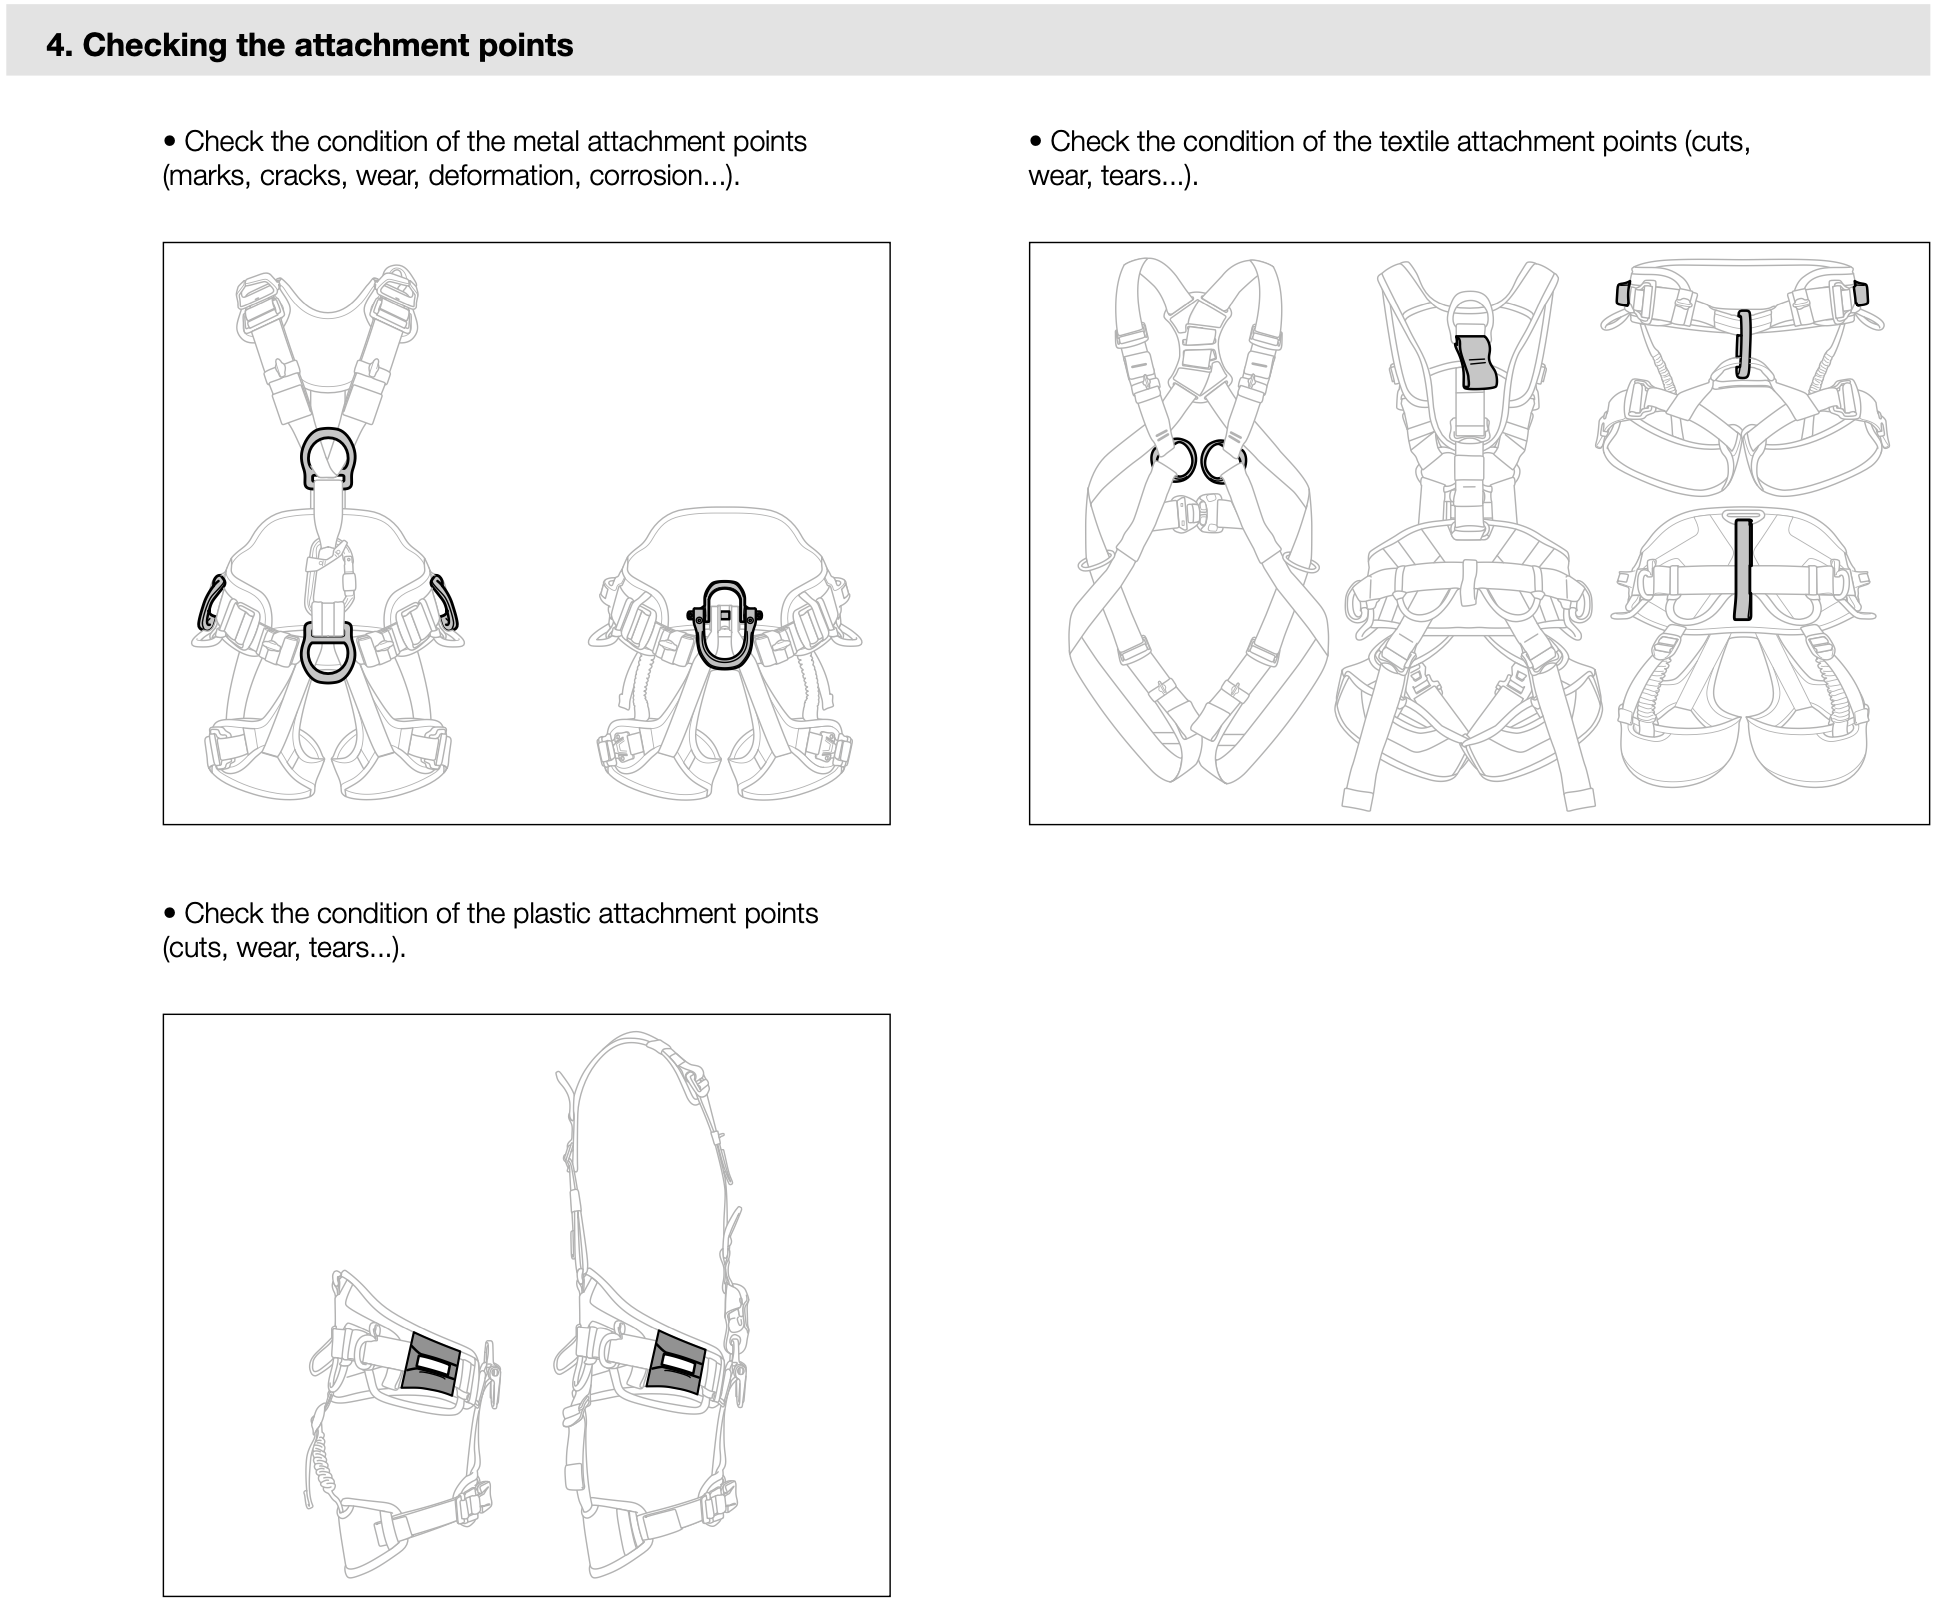
4. Checking attachment points
-
-
Check the condition of the metal attachment points (marks, cracks, wear, deformation, corrosion...).
-
Check the condition of the textile attachment points (cuts, wear, tears...).
-
Check the condition of the plastic attachment points (cuts, wear, tears...).
-
On the International Version: Astro Bod Fast series harnesses, check the fall arrest indicator. The indicator shows red if the dorsal attachment point sustains a shock load greater than 400 daN.
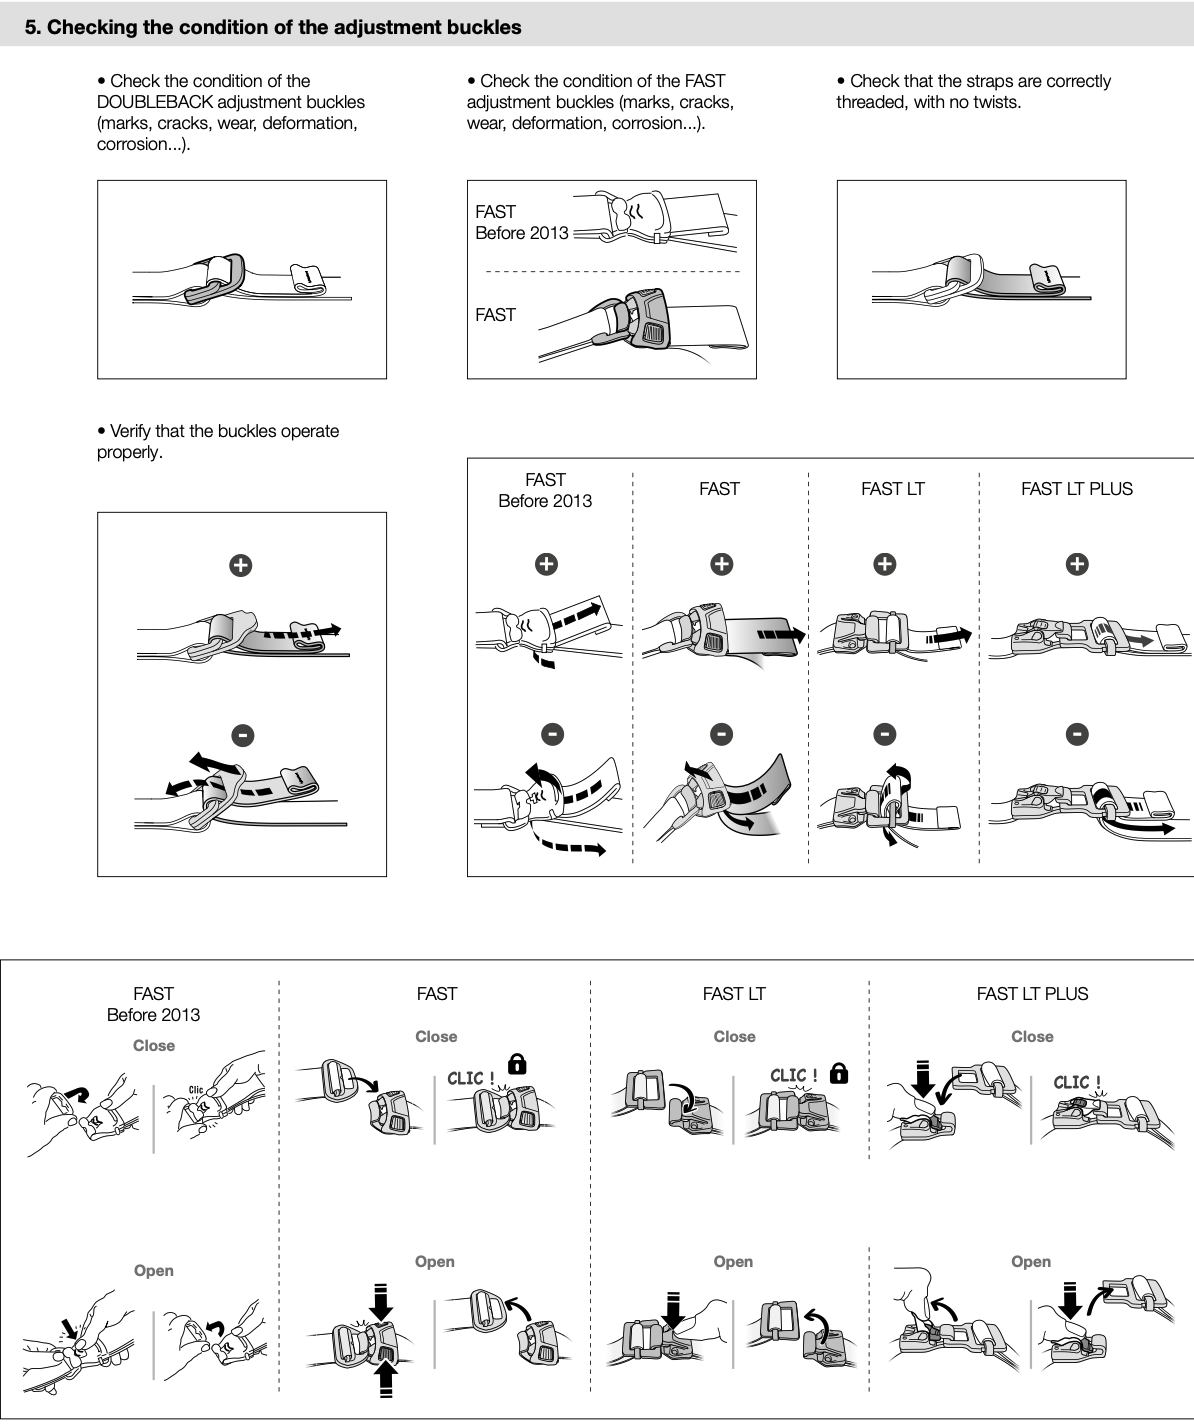
5. Checking the condition of the adjustment buckles
-
-
Check the condition of the DOUBLEBACK adjustment buckles (marks, cracks, wear, deformation, corrosion...).
-
Check the condition of the FAST adjustment buckles (marks, cracks, wear, deformation, corrosion...).
-
Check that the straps are correctly threaded, with no twists.
-
Verify that the buckles operate properly.
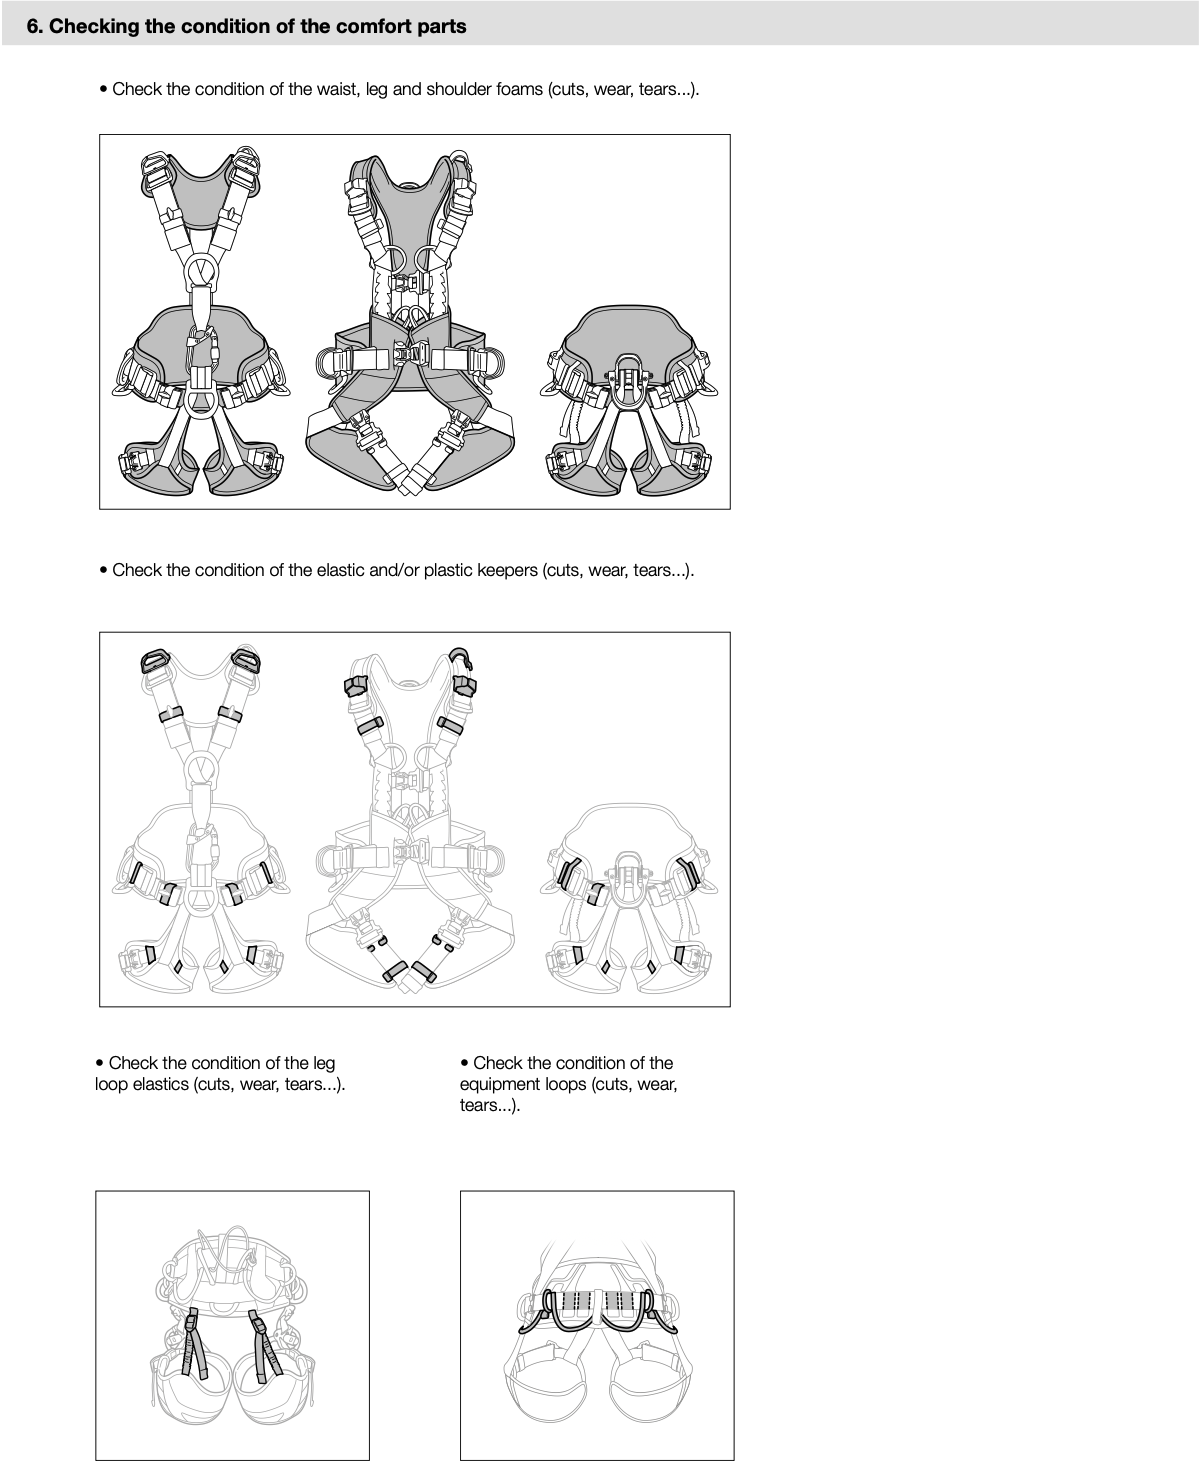
6. Checking the condition of the comfort parts
-
-
Check the condition of the waist, leg and shoulder foams (cuts, wear, tears...)..
-
Check the condition of the elastic and/or plastic keepers (cuts, wear, tears...).
-
Check the condition of the leg loop elastics (cuts, wear, tears...).
-
Check the condition of the equipment loops (cuts, wear, tears...).
7. Checking the condition of the chest/seat harness connector
-
-
For connector inspection, see the inspection form for your connector model at Petzl.com.
-
Gated attachment point: verify that the screws on the gated attachment point are present and properly tightened.
-
If the harness features a chest/seat harness connector, make sure that it is present.
-
Verify that the connector is the correct model and that it is correctly attached to the harness.

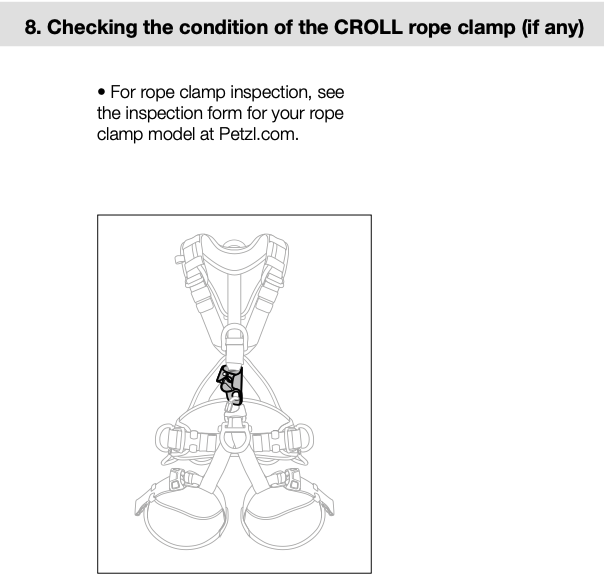
8. Checking the condition of the CROLL rope clamp
-
-
Verify the presence and legibility of the serial number and the CE mark.
-
Verify that the product lifetime has not been exceeded.
-
Compare with a new device to verify there are no modifications or missing elements.
Checking the condition of the frame
-
Check the condition of the frame (marks, wear, cracks, deformation, corrosion...).
-
Check the condition of the attachment holes (marks, deformation, cracks, corrosion...).
-
Check for wear caused by rope running through the device.
-
For CROLL's manufactured after February 2017, check that the wear indicator is not visible.
Checking the cam of the
-
Check the condition of the cam (marks, deformation, cracks, corrosion). Check that all teeth are present and check their state of wear. The teeth must not be fouled. If necessary, clean them with a brush.
-
Check the condition of the cam axle and rivet (marks, deformation, cracks, corrosion...).
-
Check the cam's rotation and the effectiveness of the return spring.
Checking the safety catch
-
Check the condition of the safety catch and its axle (marks, deformation, cracks, corrosion...).
-
Check the effectiveness of the safety catch return spring.
-
Verify that the safety catch is able to hold the cam open.
Function test
-
Verify that the rope clamp slides along the rope in one direction and locks in the other direction.
")
