Information
Flight Register
-
Select Your UAV
-
Flight Objective
-
Pilot
-
Flight Date and Time
-
Client
Flight Condition
-
Location
-
Weather Conditions
System Setting
Flight System
-
Flight Controler
-
Propellers
-
GPS
-
Radio System
-
FC Downlink
-
Video Downlink
Camera
-
Camera
-
Type and Model
-
Camera Mount
Flight Safety
Flight Safety Assessment
-
Necessary maps and charts (either hard copy or electronic) for the area?
-
Type of Map Reviewed
-
The weather is suitable for the machine and the operation
-
NOTAMs
-
Public moving into the area of operation or landing area during flight?
-
Footpath, or other rights of way?
-
Suitable take-off and landing areas (including alternate landing area)
-
Ability to maintain 30m separation from the public
-
Obstructions (Buildings Trees etc.)
-
Possible radio interference (power lines, antennas etc.)
-
Ability to maintain visual line of sight
-
Permission from land owner
-
Controllers ability matches location/task
-
Privacy
-
Local restrictions, by laws,
-
Need for signage
-
Additional Notes
Risk Assessment
-
Risk Assessmnet
-
Risk Description
-
Likelihood
- Extremely Rare
- Rare
- Unlikely
- Possible
- Likely
- Almost Certain
-
Consequene
- Insignificant
- Minir
- Moderate
- Major
- Significant
- Catastrophic
-
Mitigation Strategy?
-
Notes?
Pre Flight Checksheet
Turn the Transmitter on check the binding
-
Propellers are OK and Secured and mounted with correct direction.
-
Motor mounts are OK
-
The FlightCtrl is pointing with the arrow forward to the front direction
-
FC Connections are OK
-
Visual check of all solder points
-
Battery charged and secured
-
Transmitter ON and binding Check
-
Motor Start and Stop
-
Throttle, Yaw Test
-
Roll and Pitch Test
-
Fail safe Functional
-
Type of Fail Safe
Calibrations
-
Select your Platform
-
Wait for the lights to get to normal blinking
-
Compass already calibrated
-
Switch between Atti and GPS mode 5 times quickly and calibrate the compass on horizontal and vertical planes.
-
Calibrate the Gyro
-
Place the Copter on a perfectly LEVEL LZ - it must be completely static - Set Trims to neutral - Stand back - With THRO off, Hold the YAW LEFT and the Cy- clic stick Back for 1 Sec ; release - you will see the GREEN LED blinking fast for a few secs then go out - The Gyro is now calibrated for drift (at this ambient temperature) -The Gyro on a PARIS/warthox board is the WiiMP+ You can Do this everytime you fly - preferably about 2mins after Powering up - in the outside air temps where you will fly.
-
Has there been a recent software change?
-
Calibrate Accelerometer
-
Fly the Copter in ACRO mode -Trim the copter using theTransmitter stick sub-Trims so it hovers still on STILL air (no wind) - Land - Disarm the copter (see above) ; ensure the Copter is on a perfectly LEVEL LZ - it must be completely static - Confirm the DISARMED LED is OFF - Hold Full THRO/YAW LEFT and the Cyclic stick Back for 1 Sec ; release - you will see the GREEN LED blinking fast for a few secs then go out - The Acc is now calibrated for LEVEL mode (at this ambient temperature) - The ACC on a PARIS/ warthox board is the Nunchuk®.
-
Accelerometer Trimming
-
Accelerometer (Acc) Trimming - Also called auto-LEVEL trim- ming - FIRST do after the GYRO & ACC calibrations and normal ACRO trimming (see above) using the Tx trims. LAND. Switch over to LEVEL mode (Gear Switch). Take off and mentally note the way the copter wants to drift - DO NOT TRIM THE TX - Land - The final ACC trimming procedure (below) is this -DISARM (see above - the Green LED will go OFF) Move the THRO to the ‘Learn Position - full up) - in this example the copter was moving back and right - so ; using stick-banging - move the cyclic (right stick) up once (led blinks) - then left once (led blinks) - these alterations are saved to the CPU memory. ARM again - hover and repeat the process until the copter hovers ‘level’.
-
Calibrate the Accelerometer (should be done only once)
-
1. The Kopter should stand straight.
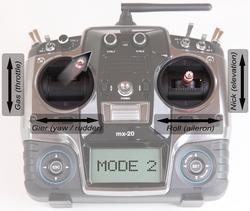
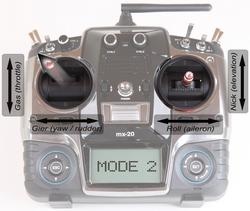
2. Throttle up + Yaw right, Nick middle, Roll middle
3. The Kopter acknowledges the ACC calibration with beep-tones. -
Calibrate Gyro
-
Before every initial startup or after changing the Lipo a new calibration of the Gyro's must be done.
1. The Kopter should stand on the ground and not move or shake.
2. Throttle up + Yaw left, Nick middle, Roll middle
3. The Kopter acknowledges the ACC calibration with beep-tones. -
Calibrate Compass
-
http://www.mikrokopter.de/ucwiki/en/Erstinbetriebnahme/Step12
Flight Logs
Flight Logs
-
Flight Notes
Flight Register
-
Pilot
-
Launch time
-
Post Flight Notes
Defects
Defects
-
Notes
Defect Logs
-
Defect Description
-
Repair Type
Incidents
Incidents
-
Notes
Incidents
Signatures
Signatures
-
Signatures
-
Name
-
Role
-
Add signature


