


Title Page
-
This iauditor is to be used when you are installing ABS EPOS equipment into a Marston's Site. The iauditor will not only be a manual of what to do whilst on site it is also used as a sign off. All fields need to be filled in and all pictures need to be clear not blurred before leaving site.
When arriving on site introduce Yourself to the Manager/Staff on site explain you are from ngeneration working on behalf of Marston's there to install there new till system.
Walk round with the manager get them to show you were the tills need to be installed, ask them where possible they would like the Cash draws and Receipt printers to go. If you are required to install any Kitchen printers ask the manager to show you were they need to be installed.
lastly get the manager to show you where the Back Office is. -
Document No.
-
Audit Title
-
Client / Site
-
Conducted on
-
Prepared by
-
Location
On Site Instructions Front Of House
-
-
Once you have been shown where all equipment is to be installed by the manager proceed to get all equipment out of the van. Make sure you take all tools and cables ties necessary to complete the job.
-
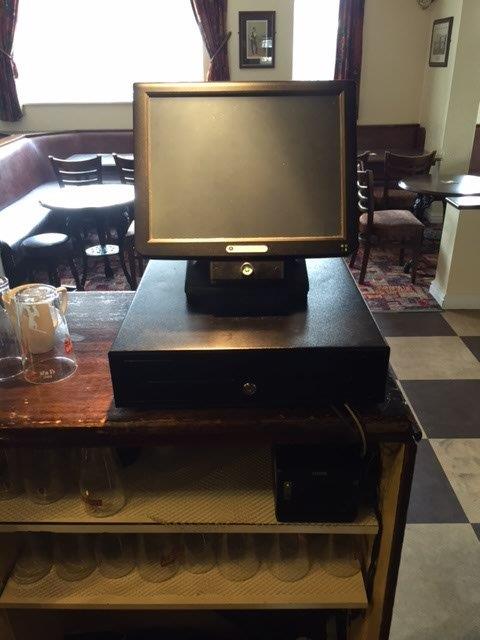
Firstly, install the tills where the cabling points are on the bar till 1 will need to be installed by till 1’s network point and so on for all other tills. Do not power the till on yet as you will need to install the Cash Draw and RP if needed. Make sure all cables are tidy and not obstructing anything on the bar.
• RP goes into com 1
• Cash draw goes into CD port 1
• Network cable from wall socket to network point on till -
-
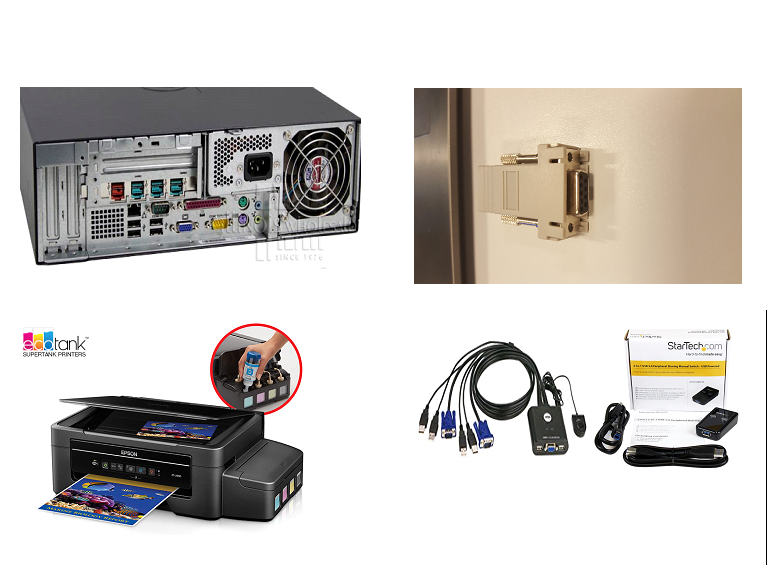
After all tills have been installed then install the Kitchen printers if site require one. To install a KP you will need a CBM 1000 or CTS 651 a network cable and a 25-pin serial adapter. The serial adapter goes in the back of the KP the network cable then connects from the 25 pin to the network port on the wall.
-


On Site Instructions Back Of House
-
-
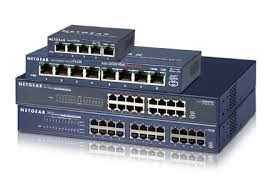
Switch
Connect all tills to the Switch using RJ45 network cables the network ports should be labelled on the wall T1 T2 etc. -
-
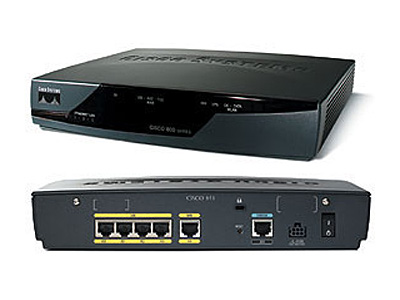
Router
Router should also be connected to the switch. Project control will be able to advise what the BT line number is that the router should be connected to. ADSL cable goes into the ADSL port on the router the other end goes into the filter then into the BT socket. Power cable comes in two half's plug into the nearest plug neatly. -
-
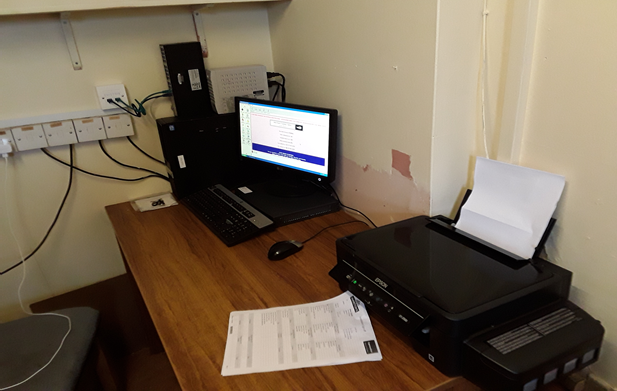
BOS PC
Start by connecting all necessary cables to the PC - VGA, Power, Network (cable must run from PC to switch), Keyboard + mouse (Or KVM if site have got a VDI) and printer switch. Install monitor and Printer, Printer takes around 15 mins to pre-charge the ink etc so unbox and setup first.
KP’s will need to be plugged into the back of the PC using a 9pin serial to Ethernet adapter. Use a network cable from the serial adapter to the kitchen printer ports on the wall.
Com Port 1 - Kitchen printer 1
Com Port 2 - Kitchen Printer 2 -
-
VDI
Install KVM switch cables, printer switch cables and power cable for the VDI then refer to the iAuditor template to install the VDI and complete the necessary sign off.
Power on the back-office PC Router etc install printer drivers and test the printer. Once the printer has been tested and working we need to the complete an image check. -
Image check
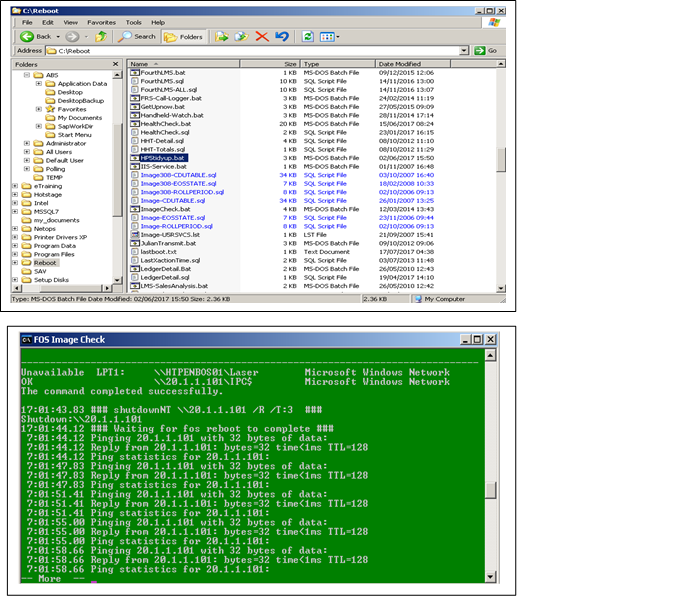
Navigate to start, Programs, admin tools - run imagecheck
After image check has been completed a green window will appear press space bar to complete image check.
After image check has finished successfully navigate to C://Reboot/HP5tidyup.bat
hp5tidyup.bat
Run HP5tidyup.bat
command window will open press space bar to continue
A green window will display when completed -
-
After image check has completed proceed to start session through ABS EPOS Control then turn all Tills, Receipt Printers and Kitchen Printers on so they can be tested.
Engineer Testing & Photo Finish
-
First thing we are going to test in the functionality of the Tills, RP, CD and kitchen printers where necessary
-
Till Testing & Photo Finish
Till install
-
Take a picture Displaying the Installed Till, CD and RP Ensure all cables are tidy
-
Is the Till online and in Sales mode
-
Does the Cash Draw Fire and have a CD Key
-
Does the Receipt Printer Print
-
Does the Site have any Kitchen Printers
-
Can you print orders to the Kitchen Printers from all tills ?
-
After you have tested all the Tills, CD, RP and KP make your way to the Back office to test the Printer and complete a coms test
-
Print a test page from the back office PC and take a picture
-
Does the site have COM'S?
-
Have you contacted Marston's Telecoms or Project Control ?
-
What is the reason for no coms on site ?
-
Coms check is needed from both Marston's Retail systems and nGeneration
-
What was the Contact name of the person who completed the Coms check from Marston's
-
What was the Contact name of the person who completed the Coms check from nGeneration
-
Does the site have a VDI
-
Have you Completed the relevant iauditor Sign Off
Engineer Sign Off
-
Are all Tills online ?
-
Do all receipt Printers work ?
-
Do all Kitchen Printers Work if applicable ?
-
Do all Cash draws work ?
-
Have you been left with Cash draw and Dallas Keys ?
-
Managers Signature
-
Comments
-
Engineer Fault Log


