Title Page
-
Date
-
Prepared by
- Trent Riekstins
- Marty Dakin
- Michael Collins
- James Kirkpatrick
- Dimitri Trajkoski
- Matt Miraudo
- Mitch Cunnane
- Patrick Kelleher
- Ross Simpson
- Steve Johnstone
- Elliott Dube
- Addam Riley
- Bert Brunton
- Shaun Murrell
- Aaron Power
- Jordan Bryden
- Daniel Guy
-
Elevation
- E-a
- E-b
- L16 Balcony Hood
- L16 Rakers
- L25 Balcony Hood
- L25 Rakers
- L33 Balcony Hood
- L33 Rakers
- L42 Balcony Hood
- L42 Rakers
- N1
- N2
- N3
- N4-a
- N4-b
- N5
- S1
- S2
- S3
- S4-a
- S4-b
- S5
- TS (East)
- TS (North)
- TS (South)
- TS (West)
- W-a
- W-b
- W-c
-
Panel ID (i.e. L04-12)
-
Take photo of fabrication Panel ID label
-
Is Installed Location different to Panel ID?
-
Installed Elevation
- E-a
- E-b
- L16 Balcony Hood
- L16 Rakers
- L25 Balcony Hood
- L25 Rakers
- L33 Balcony Hood
- L33 Rakers
- L42 Balcony Hood
- L42 Rakers
- N1
- N2
- N3
- N4-a
- N4-b
- N5
- S1
- S2
- S3
- S4-a
- S4-b
- S5
- TS (East)
- TS (North)
- TS (South)
- TS (West)
- W-a
- W-b
- W-c
-
Installed Location ID (i.e. L04-12)
Preparation (before loading Mast-climber)
-
New Column Panel<br>Verify panel number and condition.
-
Make Good Brackets<br>Check bracket type, quantities and condition.
-
Fixings and Sealant<br>Check correct sealants and fixings available and within expiry date.
-
Take a photo showing Structural Sealants Batch # and Expiry • Panel Structural Sealant =Tremco SG300
Removal of Existing Panel
-
Public Protection<br>Setup MC temp façade face encapsulation system once at work elevation.
-
• Cut weather sealant from horizontal joint using a Multi tool.<br>• Unscrew fixings from the vertical edges<br>• Cut structural sealant from vertical side edges and horizontal top/bottom edges with Multi-tool with 90deg blade<br>
-
Place the removed panel in a secure designated storage area
-
Clean existing frame ready for replacement panel
-
Take photo of existing frame showing surface free of contaminants
Curtain Wall Make Good Works
-
Are Make Good works required?
-
Is Cooling tower framing required?
-
Install lower (No. 2) angle 60mm long 40x40x3mm Aluminium EA each side. Fix to existing rolled channel with 1# 14G SS Tek each side and fix to vertical RHS with 2# 14G SS Tek each side, top and bottom.
-
Install upper (No. 2) angle 60mm long 40x40x3mm Aluminium EA each side. Fix to existing rolled channel with 1# 14G SS Tek each side and fix to vertical RHS with 2# 14G SS Tek each side, top and bottom.
-
Install new vertical RHS 60x40x3mm to lower and upper angles.
-
Install left and right mullion angles (No. 5). 85mm long 40x40x3mm Aluminium EA bracket top and bottom fixed to existing mullions with 3# 14G SS TEKS each leg and fixed to rolled 75x75x3mm RHS WITH 3# 14G SS TEKS each leg (30mm CTRS typical)
-
Install horizontal SHS (No. 3) and fix to left and right mullion angles
-
Install angles between SHS and vertical RHS (no. 4). 140mm long 40x40x3mm Aluminium EA each side. Fix to vertical RHS <br>60x40x3mm with 2# 14G SS TEK each side and fix to horizontal SHS 75x75x3mmm with 3# 14G SS TEK each side.
-
Take photo of completed framing works
-
Is female mullion bracket required?
-
Install new female mullion bracket with 4off 12G SS Self tapping screws. Take Photo
-
1. Install new 120x20x.095mm pressed cover plate 2. Install 6mm spacer tape to void 3. Install Silicon (Tremco TremFlex) to full perimeter of cover plate 4. Take Photo.
-
Is Apex column bracket make good required?
-
Take photo
Installation of New Column Panel
-
Is weather bead installed in the adjacent W6 panel?
-
Install weather bead and weather sealant as per drawing.
-
Preparation and installation of Structural Sealant Tremco SG300. Record climatic conditions using dewpoint meter.
Climatic Conditions
-
Time
-
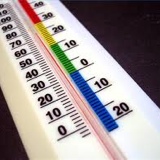
Substrate Temperature C°
-
Prepare the surface of curtain wall frame and panel<br>1. Roughen only the curtain wall frame using sand paper to achieve a raw aluminium finish. <br>2. Wipe surface of curtain wall frame and panel with ISO alcohol cleaner using the two rag wipe method.<br>3. Clean bottom face of existing top extrusion which is captive within curtain wall.
-
Apply thin coating of primer to curtain wall frame and panel using rag and allow to flash off for 15 minutes
-
Install new Cladding Panel, ensuring panel is straight, plumb and equal gaps on sides within the frame.
-
Install screws within vertical joints and structurally seal horizontal top & bottom interface between rear of panel and framing.
-
Remove protective film coating from panel and take photo of installed panel.
-
Clean up area and ensure all general rubbish is removed and placed in bins.<br>
Issues / Comments
-
Were any issues encountered or any comments?
-
Briefly list issue / comment


