


Information
-
-
-
Upon arrival :- introduce your self to the manager/staff member. explain you are there to install there new VDI and will need access to where there current VDI is located.
-
Audit Title
-
Site PHC number
-
Conducted on
-
Prepared by
-
Location
-
Managers name


Pre installition checks
-
In order to complete this install you will need the following items –
please check the status of the following before beginning: -
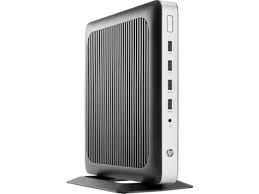
New HP T630 thin client with nGen asset tag New HP T630 stand New HP T630 keyboard with nGen asset tag New HP T630 USB mouse
Deinstallation of old equipment
-
Turn off the current VDI site are using and De install it.
These items need to remain when de-installing the old VDI unit:
-clover leaf power cable (as new VDI needs the same lead).
-TFT monitor + VGA cable + power lead
-Network cable
-Printer/Scanner + USB cable + power lead
-Printer USB switcher + USB lead
-KVM + cables (if present) -
What is the MAC address of the old thin client?
-
What is the Serial Number of the old thin client?
-
The De-installed VDI should be labelled with site number, name and engineers name then packed neatly away with the old keyboard and mouse all inside the empty box of the HP T630.
-
How to pack the old VDI away :
-Unplug all devices from the thin client e.g. Wyse P25 or Wyse D90
-Undo the DVI adapter from the thin client and store in the T630 inner cardboard box
-Pack the old thin client into the T630 inner cardboard box
-Check to see if the PSU is connected to a UPS or mains supply. If UPS, reuse this power cable for the new unit. Record which power supply is in use
-Remove the thin client Power Supply + power cable (if applicable) and pack in the main section of the T630 cardboard box
-Remove the old Keyboard and arrange the polystyrene packaging in the main section of the T630 box to hold the old keyboard
-Remove the USB Mouse and store in the main section of the T630 box -
Is the old Thin client packed neatly away ready to be brought back to unit 18 with the PHC number written on the outside of the T630 box?
Insallation of new VDI on site
-
-
How to Assemble the HP T630
-
Firstly Remove all the clear plastic protection strips from the HP T 630.
-
Record the MAC address from the side pull out tab of the HP T630
-
Record the MARxxxxxx Asset tag number on the side of the HP T630
-
Screw the stand onto the T630 either in the vertical or horizontal position – the unit may overheat if it is not on the stand and is not recommended by the manufacturer.
-
has the stand been attached to the HP T630
-
Install the USB mouse into the USB ports at the back of the HP T630 or into the KVM switch if site have one
-
install the USB Keyboard into the USB ports at the back of the HP T630 or into the KVM switch if site have one
-
keyboard asset tag:
-
Has the USB keyboard and mouse been installed into the rear USB's of the HP T630?
-
Install network cable into the back of HP T630
-
Has the network cable been plugged into the HP T630
-
Install the Back office USB printer lead into the FRONT USB ports where the power switch is on the HP T 630.
-
Has the USB printer been plugged into one of the front USB ports of the HP T630
-
Fit VGA cable to rear of the HP T630 – if the previous connection was a DVI cable, replace with a spare VGA cable
-
has the VGA cable been plugged into the HP T630?
-
Install speakers (if present) into the headphone socket on the front of the HP T630
-
Install the power lead for the HP T630 it should turn itself on if not press the power button to switch it on.
Run the power supply cable with enough slack that the unit can be moved around without pulling too tightly – this should be fitted to the same power source as the previous thin client i.e. UPS or mains outlet -
Record the power supply MAR asset tag
-
Is the power lead plugged into the HP T630 so it can be moved if needed without pulling the cable out?
-
Take a picture of the area where the power supply is fed from i.e. the wall point or extension lead. This is to be used by the helpdesk when handling calls regarding power issues in the future
-
Take a picture of the layout of the office where the T630 is installed i.e. desk or work surface
-
Take a picture of Printer that is installed on site
-
What port is the HP T630 plugged into?
Setup of the HP T630
-
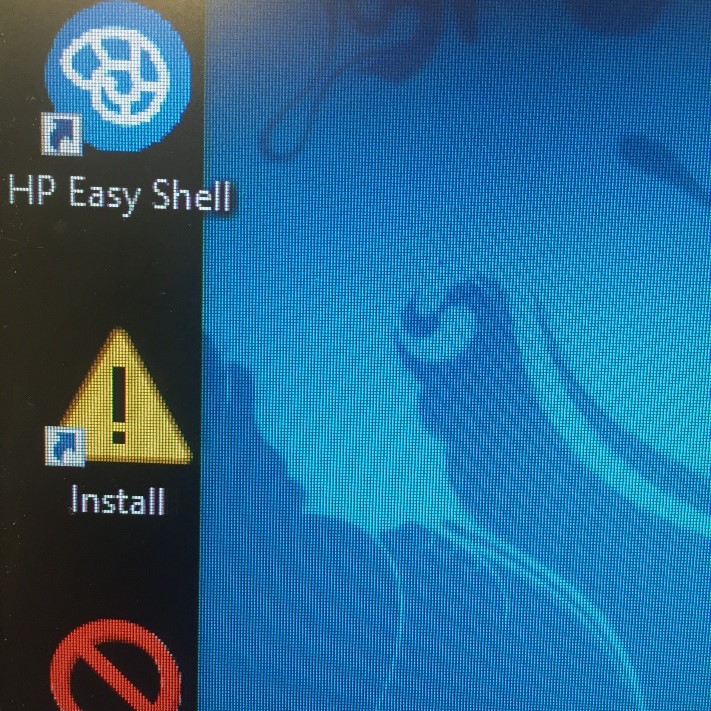
The Thin client will automatically login and start a full screen kiosk application called HP Easy Shell. Need to logout and login to the Admin account the password will be verbally given by the project manager and is not to be written down
-
-
After logging into the admin account we will now prepare the thin client for use again by right clicking and running the Install shortcut on the desktop as an Administrator
-
This will set the Write filter to ON, set the static IP address, reset the Easy Shell kiosk settings, power settings and prompt for the computer name.
This has to be completed using the following format for HP T630 sites -
A T630 would need a computer name of W12345C1
PHC number - W12345
Classification no - C (as site are having a T630 installed)
Count of machine - 1 (some sites will be receiving more than 1 device)
Once you have inputted the PC name in the correct format the VDI will then reboot -
Record the PC name
-
Take a Picture of the PC NAME you have set
-
Check the Date and time is correct on the bottom left hand side of the HP Easy Shell Kiosk – if it is not correct restart the HP T630 and repeatedly press ESC until the BIOS menu appears
-Choose Utilities
-Check that the time is correct – press F10 to save
-Power off the thin client -
Is the time and date correct on the HP T630?
-
These next steps need to be completed with a user from the site that has credentials to logon to VDI.
-
If there isn’t anyone onsite that can logon to VDI or you haven’t been issued with a user to logon with you should contact Marston’s IT Servicedesk on 01902 329 129 who may be able to assist with either a temporary account or by changing the site user account’s password
-
Log into VDI using valid credentials – record which credentials you use
-
Take a picture of the pool that Is assigned to the user
-
-
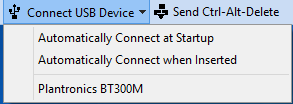
After the site user has logged on, the top of the screen displays a ‘shield’ that allows the session to interact with the physical peripherals attached to the thin client. The follow options need to be UNTICKED:
-Automatically Connect at Start up
-Automatically Connect when Inserted
-Printer -
By un-ticking these, VMware sends a Virtual Thin Print device not the physical device to the remote virtual machine making printing and scanning significantly faster
-
Take a picture of the shield on the top of the browser that includes all three items un-ticked as requested
-
If the printer isn’t available, you may need to logout of the VDI session, Shutdown the T630 and power cycle the printer. Once the printer is back online, power on the T630 and repeat the login
-
Make sure default printer is set to the correct printer – it may take 2 minutes to correctly identify the printer and update the default
-
Take a picture of the default printer on the HP T630
Testing HP T630
-
Open Microsoft Word on the HP T630 and send a test print that has colour and black text on it
-
Take a picture of the test print from the HP T630 showing both black and coloured text
-
Open Paint.exe – put a print onto the scanner of the printer and scan a full page image
-
Take a picture of the VDI screen showing the scanned image
-
Check that users data files have appeared in the profile and the profile is not an empty profile e.g. Desktop and Documents folders have items in them
-
Switch the USB connection back to the BOS PC and make sure the machine can communicate with the printer i.e. send a test print containing both colour and black text
-
Take a picture of the test page from the BOS PC
Engineers sign off
-
This next section is to be filled out by the manager on site
-
Can you access the internet on the VDI and the back office PC?
-
Can you access ABS from the back office PC?
-
Are all tills operational?
-
Can you access ABS from the back office pc?
-
Managers name
-
Managers signature
-
Managers comments
-
Date
-
To be filled out by the Engineer
-
Engineers comments : Did you have any issues with the installation? Were there any pre-existing hardware issues? Are there any steps that will require a second visit or helpdesk call to be created?


