


Information
Before starting any new document ensure to refer to previous visits/interactions to identify any outstanding actions that may need to be carried forward. Any progress should be recognised and praised.
-
Document No.Employee ID (payroll number)
-
Employee Name
-
Prepared by
-
Conducted on
-
Visit Type
- HomeSafe
- Post Check
- IDD
- Damaged Claim
- Coaching
- Health & Safety Accident/Incident Report Form
- Equipment Inspection
- RTW
- TM Proof of understanding
- TM Generic risk assessment
- Probation Discussion
- Investigation
- Parking Fine Form Bskyb
- Sky Vehicle Appraisal Form
- New start Check list
TM RISK ASSESSMENT
TM RISK ASSESSMENT
-
What EXTERNAL hazards have you identified on this visit? please select from the list.
- Strong Winds
- Garden
- Manual Handling
- Traffic / Parking
- Animals / Pets
- Scaffolding
- Uneven Ground
- Working at Height
- Ice / Snow / Wet
- Hazardous Substances
- Decking
- Third Party
- Failing Light
- Gas / Electric
-
What INTERNAL hazards have you identified on this visit? please select from the list.
- Furniture
- Stairs
- Manual Handling
- Animals / Pets
- Gas / Electric
- Hazardous Substances
- Loft Working
- Working at Height
- Non-Carpeted Flooring
- Third Party
-
Are hazards Removable or Controllable
-
Details
-
Details
-
Document Type
- HomeSafe
- Post Check
- IDD
- Damaged Claim
- Coaching
- Health & Safety Accident/Incident Report Form
- Equipment Inspection
- RTW
- TM Proof of understanding
- TM Generic risk assessment
- Probation Discussion
- Investigation
- Parking Fine Form Bskyb
- Sky Vehicle Appraisal Form
- New start Check list
HOMESAFE
-
Visit Number
-
Visit Type
- Service
- Install
- Install (multi-screen)
- MHO
- MHO (multi-screen)
- Other
-
Product Type
-
Observation
-
Is the engineer working safely on arrival?
-
Risk Assessment
-
Engineer has completed a dynamic risk assessment with all relevant hazards identified. They have demonstrated a good understanding of removing, controlling or escalating the relevant hazards.
-
Additional Comments
-
Add Photos
-
Unsafe Conversation
-
Add Photos
-
Tick box for Risk Assessment Tool box Talk
Risk Assessment and Hazard Awareness Tool Box Talk
-
An important part of your daily work is a formal risk assessment. Comprehensive training for Risk Assessment on-site was given in training. If you require any more information on Risk Assessment it can be found in the training manual .PAGES 25 to 33
It is your responsibility to ensure that you do not expose yourself or others to unnecessary hazards whilst at work.
To do this we must perform a Risk Assessment before we start ANY work.
Carrying out a risk assessment allows the correct control measures to be put into place.
Definitions within Risk Assessment:
HAZARD: A Hazard is something with the potential to cause harm, even if it is not presently doing so.
HARM: Harm is the physical injury or ill health or damage suffered by those exposed to a hazard.
RISK: Risk is the likelihood that the harm from a particular hazard is realised and how much harm occurs.
RISK = LIKELIHOOD X SEVERITY
The basic approach to the assessment of risks can be summed up in the following steps.
Stages of Risk Assessment:
-
1. Identify The hazards involved
2. Decide Who may be harmed and how
3. Evaluate The risks and decide on the controls needed
4. Record Your findings and implement them
5. Review Your assessment and update if necessary
Types of Hazard
-
Wherever possible hazards must be removed rather than controlled.
The following category is a list of hazards likely to be encountered but the list is not exhaustive -
• Adverse Weather.
• Third Parties.
• Traffic.
• Existing External Equipment.
• Property Hazards
• Garden Hazards.
• Ground Hazards.
• Other Hazards.
N.B. For a more detailed breakdown of these Hazard Categories, please refer to The Risk Assessment Module in your Safety Manual.
Hazard Awareness Procedure and Form
An important aspect of the Health and Safety procedure is the empowerment given to you to determine what H&S equipment to use in addition to the minimum requirements. On every installation or service call, the full hazard awareness procedure (i.e., a Risk Assessment) must be carried out in order to identify any hazards that are present. This is completed on your I Pad (paper form if I Pad is not available) and is a vital part of your role. This must be completed before any on-site activity is started.
• You must determine what hazards are present when parking or working internally/externally on every occasion.
• Wherever possible, hazards must be removed.
• If a hazard cannot be removed, then it must be adequately controlled.
If hazard cannot be removed or controlled it must be escalated to your manager.
You must ensure at all times that you are working in the safest manner possible considering the hazards that are present.
Consider all tasks and situations and explain what you would do in these scenarios How would you control remove the risk
-
You arrive at the customer’s door and as he opens the door a dog appears he is not aggressive but is a little boisterous.
-
You complete risk assessment and have stated that dish will go low level with no ladder work needed but after trying to get signal it becomes clear that dish needs to be put on the chimney.
-
While you are doing your risk assessment you come across damp decking
Please sign the appropriate statement
-
I have read and understood this tool box talk and I understand my responsibilities. I am aware that failure to comply with the risk Assessment process could result in disciplinary action being taken.
-
I have read and do not fully understand this tool box talk and i need further refresher training.
-
Manual Handling
-
Engineer has demonstrated good manual handling techniques to help reduce any potential injuries
-
Additional Comments
-
Add Photos
-
Unsafe Conversation
-
Add Photos
-
Tick the box for the Manual Handling Tool Box Talk
Manual Handling Tool Box Talk
-
Manual Handling includes the Lifting, Lowering, Push-ing, Pulling, Turning, Transporting and Throwing of ANY load.
Manual Handling Operations Regulations are made under the Health & Safety at Work Act and are in place to try and reduce the amount of accidents caused by manual handling activities.
Manual Handling accidents account for approximately 20% of all accidents reported by Installation Engineers.
Some common injuries are:
• Bruises
• Sprains
• Muscle Strain
• Back Ache
• Arm and Shoulder Pain
It is YOUR responsibility to carry out a Risk Assessment before attempting to move ANY load to prevent potential injuries. -
-
All manual handling activities should be carried out as smoothly as possible; this will help to reduce the strain on your body. Wherever possible, face in the direction you need to move and perform the lifting and moving as one smooth movement. If you need to turn then move your feet rather than rotate your body. This will help prevent back injuries.
In the event of an injury you should escalate immediately to your duty TM and seek medical advice if required.

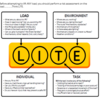
THINK LITE
Knowledge check questions
-
Name 2 common injuries from poor manual handling?
-
What should you do before attempting to move any load?
Please sign the appropriate statement.
-
I have read and understood this tool box talk and I understand my responsibilities. I am aware that failure to comply with the risk Assessment process could result in disciplinary action being taken.
-
I have read and do not fully understand this tool box talk and i need further refresher training.
-
PPE
-
All relevant personal protective equipment has been used to complete the listed activity’s which demonstrates the engineers awareness to their own personal safety
-
Coaching Conversation
-
Additional Comments
-
Unsafe Conversation
-
Tick the box to show PPE Tool Box Talk
PPE Tool Box Talk
-
Engineer has followed the Safe System Of Work using all necessary equipment in line with the relevant hierarchy to complete all working at height activities
PPE Supplied The correct use and routine daily checks for PPE can be found in your safety manual from page 7.


Knowledge check questions
-
1. Who is responsible for checking and maintaining your PPE?
-
2. What is the main reason for wearing your manual handling gloves?
-
3. Who is responsible for providing you with PPE?
Please sign the appropriate statement.
-
I have read and understood this tool box talk and I understand my responsibilities. I am aware that failure to comply with the risk Assessment process could result in disciplinary action being taken.
-
I have read and do not fully understand this tool box talk and i need further refresher training.
-
Activity
- Cable Cliping
- Drilling
- Moving Equipment
- Stock Collection
- Working at Height
- Working in lofts
- working near roads / Low Visibility
- Other
-
PPE Used
- Boots
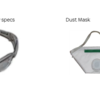
- Dust mask
- Ear defenders / Plugs
- Gloves
- Goggles
- Hard Hat
- High Viz
- Knee Pads
- Safety Specs
-
Add Photos
-
Damage Awareness Property
-
Engineer followed the correct process and procedures to minimize the risk of damage to property.
-
Add Photos
-
Additional Comments
-
Add Photos
-
Unsafe Conversation
-
Tick box for Damage Awareness Tool Box Talk
Damage Awareness Tool Box Talk
-
The following guidelines have been put in place to support our customers and yourself. During our working day we may come across situations whereby actions we take could result in unnecessary damage and critical hits.
Through our investigations that have taken place it has been found that if you follow these guidelines we are laying out below will significantly reduce damage, critical hits and injury during your daily activities.
1) Risk Assessment
• Carry out a thorough risk assessment before starting any activity onsite, please refer to health and safety manual (pages 25-33)
2) Safe Drilling Practices
• Carry out visual inspection inside and out of drilling location before starting
• At all times use stud detector is to be used to ensure location is safe to drill (Health and safety manual pages 33-38)
• Usage of dust pan or reasonable precautions are to be taken to reduce dust/dirt on customers flooring (page 48)
• All relevant PPE for drilling must be used (Health and safety manual pages 7-10)
• Follow safe drilling practices as set out in Health safety manual (pages 43-48)
• all cable entry and eyebolt holes are sealed
• Sealing holes
3) Handling equipment and customers personal possessions
• Always take care when moving equipment around customer premises, if possible use external access in the first instance
• Ask customer to move own possessions, if help is required then assist taking care at all times
• Ensure manual handling guidelines are followed at all times (page 49-56)
4) Cleanliness
• All uniform is to be at a good standard of cleanliness and serviceable
• Overshoes to be worn at all times inside customers property, care should be taken at all times when overshoes are worn
• Working area must be left clean and tidy once all works are complete (page 48)
• All old equipment must be removed from customers property and returned through standard stock return process
• Once work is complete carry out inspection with customer and explain and clarify works completed
Please sign the appropriate statement.
-
I have read and understood this tool box talk and I understand my responsibilities. I am aware that failure to comply with the risk Assessment process could result in disciplinary action being taken.
-
I have read and do not fully understand this tool box talk and i need further refresher training.
-
Damage Awareness Van
-
Engineer followed the correct process and procedures to minimize
the risk of damage to the van. -
Add Photos
-
Additional Comments
-
Add Photos
-
Unsafe Conversation
-
Tick box for Van Damaged Awareness Guiedlines Tool Box Talk
Van Damage Awareness guidelines
-
The following guidelines have been put in place to support you. During your working day we may come across situations whereby actions you take could result in unnecessary van damage resulting in unnecessary costs and potential injuries.
Through Observations that have taken place it has been found that if you follow these guidelines we are laying out below will significantly reduce damage and injury risk. -
1) Risk Assessment
• Before commencing use of your van ‘HS&S vehicle checks’ must be completed as per fleet guidelines, any issues must be escalated to your TM.
• Suitable and lawful parking must be considered at all times, follow UTL fleet ‘parking process’
• Wing mirrors must be turned in or up when parked in any location
• Observe and adhere to all height restrictions for your type of van -
2) Equipment and Stock storage
• All tools and equipment must be stored in a safe manner reducing the risk of damage.
• All stock must be stored on shelving and racking provided, no stock or tools to be carried in cab area of van
• Cab area must be kept clean and tidy at all times, all loose items secured
• Rubbish/faulty stock must be cleared on a daily basis, following correct returns process
• Ladders must be checked for security before making any journey, all relevant locks and straps must be in place -
3) Handling equipment
Refer to manual handling toolbox talk -
4) Cleanliness
• All branded vehicles are used as a marketing tool and therefore should be cleaned and presentable at all times, this includes dash area
Please sign the appropriate statement.
-
I have read and understood this tool box talk and I understand my responsibilities. I am aware that failure to comply with the risk Assessment process could result in disciplinary action being taken.
-
I have read and do not fully understand this tool box talk and i need further refresher training.
-
Add Photos
-
Working at Height
-
Engineer has followed the Safe System Of Work using all necessary equipment in line with the relevant hierarchy to complete all working at height activities
-
Additional Comments
-
Unsafe Conversation
-
Ladder Type
- No Ladder
- Step/ Combi
- Single Section
- Double Section
- Triple Section
- CAT
- DAT
- SAT (inc rope access)
- Access Ladder (inc flat roof working)
- 10 Rung
- Rope Assisted 15 Rung
- Rope Assisted 19 Rung
-
How was Combi-Ladder Used?
-
Equipment Used
- 10mm Eye bolt
- 20mm Eye Bolt
- Chimney Strop
- Cow's Tail
- Cable Rod's
- Crawl Boards
- Gravel Bag
- Harness
- Karabiners
- Ladder Mate
- Ladder Spike
- Microlight
- Ratchet Strap
- Ropes
- Rope Grab
- Soft Slings
- Y Hang
- Other
-
Add pictures to support observation (inc RAMS forms if applicable)
-
Additional visit notes
-
Tick For IDD
IDD
-
Reason for IDD
-
Time and Date of incident
-
TM
-
Engineer
-
TM
-
Engineer
-
TM
-
Engineer
-
TM
-
Engineer
-
TM
-
Engineer
-
TM
-
Engineer
-
Tick for more text boxes
-
TM
-
Engineer
-
TM
-
Engineer
-
TM
-
Engineer
-
TM
-
Engineer
-
TM
-
Engineer
-
TM
-
Engineer
-
Tick for more text boxes
-
TM
-
Engineer
-
TM
-
Engineer
-
TM
-
Engineer
-
TM
-
Engineer
-
TM
-
Engineer
-
TM
-
Engineer
-
Tick for more text boxes
-
TM
-
Engineer
-
TM
-
Engineer
-
TM
-
Engineer
-
TM
-
Engineer
-
TM
-
Engineer
-
TM
-
Engineer
-
Tick for more text boxes
-
TM
-
Engineer
-
TM
-
Engineer
-
TM
-
Engineer
-
TM
-
Engineer
-
TM
-
Engineer
-
TM
-
Engineer
-
Tick for more text boxes
-
TM
-
Engineer
-
TM
-
Engineer
-
TM
-
Engineer
-
TM
-
Engineer
-
TM
-
Engineer
-
TM
-
Engineer
-
Tick for more text boxes
-
TM
-
Engineer
-
TM
-
Engineer
-
TM
-
Engineer
-
TM
-
Engineer
-
TM
-
Engineer
-
TM
-
Engineer
-
Tick for more text boxes
-
TM
-
Engineer
-
TM
-
Engineer
-
TM
-
Engineer
-
TM
-
Engineer
-
TM
-
Engineer
-
TM
-
Engineer
If more text boxes are needed please start a new IDD Form
-
Tick for Additional HomeSafe Observations on the same day.
HOMESAFE
-
Visit Type
- Service
- Install
- Install (multi-screen)
- MHO
- MHO (multi-screen)
- Other
-
Product Type
-
Risk Assessment
-
Visit Number
-
Engineer has completed a dynamic risk assessment with all relevant hazards identified. They have demonstrated a good understanding of removing, controlling or escalating the relevant hazards.
-
Additional Comments
-
Add Photos
-
Visit Number
-
Unsafe Conversation
-
Add Photos
-
Tick box for Risk Assessment Tool box Talk
Risk Assessment and Hazard Awareness Tool Box Talk
-
An important part of your daily work is a formal risk assessment. Comprehensive training for Risk Assessment on-site was given in training. If you require any more information on Risk Assessment it can be found in the training manual .PAGES 25 to 33
It is your responsibility to ensure that you do not expose yourself or others to unnecessary hazards whilst at work.
To do this we must perform a Risk Assessment before we start ANY work.
Carrying out a risk assessment allows the correct control measures to be put into place.
Definitions within Risk Assessment:
HAZARD: A Hazard is something with the potential to cause harm, even if it is not presently doing so.
HARM: Harm is the physical injury or ill health or damage suffered by those exposed to a hazard.
RISK: Risk is the likelihood that the harm from a particular hazard is realised and how much harm occurs.
RISK = LIKELIHOOD X SEVERITY
The basic approach to the assessment of risks can be summed up in the following steps.
Stages of Risk Assessment:
-
1. Identify The hazards involved
2. Decide Who may be harmed and how
3. Evaluate The risks and decide on the controls needed
4. Record Your findings and implement them
5. Review Your assessment and update if necessary
Types of Hazard
-
Wherever possible hazards must be removed rather than controlled.
The following category is a list of hazards likely to be encountered but the list is not exhaustive -
• Adverse Weather.
• Third Parties.
• Traffic.
• Existing External Equipment.
• Property Hazards
• Garden Hazards.
• Ground Hazards.
• Other Hazards.
N.B. For a more detailed breakdown of these Hazard Categories, please refer to The Risk Assessment Module in your Safety Manual.
Hazard Awareness Procedure and Form
An important aspect of the Health and Safety procedure is the empowerment given to you to determine what H&S equipment to use in addition to the minimum requirements. On every installation or service call, the full hazard awareness procedure (i.e., a Risk Assessment) must be carried out in order to identify any hazards that are present. This is completed on your I Pad (paper form if I Pad is not available) and is a vital part of your role. This must be completed before any on-site activity is started.
• You must determine what hazards are present when parking or working internally/externally on every occasion.
• Wherever possible, hazards must be removed.
• If a hazard cannot be removed, then it must be adequately controlled.
If hazard cannot be removed or controlled it must be escalated to your manager.
You must ensure at all times that you are working in the safest manner possible considering the hazards that are present.
Consider all tasks and situations and explain what you would do in these scenarios How would you control remove the risk
-
You arrive at the customer’s door and as he opens the door a dog appears he is not aggressive but is a little boisterous.
-
You complete risk assessment and have stated that dish will go low level with no ladder work needed but after trying to get signal it becomes clear that dish needs to be put on the chimney.
-
While you are doing your risk assessment you come across damp decking
Please sign the appropriate statement
-
I have read and understood this tool box talk and I understand my responsibilities. I am aware that failure to comply with the risk Assessment process could result in disciplinary action being taken.
-
I have read and do not fully understand this tool box talk and i need further refresher training.
-
Manual Handling
-
Visit Number
-
Engineer has demonstrated good manual handling techniques to help reduce any potential injuries
-
Additional Comments
-
Add Photos
-
Visit Number
-
Unsafe Conversation
-
Add Photos
-
Tick the box for the Manual Handling Tool Box Talk
Manual Handling Tool Box Talk
-
Manual Handling includes the Lifting, Lowering, Push-ing, Pulling, Turning, Transporting and Throwing of ANY load.
Manual Handling Operations Regulations are made under the Health & Safety at Work Act and are in place to try and reduce the amount of accidents caused by manual handling activities.
Manual Handling accidents account for approximately 20% of all accidents reported by Installation Engineers.
Some common injuries are:
• Bruises
• Sprains
• Muscle Strain
• Back Ache
• Arm and Shoulder Pain
It is YOUR responsibility to carry out a Risk Assessment before attempting to move ANY load to prevent potential injuries. -
-
All manual handling activities should be carried out as smoothly as possible; this will help to reduce the strain on your body. Wherever possible, face in the direction you need to move and perform the lifting and moving as one smooth movement. If you need to turn then move your feet rather than rotate your body. This will help prevent back injuries.
In the event of an injury you should escalate immediately to your duty TM and seek medical advice if required.
THINK LITE
Knowledge check questions
-
Name 2 common injuries from poor manual handling?
-
What should you do before attempting to move any load?
Please sign the appropriate statement.
-
I have read and understood this tool box talk and I understand my responsibilities. I am aware that failure to comply with the risk Assessment process could result in disciplinary action being taken.
-
I have read and do not fully understand this tool box talk and i need further refresher training.
-
PPE
-
Visit Number
-
All relevant personal protective equipment has been used to complete the listed activity’s which demonstrates the engineers awareness to their own personal safety
-
Coaching Conversation
-
Additional Comments
-
Visit Number
-
Unsafe Conversation
-
Tick the box to show PPE Tool Box Talk
PPE Tool Box Talk
-
Engineer has followed the Safe System Of Work using all necessary equipment in line with the relevant hierarchy to complete all working at height activities
PPE Supplied The correct use and routine daily checks for PPE can be found in your safety manual from page 7.
Knowledge check questions
-
1. Who is responsible for checking and maintaining your PPE?
-
2. What is the main reason for wearing your manual handling gloves?
-
3. Who is responsible for providing you with PPE?
Please sign the appropriate statement.
-
I have read and understood this tool box talk and I understand my responsibilities. I am aware that failure to comply with the risk Assessment process could result in disciplinary action being taken.
-
I have read and do not fully understand this tool box talk and i need further refresher training.
-
Activity
- Cable Cliping
- Drilling
- Moving Equipment
- Stock Collection
- Working at Height
- Working in lofts
- working near roads / Low Visibility
- Other
-
PPE Used
- Boots
- Dust mask
- Ear defenders / Plugs
- Gloves
- Goggles
- Hard Hat
- High Viz
- Knee Pads
- Safety Specs
-
Add Photos
-
Damage Awareness Property
-
Visit Number
-
Engineer followed the correct process and procedures to minimize the risk of damage to property.
-
Add Photos
-
Additional Comments
-
Visit Number
-
Add Photos
-
Unsafe Conversation
-
Tick box for Damage Awareness Tool Box Talk
Damage Awareness Tool Box Talk
-
The following guidelines have been put in place to support our customers and yourself. During our working day we may come across situations whereby actions we take could result in unnecessary damage and critical hits.
Through our investigations that have taken place it has been found that if you follow these guidelines we are laying out below will significantly reduce damage, critical hits and injury during your daily activities.
1) Risk Assessment
• Carry out a thorough risk assessment before starting any activity onsite, please refer to health and safety manual (pages 25-33)
2) Safe Drilling Practices
• Carry out visual inspection inside and out of drilling location before starting
• At all times use stud detector is to be used to ensure location is safe to drill (Health and safety manual pages 33-38)
• Usage of dust pan or reasonable precautions are to be taken to reduce dust/dirt on customers flooring (page 48)
• All relevant PPE for drilling must be used (Health and safety manual pages 7-10)
• Follow safe drilling practices as set out in Health safety manual (pages 43-48)
• all cable entry and eyebolt holes are sealed
• Sealing holes
3) Handling equipment and customers personal possessions
• Always take care when moving equipment around customer premises, if possible use external access in the first instance
• Ask customer to move own possessions, if help is required then assist taking care at all times
• Ensure manual handling guidelines are followed at all times (page 49-56)
4) Cleanliness
• All uniform is to be at a good standard of cleanliness and serviceable
• Overshoes to be worn at all times inside customers property, care should be taken at all times when overshoes are worn
• Working area must be left clean and tidy once all works are complete (page 48)
• All old equipment must be removed from customers property and returned through standard stock return process
• Once work is complete carry out inspection with customer and explain and clarify works completed
Please sign the appropriate statement.
-
I have read and understood this tool box talk and I understand my responsibilities. I am aware that failure to comply with the risk Assessment process could result in disciplinary action being taken.
-
I have read and do not fully understand this tool box talk and i need further refresher training.
-
Damage Awareness Van
-
Visit Number
-
Engineer followed the correct process and procedures to minimize
the risk of damage to the van. -
Add Photos
-
Additional Comments
-
Visit Number
-
Add Photos
-
Unsafe Conversation
-
Tick box for Damage Awareness Tool Box Talk
Van Damage Awareness guidelines
-
The following guidelines have been put in place to support you. During your working day we may come across situations whereby actions you take could result in unnecessary van damage resulting in unnecessary costs and potential injuries.
Through Observations that have taken place it has been found that if you follow these guidelines we are laying out below will significantly reduce damage and injury risk. -
1) Risk Assessment
• Before commencing use of your van ‘HS&S vehicle checks’ must be completed as per fleet guidelines, any issues must be escalated to your TM.
• Suitable and lawful parking must be considered at all times, follow UTL fleet ‘parking process’
• Wing mirrors must be turned in or up when parked in any location
• Observe and adhere to all height restrictions for your type of van -
2) Equipment and Stock storage
• All tools and equipment must be stored in a safe manner reducing the risk of damage.
• All stock must be stored on shelving and racking provided, no stock or tools to be carried in cab area of van
• Cab area must be kept clean and tidy at all times, all loose items secured
• Rubbish/faulty stock must be cleared on a daily basis, following correct returns process
• Ladders must be checked for security before making any journey, all relevant locks and straps must be in place -
3) Handling equipment
Refer to manual handling toolbox talk -
4) Cleanliness
• All branded vehicles are used as a marketing tool and therefore should be cleaned and presentable at all times, this includes dash area
Please sign the appropriate statement.
-
I have read and understood this tool box talk and I understand my responsibilities. I am aware that failure to comply with the risk Assessment process could result in disciplinary action being taken.
-
I have read and do not fully understand this tool box talk and i need further refresher training.
-
Add Photos
-
Working at Height
-
Visit Number
-
Engineer has followed the Safe System Of Work using all necessary equipment in line with the relevant hierarchy to complete all working at height activities
-
Additional Comments
-
Visit Number
-
Unsafe Convesation
-
Ladder Type
- No Ladder
- Step/ Combi
- Single Section
- Double Section
- Triple Section
- CAT
- DAT
- SAT (inc rope access)
- Access Ladder (inc flat roof working)
- 10 Rung
- Rope Assisted 15 Rung
- Rope Assisted 19 Rung
-
How was Combi-Ladder Used?
-
Equipment Used
- 10mm Eye bolt
- 20mm Eye Bolt
- Chimney Strop
- Cow's Tail
- Cable Rod's
- Crawl Boards
- Gravel Bag
- Harness
- Karabiners
- Ladder Mate
- Ladder Spike
- Microlight
- Ratchet Strap
- Ropes
- Rope Grab
- Soft Slings
- Y Hang
- Other
-
Add pictures to support observation (inc RAMS forms if applicable)
-
Additional visit notes
-
Tick For IDD
IDD
-
Reason for IDD
-
Time and Date of incident
-
TM
-
Engineer
-
TM
-
Engineer
-
TM
-
Engineer
-
TM
-
Engineer
-
TM
-
Engineer
-
TM
-
Engineer
-
Tick for more text boxes
-
TM
-
Engineer
-
TM
-
Engineer
-
TM
-
Engineer
-
TM
-
Engineer
-
TM
-
Engineer
-
TM
-
Engineer
-
Tick for more text boxes
-
TM
-
Engineer
-
TM
-
Engineer
-
TM
-
Engineer
-
TM
-
Engineer
-
TM
-
Engineer
-
TM
-
Engineer
-
Tick for more text boxes
-
TM
-
Engineer
-
TM
-
Engineer
-
TM
-
Engineer
-
TM
-
Engineer
-
TM
-
Engineer
-
TM
-
Engineer
-
Tick for more text boxes
-
TM
-
Engineer
-
TM
-
Engineer
-
TM
-
Engineer
-
TM
-
Engineer
-
TM
-
Engineer
-
TM
-
Engineer
-
Tick for more text boxes
-
TM
-
Engineer
-
TM
-
Engineer
-
TM
-
Engineer
-
TM
-
Engineer
-
TM
-
Engineer
-
TM
-
Engineer
-
Tick for more text boxes
-
TM
-
Engineer
-
TM
-
Engineer
-
TM
-
Engineer
-
TM
-
Engineer
-
TM
-
Engineer
-
TM
-
Engineer
-
Tick for more text boxes
-
TM
-
Engineer
-
TM
-
Engineer
-
TM
-
Engineer
-
TM
-
Engineer
-
TM
-
Engineer
-
TM
-
Engineer
If more text boxes are needed please start a new IDD Form
Please ensure to upload a copy of this HomeSafe document to the relevant team folder on the designated Office365 site.
POST CHECK
-
Job No
-
Date of Visit
-
Product Type<br>
-
Job Type
- Service
- Install
- Install (multi-screen)
- MHO
- MHO (multi-screen)
- Other
-
Reason for post Check
H&S
-
Is there evidence of H&S?
-
Do you have the Engineer's Risk Assessment for this job?
-
Is the Risk Assessment an accurate representation of work carried out?
-
Record Findings
-
Add pictures to support findings
-
Record Findings
-
Add pictures to support findings
QUALITY & COMPLIANCE
-
In YOUR opinion, has the work been carried out to high standard?
-
F-Connectors<br>
-
Power lead<br>
-
HDMI lead<br>
-
Dish <br>
-
Cable<br>
-
Is the Q on the correct software? <br>(Use iKnow2 Model Look Up Tool)
-
Add picture of screen to show Powerline setting
-
Is the remote control paired to TV? <br>
-
Is the picture resolution optimised? <br>
-
Is the Q box connected to the internet?<br>
-
Does the customer have the correct router<br>
-
Check the mesh and using Chrome and add picture
-
Has the engineer left the property tidy? <br>
-
Record of findings
-
Add pictures to support findings
CUSTOMER
-
Having a conversation with the customer highlight any areas that were covered.
- ETA
- Engineer Attitude
- On Demand
- Showcase
- Sky Apps
- Pre/Post job Walkthrough
- Engineer Appearance
-
Record any findings to support conversation
-
Add media
-
Customer Statement (Tick to add statement)
-
Customer
-
Engineer Rating - What rating would the customer give the visit?
- 0 - 😡
- 1 - 😡
- 2 - 😡
- 3 - ☹️
- 4 - ☹️
- 5 - ☹️
- 6 - ☹️
- 7 - 😕
- 8 - 😕
- 9 - 😀
- 10 - 😀
-
Job Type
- Service
- Install
- Install (multi-screen)
- MHO
- MHO (multi-screen)
- Other
-
Reason for post Check
H&S
-
Is there evidence of H&S?
-
Do you have the Engineer's Risk Assessment for this job?
-
Is the Risk Assessment an accurate representation of work carried out?
-
Record Findings
-
Add pictures to support findings
-
Record Findings
-
Add pictures to support findings
QUALITY
-
In YOUR opinion, has the work been carried out to high standard?
-
Record Findings
-
Has the engineer left the property tidy? <br>
-
Add pictures to support findings
CUSTOMER
-
Having a conversation with the customer highlight any areas that were covered.
- ETA
- Engineer Attitude
- On Demand
- Showcase
- Sky Apps
- Pre/Post job Walkthrough
- Engineer Appearance
-
Record any findings to support conversation
-
Customer Statement (Tick to add statement)
-
Customer
-
Engineer Rating - What rating would the customer give the visit?
- 0 - 😡
- 1 - 😡
- 2 - 😡
- 3 - ☹️
- 4 - ☹️
- 5 - ☹️
- 6 - ☹️
- 7 - 😕
- 8 - 😕
- 9 - 😀
- 10 - 😀
IDD
-
Reason for IDD
-
Time and Date of incident
-
TM
-
Engineer
-
TM
-
Engineer
-
TM
-
Engineer
-
TM
-
Engineer
-
TM
-
Engineer
-
Tick for more text boxes
-
TM
-
Engineer
-
TM
-
Engineer
-
TM
-
Engineer
-
TM
-
Engineer
-
TM
-
Engineer
-
Tick for more text boxes
-
TM
-
Engineer
-
TM
-
Engineer
-
TM
-
Engineer
-
TM
-
Engineer
-
TM
-
Engineer
-
Tick for more text boxes
-
TM
-
Engineer
-
TM
-
Engineer
-
TM
-
Engineer
-
TM
-
Engineer
-
TM
-
Engineer
-
Tick for more text boxes
-
TM
-
Engineer
-
TM
-
Engineer
-
TM
-
Engineer
-
TM
-
Engineer
-
TM
-
Engineer
-
Tick for more text boxes
-
TM
-
Engineer
-
TM
-
Engineer
-
TM
-
Engineer
-
TM
-
Engineer
-
TM
-
Engineer
-
Tick for more text boxes
-
TM
-
Engineer
-
TM
-
Engineer
-
TM
-
Engineer
-
TM
-
Engineer
-
TM
-
Engineer
-
Tick for more text boxes
-
TM
-
Engineer
-
TM
-
Engineer
-
TM
-
Engineer
-
TM
-
Engineer
-
TM
-
Engineer
-
Tick for more text boxes
-
TM
-
Engineer
-
TM
-
Engineer
-
TM
-
Engineer
-
TM
-
Engineer
-
TM
-
Engineer
-
Tick for more text boxes
-
TM
-
Engineer
-
TM
-
Engineer
-
TM
-
Engineer
-
TM
-
Engineer
-
TM
-
Engineer
-
Tick for more text boxes
-
TM
-
Engineer
-
TM
-
Engineer
-
TM
-
Engineer
-
TM
-
Engineer
-
TM
-
Engineer
If more text boxes are needed please start a new IDD Form
-
Add media to support IDD
-
Is further action required? (Last IDD page only)
If this is a breach of H&S the incident is required to be reported on SOLARS as a 'Near Miss'
-
Has this IDD resulted in a suspension from duty?
-
For the reasons discussed today you are now suspended from the work place on full pay until these matters can be fully investigated. In the first instance you will be suspended until -
-
This matter will be kept confidential. If necessary your colleagues will be informed that your absence is for personal reasons.
In the meantime we may need to talk to you about this issue during your suspension so you should be available for contact and to attend meetings if necessary during your normal working hours. You will be advised of the outcome of the investigation as soon as possible.
Should you for any reason need to speak to one of your work colleagues or to come into your place of work you should contact me in the first instance for prior authorisation.
If you would like any advice or guidance in relation to company polices or processes during your period of suspension please contact ER. -
Case Justification Form
-
Please note to ensure we are operating efficiently there are mandatory parts of this form that need to be completed before submitting.
Please review all information has been provided before submitting. -
Employee Business Area/ Dept
-
Investigation Manager
-
Investigation Manager Contact Number
-
Details of reason for investigation (please detail the reason you started an investigation, summarise the discussion of each meeting and other findings)
-
Summary of findings and recommendations (please detail the specific reason why you believe there is a cases to answer)
-
FOR HEALTH AND SAFETY CASES
-
Photographs (eg - Photograph for job number xxxxxxxxx. Point of interest ie - The eyebolt has not been drilled (explain what the photograph refers to). Please write job numbers on the photographs)
-
MFT print out/ paper risk assessment (If information is required from the risk assessment)
-
HomeSafe Records (Please ensure records are dated, page numbers on each page and job numbers)
-
Post Checks (Please ensure all have job numbers and dates on pages)
-
Training Records (Detailing H&S training. This can be obtained by emailing Training Planning and providing employee name and ID number)
-
FOR DRILLING CASES
-
Relevant Policy (Please detail the policy which the investigation relates to eg - Disciplinary Policy)
-
Current Sanction Details (If applicable, please detail any current sanction)
-
Suspension Start Date or Extension Date
-
Disciplinary Details
-
Venue
-
Date and Time
-
Chair Name and Contact Number
DAMAGE CLAIM
THIS IS A STAND ALONE FORM AND SHOULD NOT BE USED ALONG SIDE ANY OTHER SECTION OF THIS DOCUMENT
Job Details
-
Job/Incident Number
-
Date incident occurred
-
Location of Incident
-
Customer Details
Engineer Details
-
Engineer
-
Tech Number
-
Team Number
Person completing report
-
Prepared by
-
Date of TM site visit
Liability
-
In my opinion was this caused by a Sky visit or install?<br>
-
Record Of Findings Full details giving reason for denying or accepting liability with photographic evidence including report and clearly stating liability accepted/ denied
-
Were there any witnesses?
-
Witness details if not the person reporting the incident (only required if not the customer)
Photographs and drawings
-
Add pictures to support findings
-
Add drawing to support findings (if required)
-
Add drawing to support findings (if required)
Corrective Action
-
Has the person reported been made adware of the incident
-
H&S Dept notified?
-
Is further investigation required?
-
Who will carry out further investigation?
-
Has an incident report been completed on Solars
-
What corrective action has been taken to prevent a recurrence?
Customer
-
What action has been agreed with customer?
-
Customer Signature
Email completed document to claimshandling@bskyb.com
Health & Safety Accident/Incident Report Form
Section 1.
-
Details Of Incident (Please make sure all section of this form are completed)
-
Date and Time of Incident:
-
Full Name of Involved Person (AF):
-
Address the Incident Occurred:
-
Exact Location:
-
Job title of person who had the incident:
-
Contact number of involved person:
-
AF Line manager + Location + tel No:
-
Check the box for the next section
Section 2.
-
About You.
-
Your Name
-
Your Occupation
-
Your Contact details (Email+Tel)
-
Your Relationship to the AF
-
Check the box for the next section
Section 3.
-
Details Of Incident If Reported At A Later Date
-
Date and Time of Incident:
-
Name of person reporting it:
-
Check the box for the next section.
Section 4.
-
About The Incident
-
Explain what happened (short version)?
-
What injury was sustained? (cut, bruise, strain, scald, etc)
-
What is the nature of the incident: (slip, trip, or fail, Manual handling, moving object, falling object, spillage, electrical, mechanical?)
-
Was first aid necessary? if so what?
-
Status of person: (back to work, received first aid, went home, sent to A&E, sent to gp ect)
-
Check the box for the next section.
Section 5.
-
Health And Safety Adviser To Complete
-
Risk assessment necessary<br>
-
Where is it Held?
-
Reportable under RIDDOR
-
If reportable Why?
-
Where is the investigation form kept?
-
Check the box for the next section.
Incident Investigation Form
-
6. Indirect Causes (please select all relevant options)
- Lack of job skill
- Lack of Knowledge
- Lack of Awareness
- Saving time of effort
- Normal wear through use
- Mental/Physical incapability
- Avoiding discomfort
- Attracting attention
- Seeking peer apprroval
- Expressing resentment
- Asserting independence
- Lack of maintenance
- Abnormal wear
- Design fault
- Outside contractors
- Normal practice
- Other
-
Please Describe
-
7. Direct causes (please select all relevant options)
- Unsafe Act/Omission/Condition
- Failure to make secure
- Failure of equipment
- Working in an unsafe position
- Hazardous atmospheric conditions
- Hazardous placment/storage
- Hazardous personal attire
- Horseplay
- Illumination/noise
- Inadequate safety device
- inadequate warning systems
- Operating at unsafe speed
- Operating without authority
- Poor housekeeping
- protruding hazards
- Repair/servicing/energised equipment
- Hazardous equipment
- Taking unsafe actions
- Unexpected movement
- Unsafe/defective equipment
- Using defective equipment
- Using equipment unsafely
- Other
-
Please Describe
-
8. Type of hazard
- Hot Surfaces
- Collided with (not vehicle)
- Chemicals
- Dust
- Electrical
- Equipmnet failure
- Explosion
- Falling (not ladders/stairs)
- Fire
- Gas
- Falling from ladders/steps
- Lighting
- Manual handling - lifting
- Manual handling - Pushing
- Manual handling - Pulling
- Noise general
- Other persons
- Repetitive movement
- Radiation (Incl Sun)
- Road trafic accident
- Soldering
- Stairs
- Steam/hot Temperature
- Surface (floor, ground etc)
- Suspect package
- Trip/slip (ex ladders or stairs)
- Weather
- Water
- Other
-
Please Describe
-
9. Body Area
- Abdomen
- Ankle
- Arm
- Back (lower)
- Back (upper)
- Chest
- Elbow
- Eye
- Face
- Finger
- Foot
- Groin
- Hand
- Head
- Hearing
- Internal
- Knee
- Leg
- Mouth/Teeth
- Neck
- Nose
- Pelvis
- Shoulder
- Skin
- Wrist
- Other
-
Please Describe
-
10. Injury Type
- Arc Eye
- Burns & Scalds
- Bites
- Bruise
- Concussion
- Crushing
- Cuts / Abrasoins
- Deafness
- Death
- Electric Shock
- Eye Injury-General
- Dislocation/Slipped Discs
- Fracture
- Infection
- Internal bleeding
- Multiple injurys
- penetrating injury
- Poison
- Repetitive strain
- RTA
- Sprains/Strains
- Unconsciousness
- Other
-
Please Describe
-
Please Describe
-
11. Cause of incident (Using descriptions of the choices above will assist)
-
Has a similar incident occurred before?<br>
-
If so When, to whom, report kept where
-
12. Equipment (State the equipment used and the condition of it at time of incident)
13. Prevention/Training (What action have been taken to prevent a repetition of this incident?) Please include dates carried out
-
1.
-
2.
-
3.
-
4.
14. Control measures (what control measures, other than in a risk assessment. where implemented?) Please include dates carried out.
-
1.
-
2.
-
3.
-
4.
15. Risk assessment/Safe system of work/Method statement
-
Has/Had a RA been conducted?
-
Location of RA?
-
Date RA conducted
-
Who conducted the RA?
-
Has/Had a SSOW/MS been conducted/produced?
-
Location of SSOW/MS?
-
Date SSOW/MS Conducted/Produced?
-
Where is it located?
-
16. Person investigating the incident
-
Date
-
Job Title.
17. Attachments
-
Are there additional reports/statements/photos?
-
Are they attached
-
Add media
-
Where are they kept?
-
Where are they?
-
If necessary, Individual HS advisers have the responsibility to inform the HSE
-
On completion of this form please send hard copy to: Christopher.jones@sky.uk
-
Date reported to HSE
-
RIDDOR No:
-
Name of HS advisor (Block Caps)
COACHING
-
Reason for coaching
- NPS
- Technical
- Customer Service
- Quality
- Safety
- Sale Through Service
- Q Install/Service
- Other
-
Please Describe.
-
Pre visit comments - What outcome is hoping to be achieved?
-
Coach on site observations/ comments
-
Engineer comments - What will you take away from today's session?
-
Follow up details (if required)
-
Review date
-
Add pictures to support
EQUIPMENT INSPECTION (All inspections are carried out in accordance with the current HS&S Maintenance Schedules)
THIS IS A STAND ALONE FORM AND SHOULD NOT BE USED ALONG SIDE ANY OTHER SECTION OF THIS DOCUMENT
-
Maintenance Schedule
https://docs.google.com/forms/d/e/1FAIpQLSfaK7jEwfgWiIDWevZXkORmCUFsyg2VmIKJAoqEbveKxNXdbQ/viewform?usp=sf_link -
Engineer Type
Hard Hat - This item have a working life (refer to ref guide)
-
Hard Hat
-
Hard Hat Date/ Serial no
-
Hop Up
-
Ear Protection
-
Ear Protection Type<br>
-
Eye Protection
-
Eye Protection Type
-
Head Torch
-
Hi-Viz Vest
-
Knee Pads
-
Dust Masks
-
Boots
-
Rubber Mat
-
Antiseptic Wipes
-
Hazard Analysis Form
-
Tyre Weld (Puncture Repair)
-
First Aid Kit Expiry Date
Harness/ Cows Tail - These items have a working life (refer to ref guide)
-
Harness<br>
-
Harness Serial no/ Date of manufacture
-
Cows Tail<br>
-
Cows Tail Serial no/ Date
Kernmantle Rope/ Retractable Safety Line - These items have a working life (refer to ref guide)
-
15M Rope
-
15M Rope Serial no/ Date
-
10M Rope
-
10M Rope Serial no/ Date
-
5M Rope
-
5M Rope Serial no/ Date
-
Rope Grab
Continuous Loop Webbing Sling Life - These items have a working life (refer to ref guide)
-
Continuous Loop Webbing Sling
-
Continuous Loop Webbing Sling Dates
-
Adjustable (ratchet) Webbing Strap
-
10M Strap with Ratchet
-
Karabiners
Chimney Strop Life - These items have a working life (refer to ref guide)
-
Chimney Strop
-
Chimney Strop Serial no/ Date
Soft Sling Life - These items have a working life (refer to ref guide)
-
Soft Slings (part of chimney kit)
-
Soft Slings Dates
-
Microlite
-
Ladder Mate
-
Ladder Spike
-
Gravel Bag
-
Cones X2
-
Crawl Boards X2
-
10mm Eyebolts
-
10mm Eyebolt Quantity
-
20mm Eyebolt
-
20mm Eyebolt Quantity
Hard Hat - This item have a working life (refer to ref guide)
-
Hard Hat
-
Hard Hat Date/ Serial no
-
Ladders
-
Combi Ladder
-
CAT Ladder
-
Eye Protection
-
Eye Protection Type
-
Ear Protection
-
Ear Protection Type
-
Draper Floodlight (Ground mounted)
-
Draper Floodlight (Tripod mounted)
-
Peli Floodlight
-
Knee Pads
-
Manual Handling Gloves
-
Hi-Viz Vest
-
Dust Masks
-
Boots
-
Drill Harness
-
Bosch Detector
-
First Aid Kit Expiry Date
-
Portable Appliance Testing (PAT) Date
-
SPECIALIST ENGINEER
-
Maintenance Schedule (SAT/DAT EQUIPMENT)
https://docs.google.com/forms/d/e/1FAIpQLSdpc3DTStS2yYUM2a-fjIGXac1Bxeoc9Y9zmoUaxBZm15dGZQ/viewform?usp=sf_link
DAT/ SAT Only
-
50M Rope
-
50M Rope Serial no/ Date
-
Rocker
-
Rocker Serial no
-
Safety Ascender/Descender Device
-
30M x 7mm Static ACC. Cord
-
Axel Belay Device
-
Wire Rope Slings
-
Wire Rope Slings Serial nos
-
Delta Mailon
-
Rope Protecters
-
Pulley Blocks (fixed sheave)
-
RGH16 Harness (life same as DTH)
-
RGH16 Serial no/ Date
-
Silverstar Helmet
-
Silverstar Helmet Serial no/ Date
-
8 Rung Extension Ladder
-
Ladder Clamp
-
Bearer Bar X2
-
Big Fish Safety Knife
-
Hop Up
-
CAMP 30ltr Kit Bag
-
NOTE - If any items are found to be defective they are to be isolated and replaced as soon as possible.
Engineers Van Safety Check
-
Engineers are required to carry out daily and weekly safety checks on their vehicles. From September 2013, to ensure that the engineer is clear about how to carry out these checks, Team Managers should carry out the following as part of the six monthly safety checks.
-
Van Registration
-
Ask the Engineer to demonstrate how they carry out their daily and weekly checks, using the HS&S Vehicle checklist PDF on their iPads
-
Visually check the items alongside the Engineer. If any defects are found record them in the comments section.
-
Discuss any items, as appropriate, to test the Engineers understanding.
-
Ask the Engineer if they have had any issues in the past six months, and whether these issues have been dealt with. If any issues are outstanding, record in the comments section.
-
Where the Engineer shows any areas for improvement, coach accordingly and comment accordingly.
-
Is Vehicle Height Sticker clearly visible on the dash board?
-
Comments
-
HS&S Vehicle Checks Reference Guide (tick box to view)
-

ENGINEER DECLARATION: I confirm that by signing below the listed equipment has been issued to and is used by me. That no other equipment is used without authorisation, and a full inspection has been carried out by the HS&S - PPE & Equipment Examiner. I also confirm that I have carried out the vehicle checks in accordance with the Fleet directives.
Please ensure to upload a copy of this Equipment Inspection to the relevant team folder on the designated Office365 site
RTW
-
Type of absence
-
First day of absence
-
Last day of absence
-
Absence reason
- Alcohol/ Drug addition
- Allergy
- Asthma (excl work related)
- Blood disorder
- Breast problems
- Cancer/ Tumors
- Chest/ Respiratory problems
- Cold/ Cough/ Flu/ Influenza
- Dental
- Diabetes/ Thyroid/ Endocrine
- Disease of nervous system
- Ear/ Nose/ Throat condition
- Epilepsy or Neurological
- Eye problem
- Gastrointestinal problems
- Gynae including period pains
- Headache/ Migraine
- Heart/ BP/ Cirulatory
- Infectious disease
- Kidney/ Bladder problem
- Non work Injury/ Burn/ Fracture/ RTA
- Non work Musculoskeletal problem
- Non work Back/ Disc problem
- Occupational Asthma
- Occupational Dermatitis
- Pregnancy related
- Scheduall Sickness code
- Stess/ Anxiety/ Depression (non work)
- Stess/ Anxiety/ Depression (work related)
- Swine flu
- Unknown cause
- Vertigo/ Dizziness/ Insomnia
- Virus
- Work Injury/ Burn/ Fracture/ RTA
- Work related Musculoskeletal problem
- Work related Back/ Disc problem
- Other
-
Please state reasons
-
Is the absence work related?
-
Details
-
Was this a linked absence?
-
Details
-
Did Engineer visit a GP during their absence?
-
Is this absence over 7 days?
-
In line with the company absence policy if the absence is over 7 days the employee must provide a 'Fit to Work' certificate in order for a full return to work.
-
Has a 'Fit to Work' note been provided?
-
Add any pictures of 'Fit To Work' certificates
-
Is this absence over 7 days?
-
In line with the company absence policy if the absence is over 7 days the employee must provide a 'Fit to Work' certificate in order for a full return to work.
-
Is the Engineer currently on any medication?
-
Details of medication
-
Number of absences in rolling 12 months?
- 0 (first absence)
- 1
- 2
- 3
- 4
- 5
- 6
- 7
- 8
- 9
- 10+
-
How many?
-
Percentage absence in rolling 12 months?
-
Has this absence triggered further action?
-
Process Triggered?
-
Absence Ref Guide
-
Occupational Heath referral required?
-
Date of referral/ planned referral
-
Additional information
-
First day of absence
-
Last day of absence
-
Absence reason
- Alcohol/ Drug addition
- Allergy
- Asthma (excl work related)
- Blood disorder
- Breast problems
- Cancer/ Tumors
- Chest/ Respiratory problems
- Cold/ Cough/ Flu/ Influenza
- Dental
- Diabetes/ Thyroid/ Endocrine
- Disease of nervous system
- Ear/ Nose/ Throat condition
- Epilepsy or Neurological
- Eye problem
- Gastrointestinal problems
- Gynae including period pains
- Headache/ Migraine
- Heart/ BP/ Cirulatory
- Infectious disease
- Kidney/ Bladder problem
- Non work Injury/ Burn/ Fracture/ RTA
- Non work Musculoskeletal problem
- Non work Back/ Disc problem
- Occupational Asthma
- Occupational Dermatitis
- Pregnancy related
- Scheduall Sickness code
- Stess/ Anxiety/ Depression (non work)
- Stess/ Anxiety/ Depression (work related)
- Swine flu
- Unknown cause
- Vertigo/ Dizziness/ Insomnia
- Virus
- Work Injury/ Burn/ Fracture/ RTA
- Work related Musculoskeletal problem
- Work related Back/ Disc problem
- Other
-
Please state reasons
-
Is the absence work related?
-
Details
-
Was this a linked absence?
-
Details
-
Did Engineer visit a GP during their absence?
-
Is the Engineer currently on any medication?
-
Details of medication
-
Number of absences in rolling 12 months?
- 0 (first absence)
- 1
- 2
- 3
- 4
- 5
- 6
- 7
- 8
- 9
- 10+
-
How many?
-
Percentage absence in rolling 12 months?
-
Has this absence triggered further action?
-
Process Triggered?
-
Absence Ref Guide
-
Occupational Heath referral required?
-
Date of referral/ planned referral
-
Additional information
-
If the returning Engineer has been off 28 days or more please refer to the RTWL in the first instance before a full return to work
-
Reason for Absence
-
Any follow up considerations?
-
Tick For IDD
IDD
-
Reason for IDD
-
Time and Date of incident
-
TM
-
Engineer
-
TM
-
Engineer
-
TM
-
Engineer
-
TM
-
Engineer
-
TM
-
Engineer
-
TM
-
Engineer
-
Tick for more text boxes
-
TM
-
Engineer
-
TM
-
Engineer
-
TM
-
Engineer
-
TM
-
Engineer
-
TM
-
Engineer
-
TM
-
Engineer
-
Tick for more text boxes
-
TM
-
Engineer
-
TM
-
Engineer
-
TM
-
Engineer
-
TM
-
Engineer
-
TM
-
Engineer
-
TM
-
Engineer
-
Tick for more text boxes
-
TM
-
Engineer
-
TM
-
Engineer
-
TM
-
Engineer
-
TM
-
Engineer
-
TM
-
Engineer
-
TM
-
Engineer
-
Tick for more text boxes
-
TM
-
Engineer
-
TM
-
Engineer
-
TM
-
Engineer
-
TM
-
Engineer
-
TM
-
Engineer
-
TM
-
Engineer
-
Tick for more text boxes
-
TM
-
Engineer
-
TM
-
Engineer
-
TM
-
Engineer
-
TM
-
Engineer
-
TM
-
Engineer
-
TM
-
Engineer
-
Tick for more text boxes
-
TM
-
Engineer
-
TM
-
Engineer
-
TM
-
Engineer
-
TM
-
Engineer
-
TM
-
Engineer
-
TM
-
Engineer
-
Tick for more text boxes
-
TM
-
Engineer
-
TM
-
Engineer
-
TM
-
Engineer
-
TM
-
Engineer
-
TM
-
Engineer
-
TM
-
Engineer
If more text boxes are needed please start a new IDD Form
-
Add any pictures of doctors notes
Please ensure to email a copy of this document to: admin.laserfiche@bskyb.com
TM Proof of Understanding
-
Choose Document
- Escalation Manual
- Hazard Awareness Brief
- Generic risk assessments
- Safety Manual
- Combi ladder manual
- Lone working policy
- First aid policy
- Absence policy
- Fleet policy
- Drugs and alcohol policy
- PPE policy
- Statement of arrangements
- Cladded building brief
- Safe ladder access on public highways
- Summer manual
- Working in winter conditions
- Manual handling Brief
- PPE Documents
- Damage Awareness Brief
- Company car policy
- Critical Hit Brief
-
• Escalation process
• Pitched roof work
• Dormer roof work
• Flat roof work
• Safe access through windows
• Accessing skylights and roof hatches in tenement properties
• Use of existing dish bracketry to secure ladders
• Using anchors positioned at the base of a wall or ground level
• Access to scaffolding at residential premises -
• Identifying fragile roof surfaces
• Asbestos
• Working around dogs
• Hazard awareness
• Health and safety: Awareness and principles
• Hazardous substances
• Internal RA & hazard awareness brief -
animal faeces . working in sunshine
-
• Critical hit
• Safe drilling practises
• Damage Awareness Brief -
Have you read and fully understood all the above named document and do you understand your responsibilities
-
Please inform your line manager of your further support/training requirements in understanding the above named document
-
Please sign below to indicate that you have read and fully understood all the above named document(s) and you understand your responsibilities.
TM Risk Assessment
-
Choice Document
- Manual Handling Risk Assessment
- PPE
- Surfaces Risk Assessment
- Aggressive People Risk Assessment
- Driving Risk Assessment
- Climbing Apparatus Risk Assessment
- Working at Height Risk Assessment
- Inclement-adverse weather RA
- Lone Working
- Zoonose Risk Assessment
-
I have read all the generic risk assessments listed above and fully understand them and all the relevant control measures.<br>
-
Please inform your line manager of your further support/training requirements in understanding these risk assessments
PROBATION DISCUSSION DOCUMENT
-
Week of Probation
-
Type Of Meeting
-
Welcome & Specific Team Information
-
Add media to support
-
Expectations for Performance, Attendance & Conduct
-
Add media to support
-
Targets/ Objectives
-
Add media to support
-
Support Measures or Adjustments
-
Add media to support
-
Dates & Times of Weekly 121's & Interim Review
-
Add media to support
-
Additional Comments
-
Add media to support
-
What's gone well? - Encourage & praise good performance/ behaviours
-
Add media to support
-
Progress against targets/ objectives set in Introductory Meeting
-
Add media to support
-
Any concerns around Attendance, Performance or Conduct?
-
Add media to support
-
Expectations moving forward
-
Add media to support
-
Support Measures or Adjustments
-
Add media to support
-
Additional Comments
-
Add media to support
-
What's gone well? - Encourage & praise good performance/ behaviours
-
Add media to support
-
Progress against Targets/ Objectives set in Introductory Meeting & 121's
-
Add media to support
-
Any concerns around Attendance, Performance or Conduct?
-
Add media to support
-
Expectations moving forward - Set expectations if improvement(s) not met
-
Add media to support
-
Support Measures or Adjustments
-
Add media to support
-
Date of Final Probation Review Meeting
-
Additional Comments
-
Add media to support
-
Discuss overall Attendance, Performance & Behaviours
-
Outcome
-
Congratulate on successfully completing probation period & celebrate success!
-
Set expectations moving forward
-
Add media to support
-
Explain reason for extension
-
Expected End Date -Duration of extension (no less than 4 weeks & no longer than 13)
-
Agreed improvements expected
-
Add media to support
-
Agreed support required if appropriate
-
Add media to support
-
Set expectation that if improvement not made this could result in non-confirmation of probation.
-
Additional Comments
-
Add media to support
INVESTIGATION
-
Explanation of investigation (Reasons and findings)
-
Add pictures to support investigation
-
Is the Engineer present?
I certify that I attended an investigation meeting and will not disclose to any third party the information discussed at this meeting (other than for the purposes of seeking legal advice). Please note that any breach of this agreement may result in action under the company's disciplinary procedure.
-
Engineer
-
Firstly, thank you for meeting me. Before we go any further you've signed the confidentiality agreement which I remind you means that you cannot discuss the content of this meeting with anyone. Do you understand?
-
I am currently conducting an investigation and I would like to ask you some questions.
Please be as open and honest as you can because it's important to me that I am able to gather all the facts.
You should be aware that the notes from this discussion we have today may be used going forward in any formal process. This means that these notes may be provided to other employees who have been involved in the situation, if necessary to do so. -
Tick box to open dialogue
-
TM
-
Engineer
-
TM
-
Engineer
-
TM
-
Engineer
-
TM
-
Engineer
-
TM
-
Engineer
-
Tick for more text boxes
-
TM
-
Engineer
-
TM
-
Engineer
-
TM
-
Engineer
-
TM
-
Engineer
-
TM
-
Engineer
-
TM
-
Engineer
-
Tick for more text boxes
-
TM
-
Engineer
-
TM
-
Engineer
-
TM
-
Engineer
-
TM
-
Engineer
-
TM
-
Engineer
-
TM
-
Engineer
-
Tick for more text boxes
-
TM
-
Engineer
-
TM
-
Engineer
-
TM
-
Engineer
-
TM
-
Engineer
-
TM
-
Engineer
-
TM
-
Engineer
-
Tick for more text boxes
-
TM
-
Engineer
-
TM
-
Engineer
-
TM
-
Engineer
-
TM
-
Engineer
-
TM
-
Engineer
-
TM
-
Engineer
-
Tick for more text boxes
-
TM
-
Engineer
-
TM
-
Engineer
-
TM
-
Engineer
-
TM
-
Engineer
-
TM
-
Engineer
-
TM
-
Engineer
-
Tick for more text boxes
-
TM
-
Engineer
-
TM
-
Engineer
-
TM
-
Engineer
-
TM
-
Engineer
-
TM
-
Engineer
-
TM
-
Engineer
-
Tick for more text boxes
-
TM
-
Engineer
-
TM
-
Engineer
-
TM
-
Engineer
-
TM
-
Engineer
-
TM
-
Engineer
-
TM
-
Engineer
-
Tick for more text boxes
-
TM
-
Engineer
-
TM
-
Engineer
-
TM
-
Engineer
-
TM
-
Engineer
-
TM
-
Engineer
-
TM
-
Engineer
-
Tick for more text boxes
-
TM
-
Engineer
-
TM
-
Engineer
-
TM
-
Engineer
-
TM
-
Engineer
-
TM
-
Engineer
-
TM
-
Engineer
-
Tick for more text boxes
-
TM
-
Engineer
-
TM
-
Engineer
-
TM
-
Engineer
-
TM
-
Engineer
-
TM
-
Engineer
-
TM
-
Engineer
-
Is there anything else regarding the incident that I have not asked which you feel may be relevant or that I need to look into?
-
Engineer
-
I have no further questions at this time however I may need to speak to you again.
I will finish my investigation as quickly as possible and let you know where we go from here. -
Has this investigation resulted in a suspension from duty?
-
For the reasons discussed today you are now suspended from the work place on full pay until these matters can be fully investigated. In the first instance you will be suspended until -
-
This matter will be kept confidential. If necessary your colleagues will be informed that your absence is for personal reasons.
In the meantime we may need to talk to you about this issue during your suspension so you should be available for contact and to attend meetings if necessary during your normal working hours. You will be advised of the outcome of the investigation as soon as possible.
Should you for any reason need to speak to one of your work colleagues or to come into your place of work you should contact me in the first instance for prior authorisation.
If you would like any advice or guidance in relation to company polices or processes during your period of suspension please contact ER.
MANAGER’S CHECKLIST
-
Ask employee for their ID badge
-
Ensure you have current contact telephone number for employee
-
Ask employee to sign confidentiality agreement
-
Ensure the employee has transport home, and arrange a taxi if necessary
-
Inform security that the employee has been suspended
-
Record the absence on the portal. Absence Type is “Paid Leave” and Absence Code is “Suspension on Pay”
-
Notify Incentive Team of suspension and that average incentive/bonus payment should be paid until further notice (calculated over previous 3 months)
-
Raise a case via the case management system and generate the Suspension Letter to post to the employee confirming your discussions.
Reopen Visit Type and include 'IDD' if required substituting 'Engineer' with customer, witness etc.
PARKING FINE FORM BSKYB
-
National parking Utl fleet
-
Fine reference number
-
Team Code
-
Engineer Name
-
Manager Name
-
Engineer Number
-
Van Registration
-
Local Authority
-
Cost
-
Job Number
-
Date fine occurred
-
Road Name
-
Team Manager submitting form
-
Authorised to pay
-
Authorised to recharge engineer
-
Reason for not recharging engineer
-
Photo of notification of parking issue before receiving fine
-
Photo of fine, vehicle parked and signage displaying terms
-
Date submitted and emailed to UTL utl.bskyb.fleet@unipart.com
About the Vehicle
-
Vehicle Registration
-
Vehicle Make and Model
-
Individual handing vehicle over
Transfer Details
-
Tech Number
-
Team
-
Individual receiving vehicle
-
Tech Number
-
Team
-
Livery
-
Date transfer took place
Vehicle Details
-
Vehicle Mileage
-
Is the spare wheel or tyre sealant present
-
Is the Fuel Card present
-
Is there an easi load pole?
-
Is the vehicle damage free?
-
Caddy Only - Are both ladder locks in working order with keys available?
-
Front Of Vehicle
-
Driver's door and wing
-
Driver's side sliding door and rear quarter panel
-
Rear of vehicle
-
Passenger side sliding door and rear quarter panel
-
Passenger door and wing
-
Cab - Driver's side
-
Cab - Passenger's side
Vehicle Condition
-
Signature of Individual 1
-
Date
-
Please select all Health and Safety items the engineer has on the vehicle
- Microlite Ladder Attachment (UOM 1)
- Cones Standard 21 Inch (UOM 1)
- Drill Harness
- Kneepads External
- 6m Chimney Strop
- Standard Karabiner
- Gravel Bag
- 30cm Endless sling for seatbelt (RSL)
- Sling 150 cm (qty 1)
- 9m Ratchet Strap Kit
- 15mm x 11mmKernmantleRope(UOM = 1)
- 10m x 11m Kernmantle Rope (UOM = 1)
- 5m x 11mm Kernmantle Rope (UOM = 1)
- 1.5m Para Cord
- Para Cord Karabiner
- Y Hang Sling
- 4m Ratchet Strap
- 1.2M Endless Soft Sling
- DTH Harness
- Rope Grab (UOM 1)
- Cows Tail
- Re usable eyebolt anchor (UOM 1 = 1)
- 1m Ratchet strap
- 2 Mtr Ratchet Strap (UOM 1)
- Pipe Cutter UOM = 1
- Silicon Cutter UOM = 1
- Hazard Analysis Form (DTH & DAT)
- Skylite Crawl board (UOM = 1 Pair)
- Lashing Kit gloves
- Scanner Bosch GMS120
- Ladder Spike
- 10mm x 75mm Screw Eye Bolt ( UOM1=1)
- Cable Rod Kit (Standard Issue) UOM = 1 K
- Ladder Mate (UOM 1)
- Draper working light
- Snow Gripper Size 11+ boot
- Snow Gripper Size 5-10 boot
- Snow Gripper Size 4 boot
BRACKETS/MOUNTS
-
Please select all Brackets/Mounts on the engineers has on the vehicle
- 1.25 Inch Patio Mount (Small)(UOM 1)
- New 1.4m S-Pole
- 1m S-Pole
- Single Lashing Kit including brackets (
- Triax MK4 Exhaust Clamp (UOM =1 bag of 1
CONSUMABLES
-
Please select all Consumables the engineer has on the vehicle
- *Twin core clip ( Black )(1 pack of 1000
- *Twin core clip ( White)(1 pack of 1000
- *7mm White Clip(Bag of 1000)
- *4.5mm White Clip (Box 1000)UOM
- *4.5mm Black Clip (Box 1000)UOM
- *Cable Entry Cover (White)(1 bag of 50)
- *Cable Entry Cover (Black)(1 bag of 50)
- *7mm Black Clips(1 Box of 1000)
- Arco Branded Antiseptic Wipes (Tub of 20
- 5mm x 50mm S4 W/L SDS Drill Bit (UOM 1 =
- Multimeter (DT-9201A) (UOM 1)
- Sealant Clear (UOM = 1 box of 6)
- 14mm R Staples (Box 1000)UOM
- *White Insert Plug(1 bag of 100)
- *Black PVC Tape (UOM = 1 roll)
- 160mmx4.8mm Cable Tie black short (1bag)
- 160mm x 4.8mm Cable Tie natural short
- 160mm x 4.8mm Cable Tie natural short
- *7mm White Bushing (1 Bag of 100)
- M8 x 60 Coach Screws (1 box of 100)
- *Sky + Grommet (UOM 1 pack of 100)
- ADSL Filter
- Padlock (Class 6)(UOM 1)
- Disposable Gloves ( box of 100)
- *Disposable overshoes(1 pack of 100)
- Unigrip Adhesive (UOM = 1 Tube)
- Plasters (pack of 20)
- First aid kits (UOM 1)
- *Black insert plug ( Box of 100 )
- *10mm Nylon Plug (1 Bag of 500)
- Compression F-Fit Connector Sky+ (1 =50)
- Compression F-Fit Connector 1 = bag 50
- SDS Drill Bit 10mm x 160mm
- SDS Drill Bit 6mm x 450mm
- SDS Drill Bit 10mm x 460mm
- Drill Bit 16x460mm (UOM 1 = 1)
- 20/200 drill bit (UOM 1)
- 10mm x 1m Drill Bit (UOM 1)
CABLES/LEADS
-
Please select all Cables/Leads the engineer has on the vehicle
- CT63 Dual Cable (Black) - 250m
- CT63 Dual Cable (White) - 250m
- CT100 Black 250M(1 reel of 250m)
- CT100 White 250M(1 reel of 250M)
- *Digi Pace Scart Lead(1 bag of 5)(UOM 1)
- Power Lead (1 Bag of 5)
TOOLS
-
Please select all Tools the engineer has on the vehicle
- Cable Reel Stand (UOM 1)
- Draper 870PZB Expert Screwdriver (UOM 1
- DraperH/D Diag Sidecutter (UOM 1 =1)
- Dustpan & Brush Set (1 Set)
- 15mm OE Spanner (UOM 1)
- Safety Cut Out Switches (UOM 1)
- Nightsearcher - HP910X LED Head Torch
- Tool Organiser (UOM 1)
- Rapid 36 Staple Gun (UOM 1)
- Tape Measure (3 Metre)
- 10mm Ratchet Spanner UOM 1 = 1
- Telephone Test Engineer(UOM 1)
- Lashing Kit wire cutter
- Amtec Leather Tool Belt (UOM = 1)
- Sealant Gun
- Hammer Claw (UOM 1)
- Pliers Combination ( Heavy ) (UOM 1)
- Wrench 13x14mm Rachet Ring (UOM 1)
- Nut Spinner (UOM 1)
- Tool Bag (UOM 1)
- Drill(New)(UOM= 1 drill)
- Compression Fit F-Connector Tightener
- Cable Stripping Tool (UOM=1)
- 13mm 6 point Ratchet wrench
- Compression Tool (Plastic) (UOM=1)
DISH/LNB
-
Please select all Dish's/LNB's the engineer has on the Vehicle
- Generic - MK4 Quad LNB
- Generic Mk 4 Octo LNB
- Generic MK4 Zone 1 Dish
- Generic Wide Band LNB
- Generic Hybrid LNB
STATIONARY
-
Please select all Stationary the engineer has on the vehicle
- Install form (UOM 1)
- Stock Manifest Book (1 pad)
- Outcards V2 (UOM = 1 pad)
- Paper Risk Assessment
- Paper Job Sheets
- Bump Cards
-
TM
-
Engineer


