Title Page
-
Document no
-
Description
-
Site conducted
-
Manager
-
Date
Location-Building-Elevation-Zone-Floor-Grid Line
-
Elevation-Zone-Floor-Grid Line
QAC-Inspection Checklist
-
Subcontractor
-
Linked Drawings & Details Drawings used BTS_XX_DET_TBS , Data Sheet & installation guide checked
-
SIDERISE® Product Installation Training
-
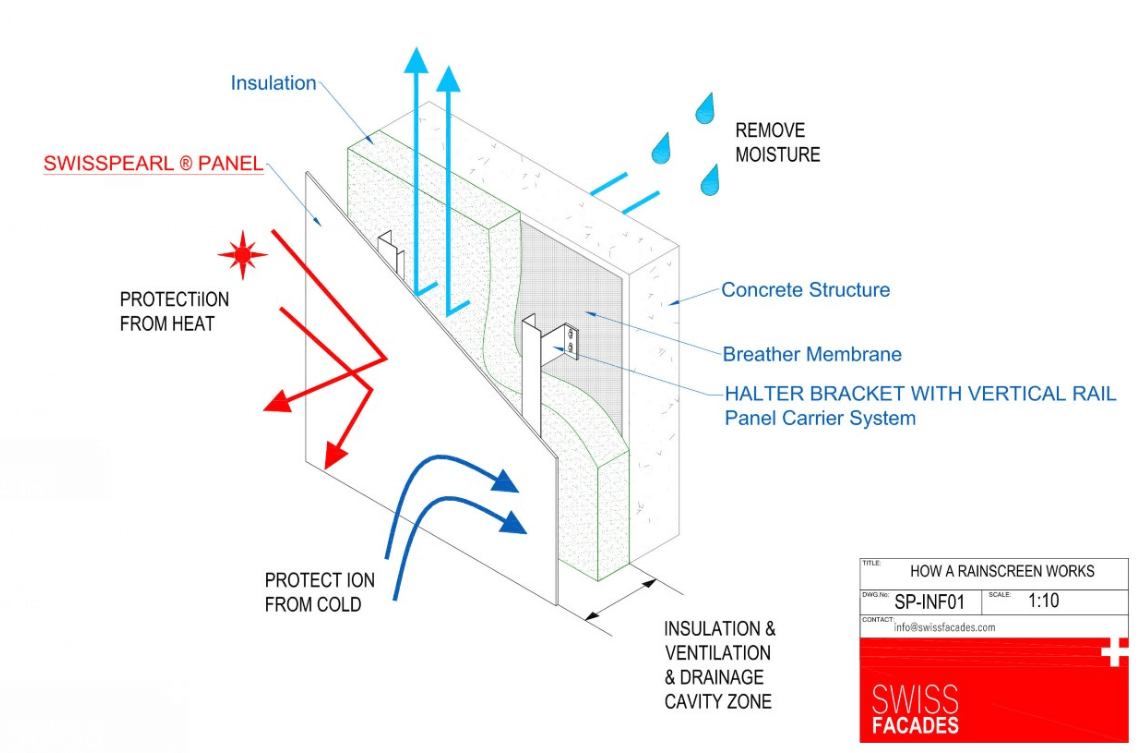
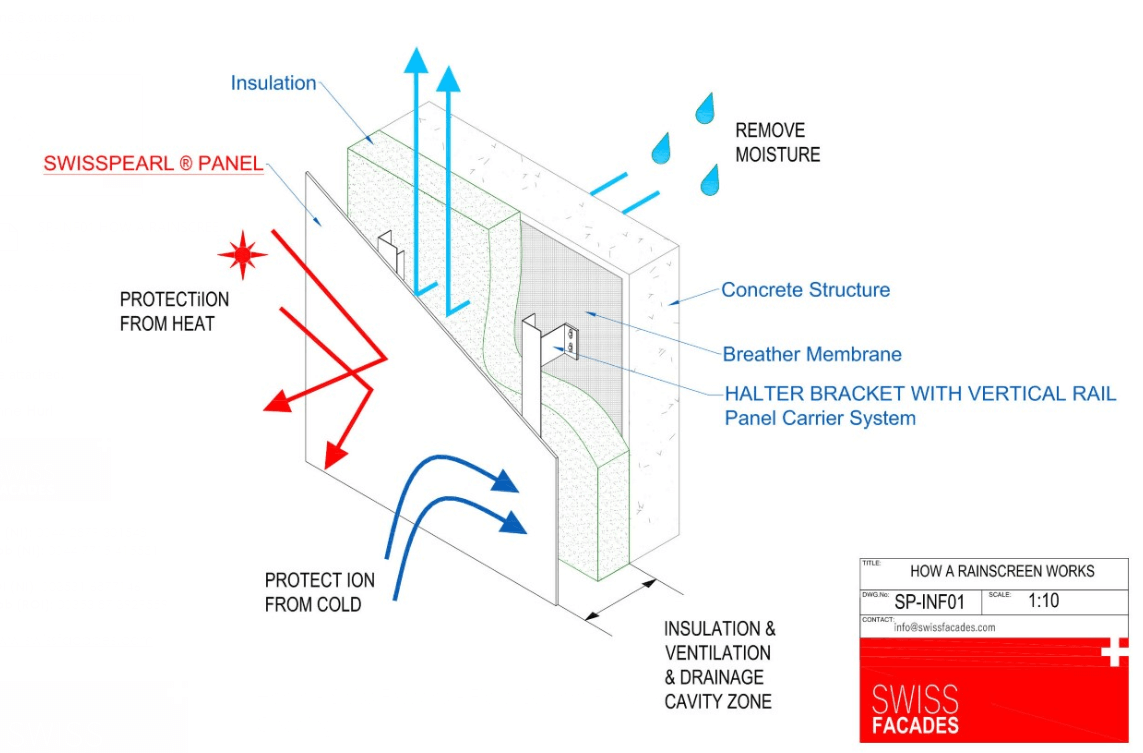
INSTALLATION RECOMMENDATIONS SIDERISE RH25(G/S) ’Open State’ horizontal cavity barrier for maximum 25mm ±3mm air gaps <br>These cavity barriers are installed in the void formed between the rainscreen facade and the inner structural wall, using the appropriate screw fixings or SIDERISE support brackets<br>
-
Tools- for installing SIDERISE CW-FS ,Snips , Long-nose ,Pliers- Sharp Knife ,Straight Edge, Soft Serrated Blade Hand Saw which cuts through mineral wool insulation
-
Sequencing (arrange in a particular order)<br>1.RV Vertical Cavity Barrier,<br>2.RH ‘Open State’ Horizontal Cavity Barrier,<br>3.Thermal Insulation<br>
-
Fitting -RV Cavity Barriers MUST take priority over RH<br>Install abutting cavity barriers tightly together making sure there are no gaps.<br>
-
Taping – RV- SIDERISE foil tape RFT 120/45.<br>Apply SIDERISE RFT Foil Tape to both sides of the cavity barrier joint.<br>You do not need to tape to the wall and the front face of the RV but you can do<br>
-
RH 25 = Horizontal ‘Open State’ Cavity Barriers are suitable for 25mm air gap<br> Checked Project Spec 25mm ±3mm air gaps <br>
-
RV = Vertical ‘Full Fill’ Cavity Barriers- Checked Project Spec <br>Inspection of vertical-cavity barriers (FB) FULL FILL CAVITY BARRIER TO SUIT CAVITY, +10 mm compression check project spec<br>
-
Measuring <br>SIDERISE RV Cavity Barriers must be installed under compression. <br>Measure the void size at two places, add 10mm to the measurement. Measure void, add 10% compression allowance. Correct compression = wrinkled foil<br>
-
Brackets RV Method 1, 1. Bend Brackets set at 600mm 2. Fix to wall 3. Install RV must penetrate the firestop by 75% at mid thickness, using non-combustible fixings at 600mm centres, Making a small incision at bracket locations is required
-
Brackets – RV Method 2-1. Bend Brackets 2. Fix to wall Horizontal the brackets & fixings is visible 3. Install RV must penetrate the firestop by 75% at mid thickness, using non-combustible fixings at 600mm centres, Making a small incision at bracket locations is required
-
Brackets RV Centres:<br>2 brackets are required per length, at nominal 600mm centres,<br>1 bracket is required if the cut length is 300mm or less.<br>2 Brackets required if the cut length is 301-1200mm<br>
-
Brackets – RH<br>The Brackets must penetrate all the way through the cavity barrier at mid thickness.<br>Use a sharp knife to make incisions into the cavity barrier both front and back.<br>Insert the brackets into the cavity barrier. Trim split leg to 10-20mm using snips.<br>Bend split leg in opposing directions using long-nose pliers making sure the bracket is<br>holding the cavity barrier tight but not overly tight<br>
-
Brackets – RH- Centres<br>3 Brackets are required per length, nominal 400mm centres.<br>2 brackets are required per length between 100mm and 800mm.<br>AVOID lengths less than 100mm.<br>
-
Fitting – RH Align the cavity barrier in location making sure it is straight.<br>Install abutting cavity barriers tightly together making sure there are no gaps<br>
-
Taping – RH<br>Apply SIDERISE RFT Foil RFT 120/45. the top side of the cavity barrier joint.<br>You do not need to tape it to the wall. You must not tape the front face of the RH.<br>Apply SIDERISE RFT Foil Tape to both sides of the RV to the RH cavity barrier joint.<br>Apply SIDERISE RFT Foil Tape to inside and outside of the RV to RH cavity barrier<br>corner joints around openings.<br>
-
Taping – Openings - SIDERISE foil tape RFT 120/45.<br>Apply SIDERISE RFT Foil Tape to inside and outside of the RV to RH cavity barrier<br>corner joints around openings.<br>
-
Details – Corners<br>Corner joints should be mitred to ensure a continuous line of intumescent.<br>1.Cut a triangle from the back of the RH to suit the shape of the corner<br>2. Fold the RH into an “L” shape and apply SIDERISE RFT Foil Tape to the top and bottom of the RH; NOT the front face<br>3. Install brackets into RH then fit to the wall.<br>4. Make sure a tight radius is maintained so the corner is not rounded.<br>
-
Details – Rails<br>Any rails intersecting the cavity barriers can be notched around.<br>Make sure the cavity barrier is tight around the rail, if there are any gaps, pack with<br>RV/RH offcuts and seal wising SIDERISE RFT Foil Tape.<br>If there is a rail in front of the RH and there will be a gap between the front face of<br>the rail and the panel, either use an OSCI or fix an intumescent strip to the rail front face<br>
-
Details – Small Voids RV<br>If the void size is less than 50mm, you do not need to use brackets with the RV<br>vertical cavity barrier.<br>
-
Details – Small Voids RH<br>If the void size is less than 75mm you can use non-combustible through fixings with<br>washers or heads between 10mm and 15mm at 400mm centres instead of brackets<br>with the RH ‘Open State’ cavity barriers<br>
-
Details – Other Penetrations<br>Lightning strips must be secured to the wall just above and below the cavity barrier,<br>tightly install the cavity barrier around the strip making sure there are no gaps.<br>If there are any type of pipe or cable penetrations, there must be additional specific<br>protection such as a collar. Check with your designer what has been approved<br>
-
Non-Combustible Fixings- Checked Project Spec
-
OSCI- Open State Cassette Inserts<br>Fitting OSCIs should be done inside somewhere as dust-free as possible, they can be<br>used with RH and RV cavity barriers<br>1. Clean and degrease the panel<br>2. Measure and cut to the required size using the method mentioned previously<br>3. Peel off the self-adhesive backing paper and align centrally to the correct position<br>where the cavity barrier will be; the OSCI is 25mm larger<br>4. Apply to the panel asserting a good amount of pressure<br>5. Tape the top and bottom exposed mineral fibre edges to the panel<br>SIDERISE recommend the OSCIs are also mechanically secured to the panel by:<br>• Sitting in a return or rib of the panel<br>• Using non-combustible insulation pins & non-return washers<br>• Using SIDERISE brackets riveted to the panel side<br>
-
-
-
Hand Over Joint Inspection
-
On behalf of Build Therm (name)
-
On behalf of Main Contractor (name)
