")


Information
Audit for RODNEY and ANNE SMORGON Cleaner: BASIA
-
Conducted on
STARTERS
The Basics
-
Employee (if others present add in Notes)
-
Date
-
Time Started
Setup.
Observations
AS YOU ARRIVE:
-
Step ladder should be in control room that you pass from the hall way on your left · Remove large filter steel lid (perhaps towel on filter door floor to protect knees ) · REMINDER: No work things/liquids on the white bar. Use the work sink on left of tank
-
LIGHTS ON. Switches for tank and sink on left as you enter the service cabinet/room
-
Take Before-service photos
-
Open mirrored covers (left and middle hinge upwards, the right hinged on left). The hinge on middle getting tire so need to lift this one first and support from the right corner so it doesn’t foul on the left one toomuch.
THE CHILLER LINE
-
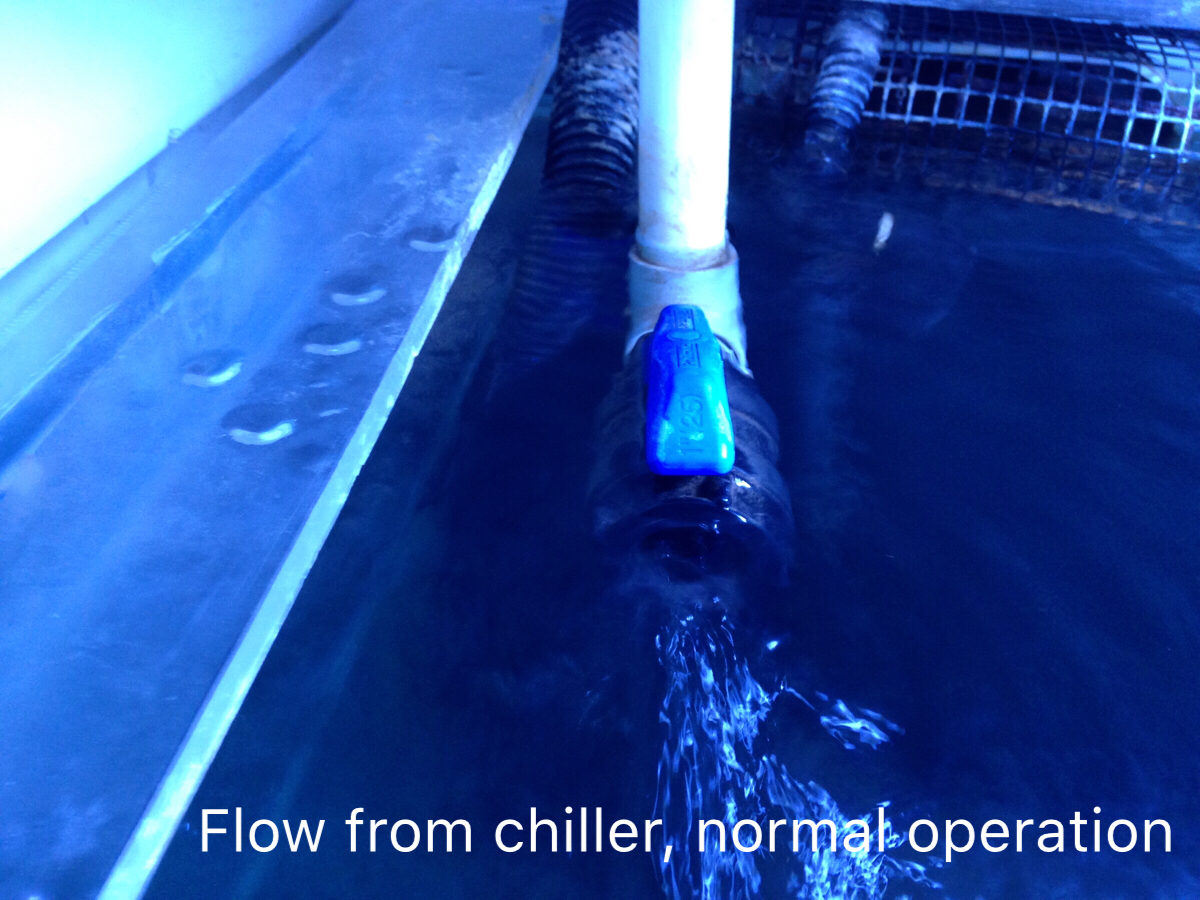
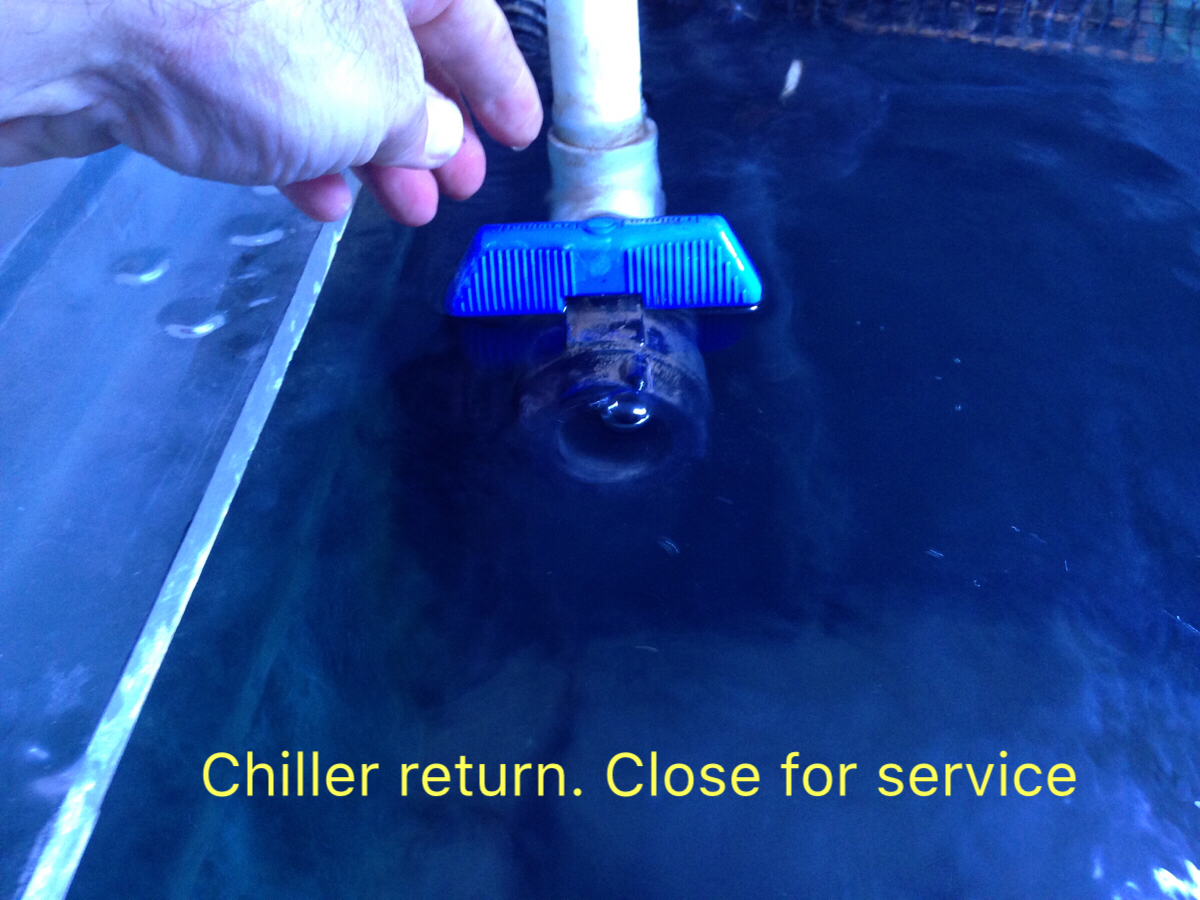
Flow from CHILLER RETURN LINE (tap here to bring up photos)
-
CHILLER RETURN LINE,
normal operation position -
Is there a healthy flow of water coming out of the CHILLER LINE? <br>(Black/blue ballvalve on top left surface)
-
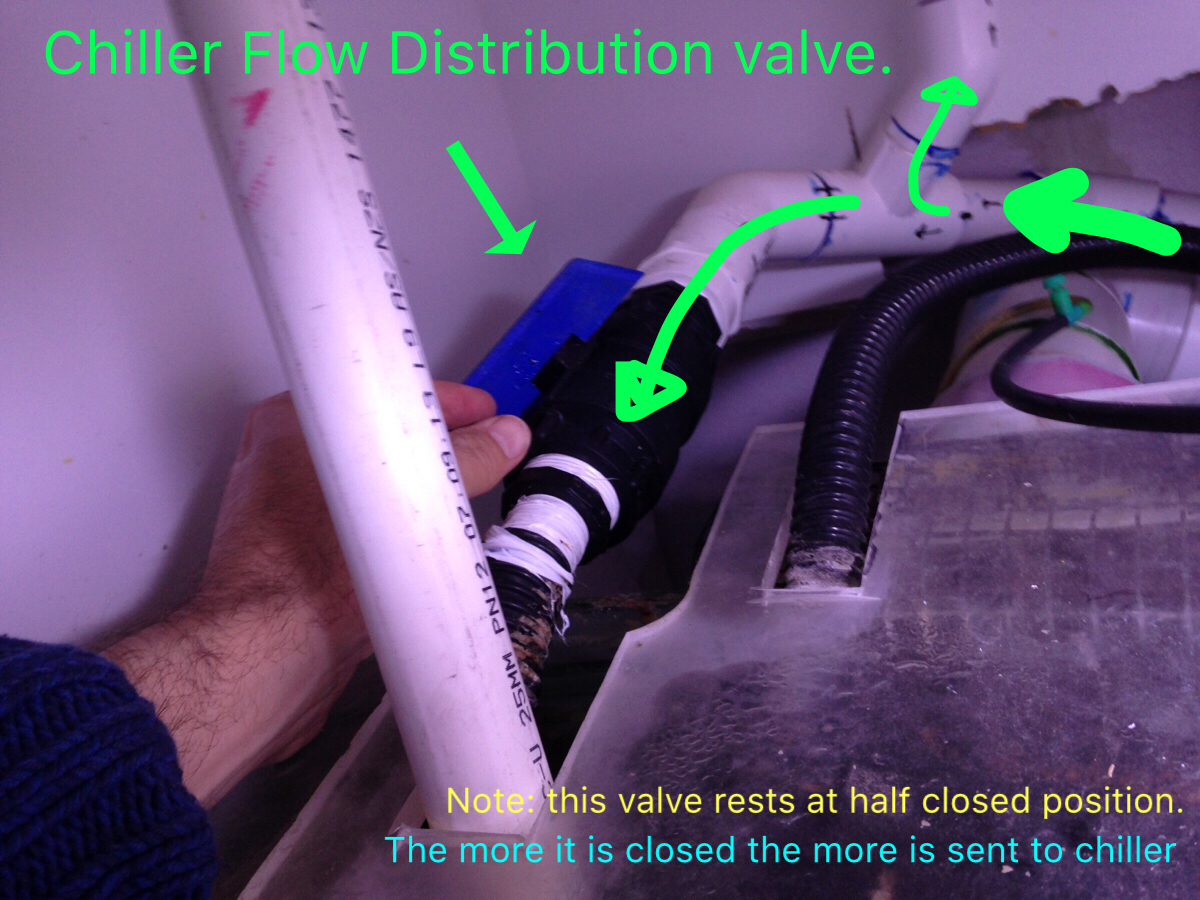
Is the DISTRIBUTION BALL-VALVE partially closed as it should be?
-
Possibly the pump is weakened somehow. Investigate while refilling.
-
This will be the cause of no flow as not enough pressure was made in the chiller line. Leave as is now as we will need it open for the water change. BUT go upstairs and turn OFF power to the CHILLER IMMEDIATELY as it will have been on without water in it. Make urgent follow up ACTION here addressed to BRUCE
-
Add drawing
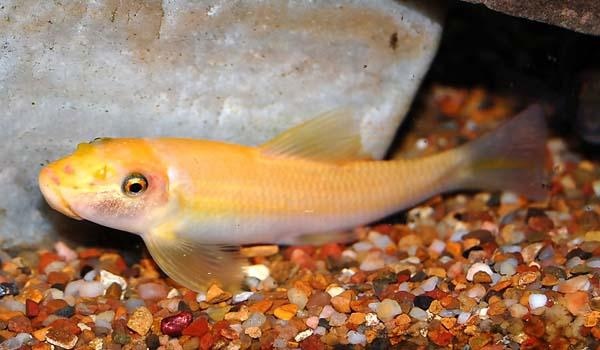
FISH
-
How are they?
- Great; vibrant, eager for food
- some individuals not right.
- sulky, sluggish, isolated from group
- Super nervous, jumpy and easily frightened
- Dead fish
- Cloudy water
-
Looking good? Place a pinch of flake food in and observe how they eat.
-
Take PHOTO where possible and NOTE down details
-
Unwell? Take photos of individuals and check for causes. Questions: 1. Is it just an individual or many affected? 2. Check for uneaten food, levels of ammonia or nitrite. 3. Filter or heater stopped or malfunctioning?
-
CONTACT BRUCE IMMEDIATELY
-
Remove dead bodies Plan for larger water change, 50% Test for AMMONIA & NITRITE
-
This is often a symptom of TOO MANY NITRATES TEST water. If 80 or higher then plan a 50% water change.
-
Anything on BODY? <br>WHITE SPOTS?<br>FUNGUS?<br>WOUNDS?
-
Take PHOTO of cases and NOTE down details
-
ALGAE LEVELS on glass
-
This is typically an indication that we have lost our main cleaner, the SUCKING CAT. Make a search and note your findings.
Plan for a large water change (75%) to dilute the nutrients in the water -
This can be a result of SUCKING CAT gone and/or lights been left on for 24/7. Search for catfish check timer and check with owners that they haven't possibly left the light on continuously. Plan for a large water change (75%)
ISOLATING THE CHILLER LINE
-
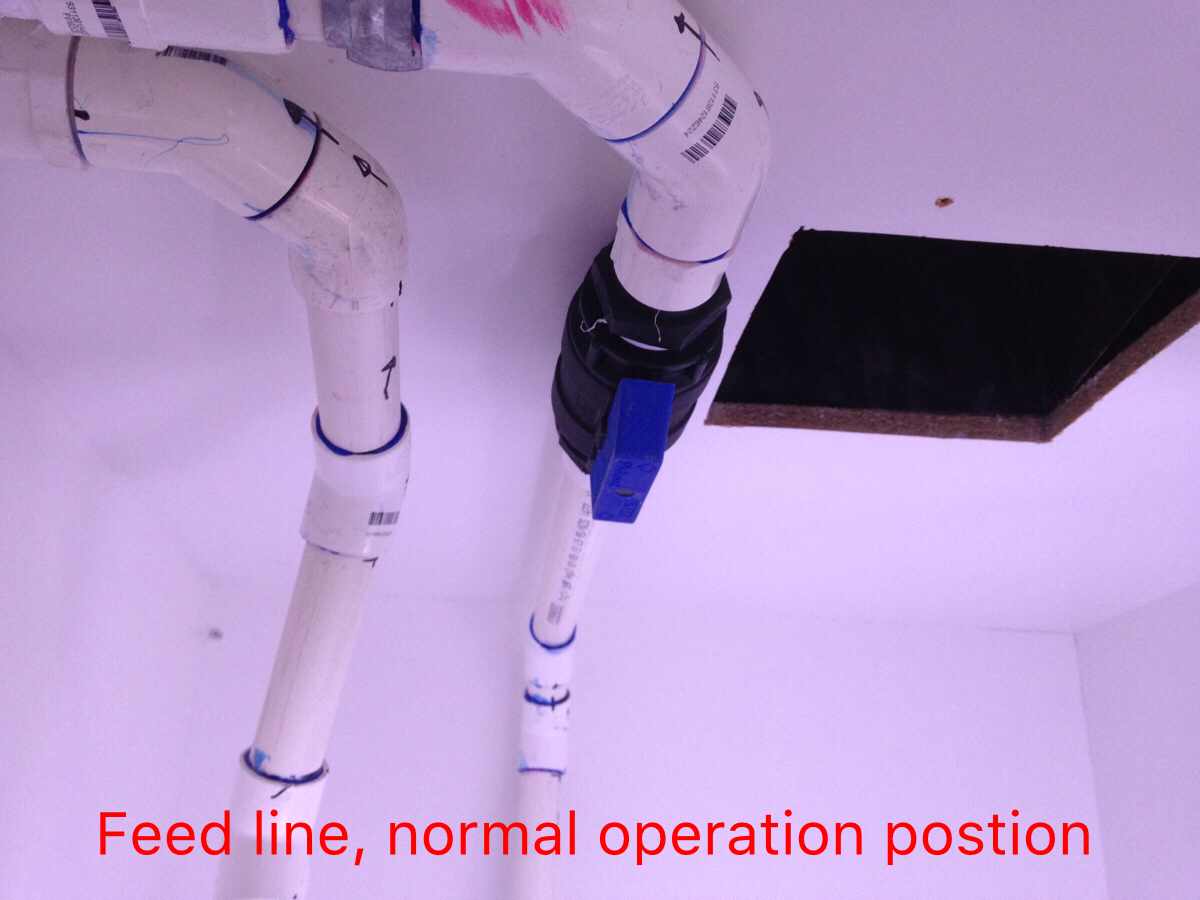
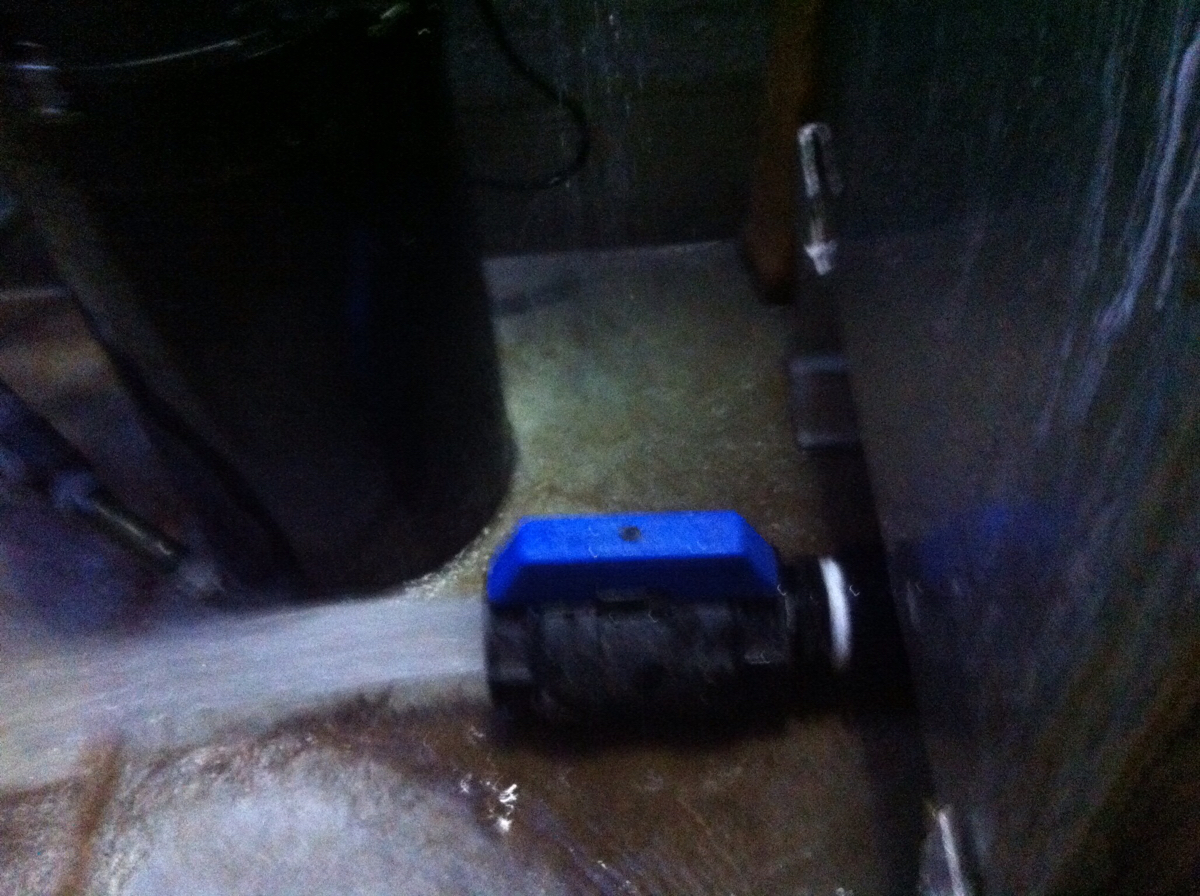
CHILLER FEED LINE PICS (tap here to toggle)
-
CHILLER FEED LINE
Normal operation position -
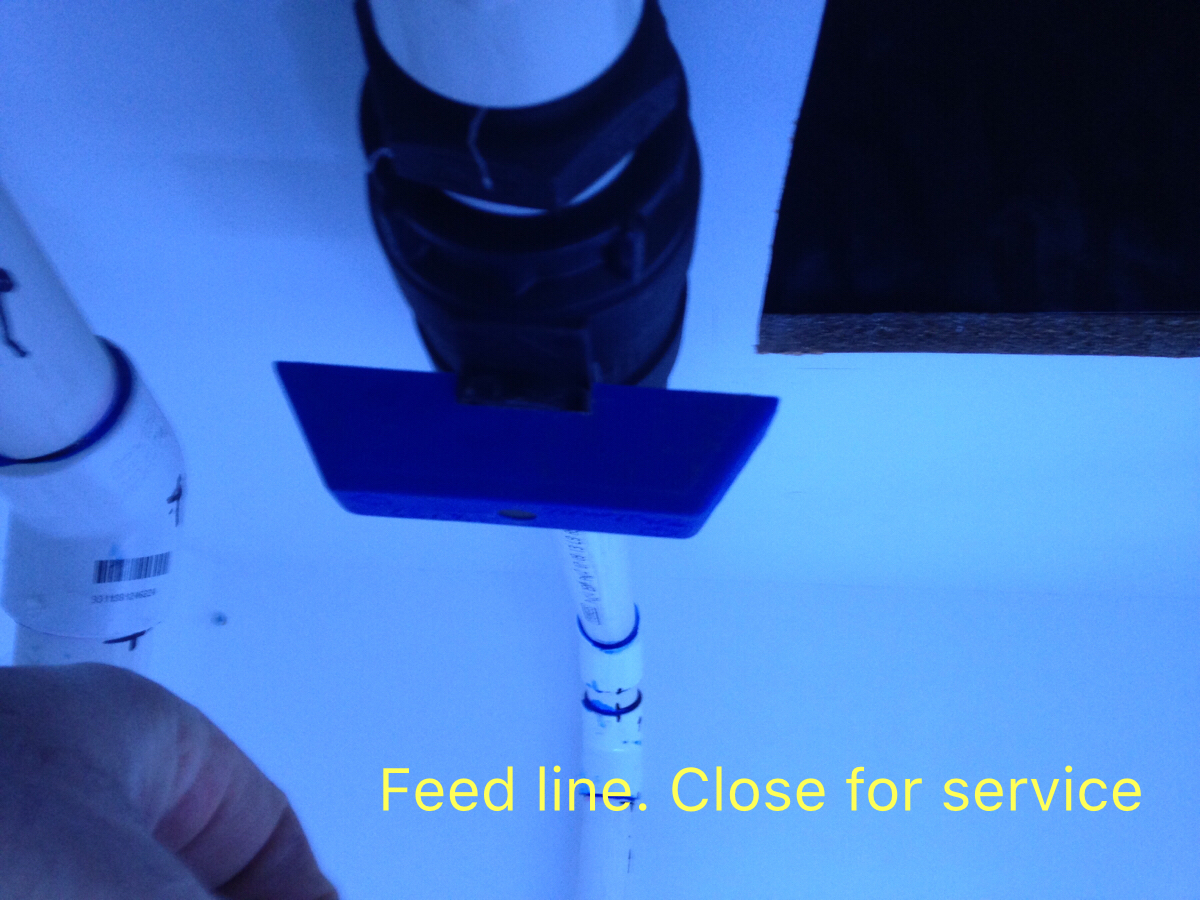
CHILLER FEED LINE
closed position for servicing -
CHILLER FEED LINE CLOSED?
-
CHILLER RETURN LINE PICS (tap here to toggle)
-
CHILLER RETURN LINE,
normal operation position -
CHILLER RETURN LINE,
closed for service -
CHILLER RETURN LINE CLOSED?
-
FLOW DISTRIBUTION BALLVALVE, normal and service positions (tap here to toggle)
-
CHILLER/TANK FLOW DISTRIBUTION (Normal operating position) (Decides how much from pump is sent up to chiller and how much goes fifty back to tank)
-
-
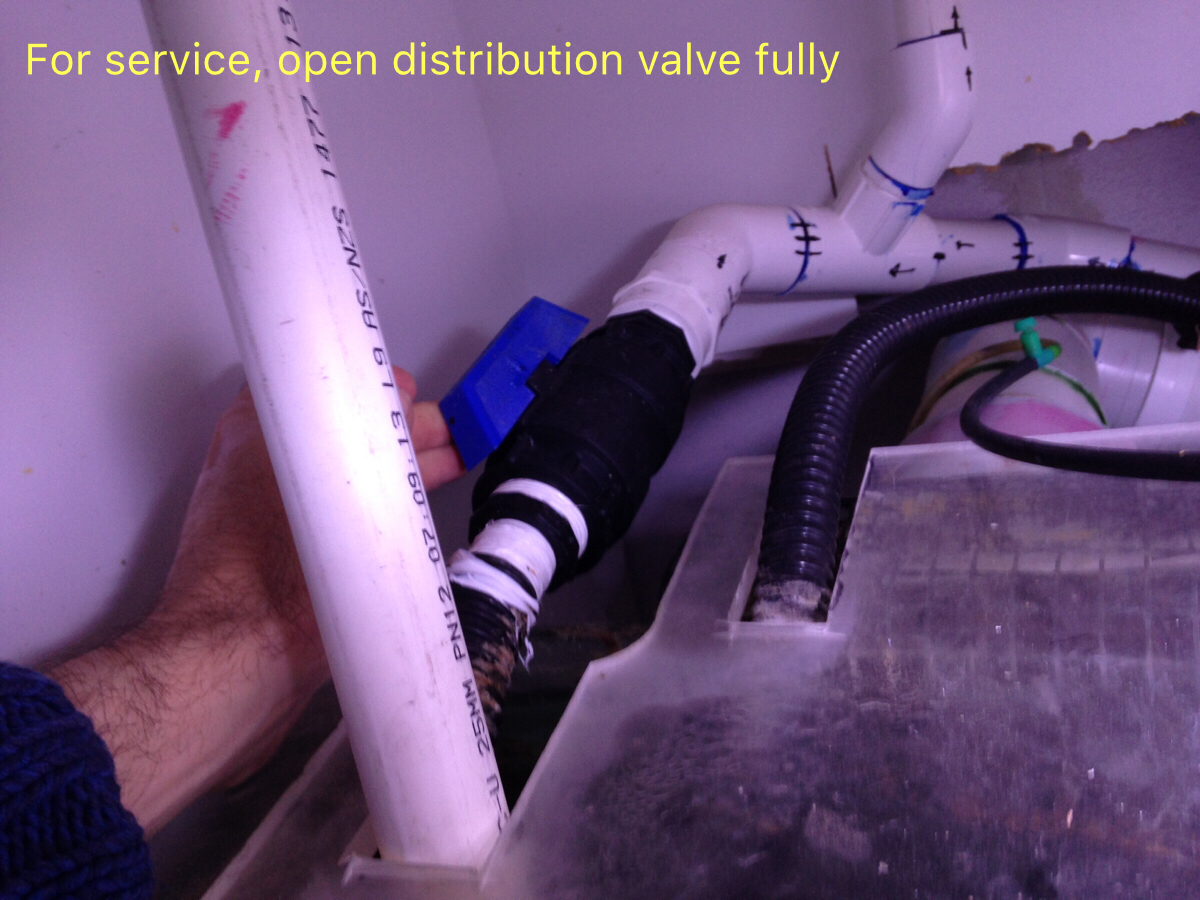
CHILLER/TANK flow divider (Service mode) OPEN FULLY for service to allow fully strength syphon when draining
-
-
FLOW DISTRIBUTION LINE OPEN?
The Drain
The WATER CHANGE (10% usual.)
ASSISTIVE PHOTOS (tap to bring them up, tap again to make hide)
-
Photo: DRAIN VALVE 1 open
-
-
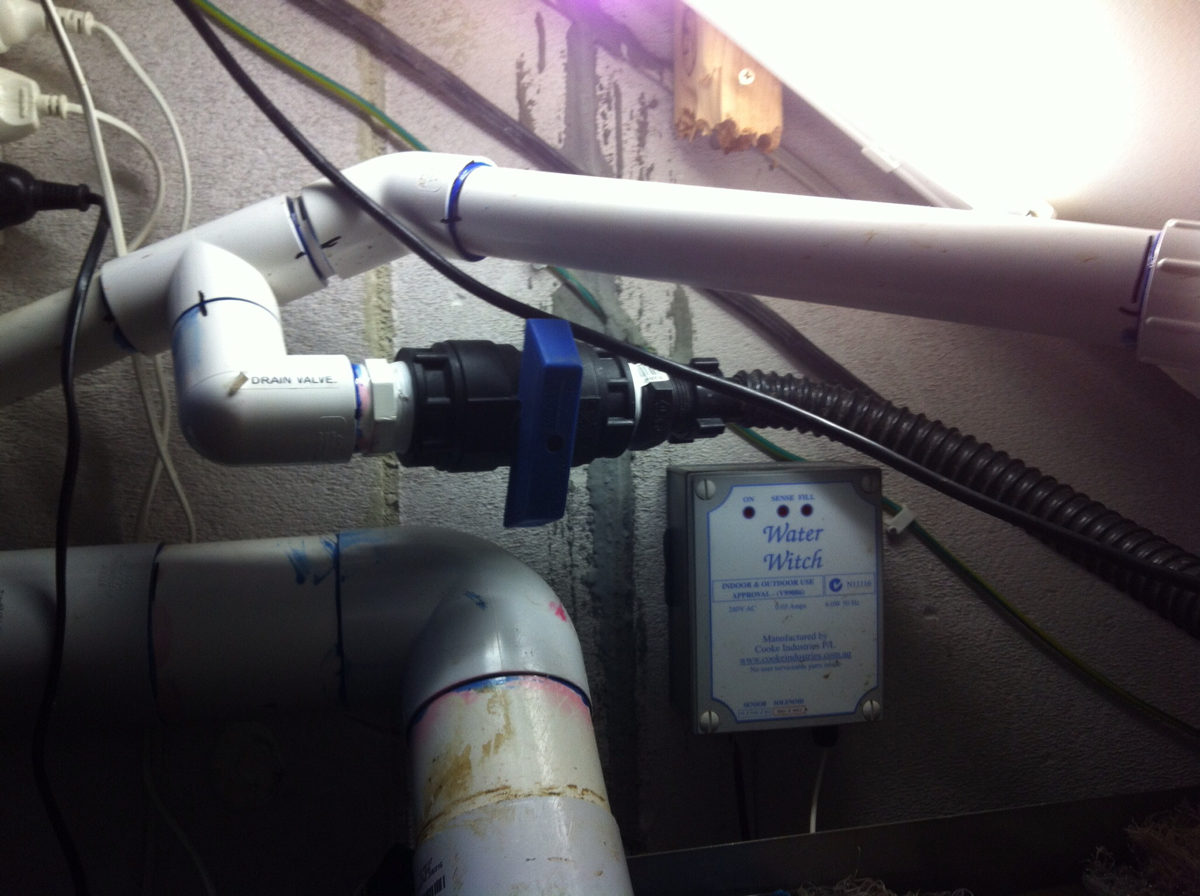
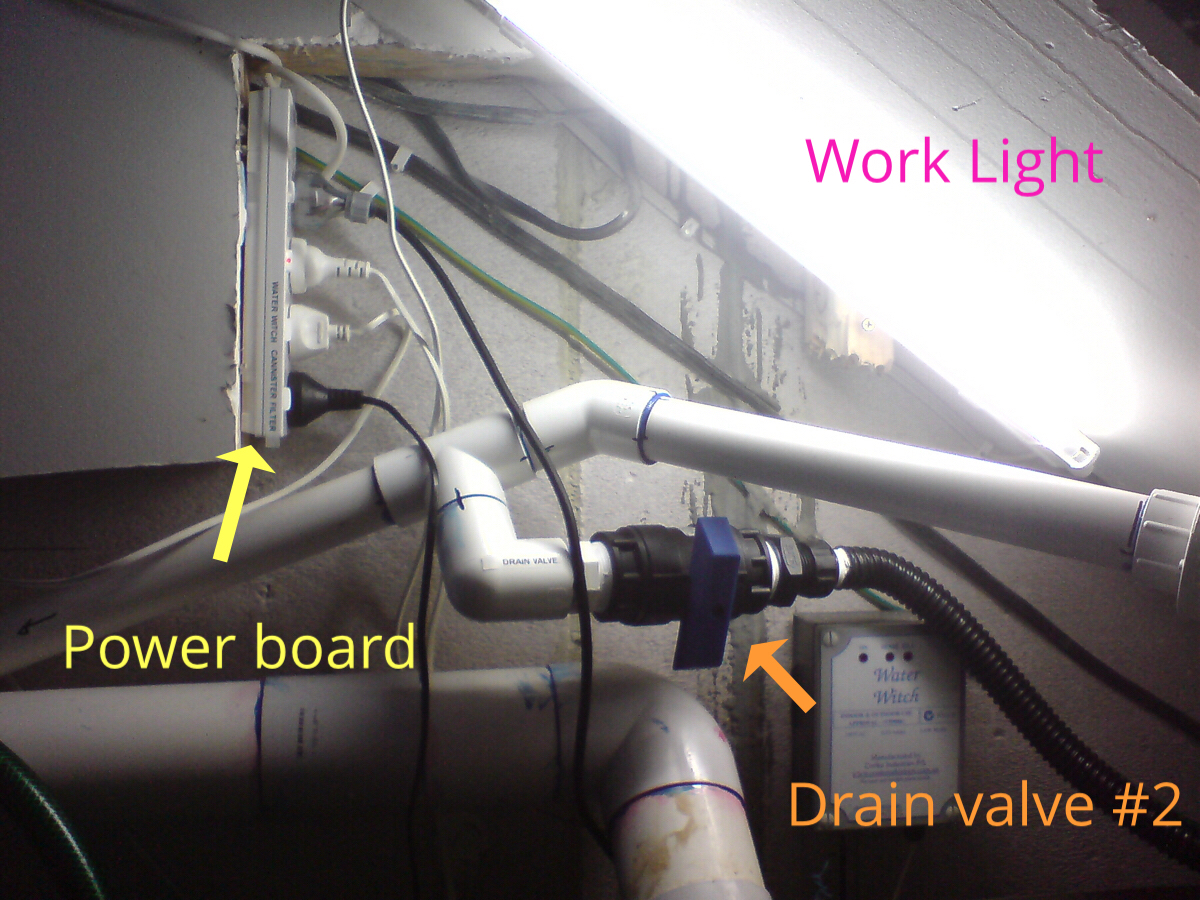
Photo: DRAIN VALVE 2 closed (normal position)
-
-
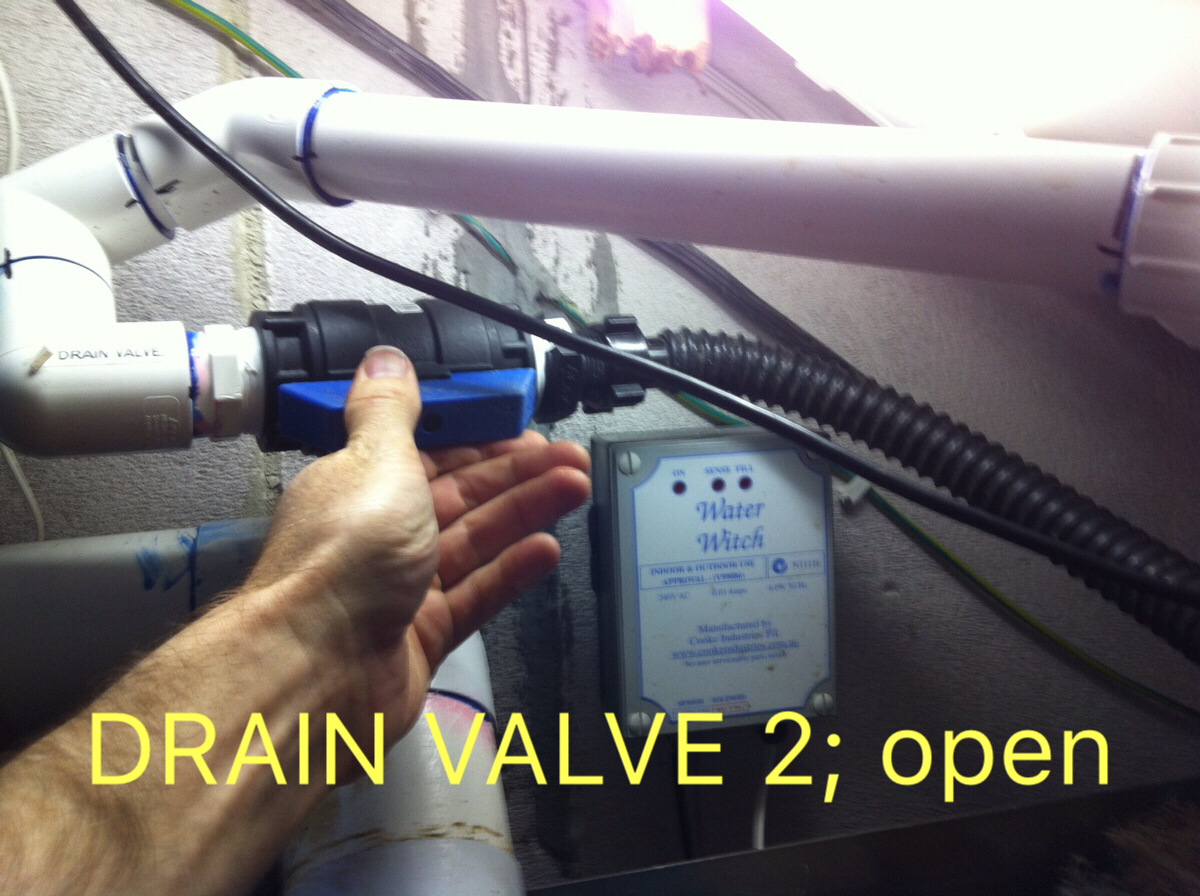
Photo: DRAIN VALVE 2 open (draining)
-
-
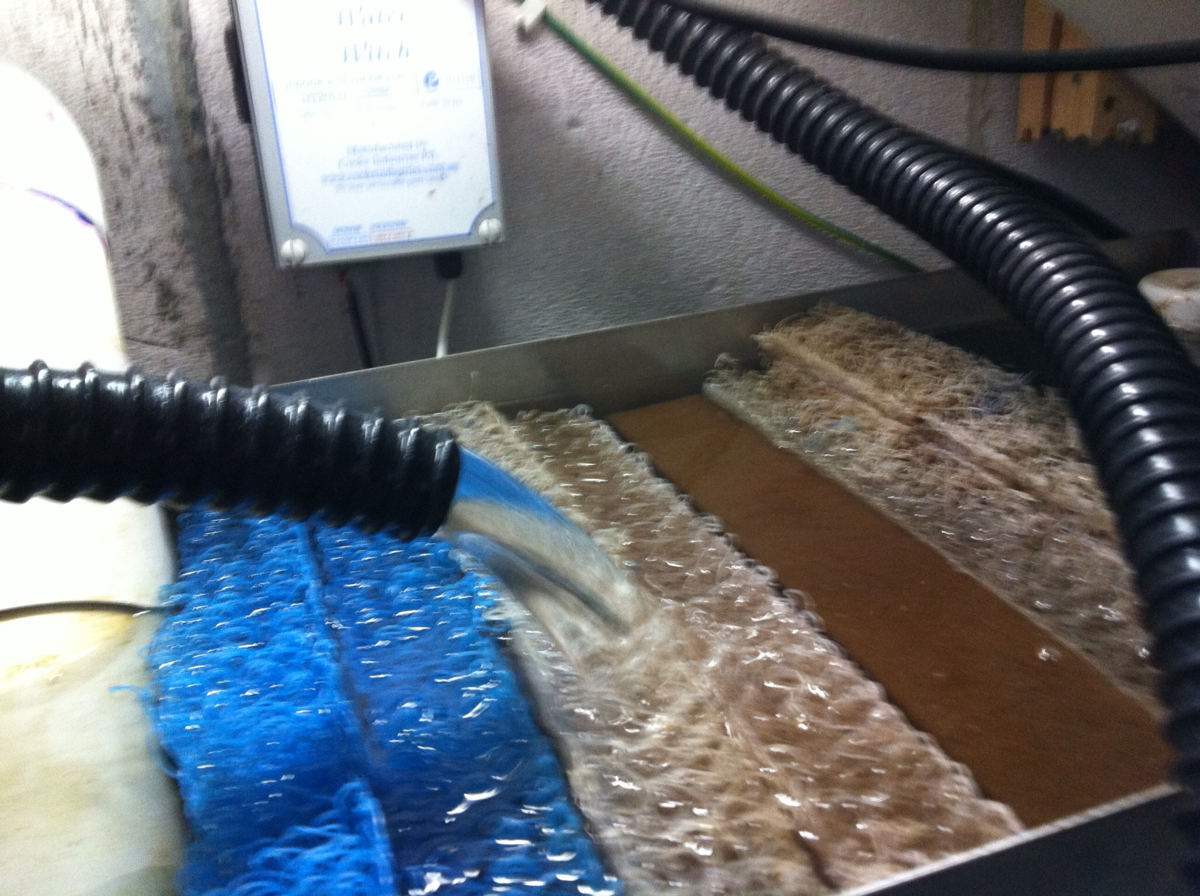
Photo: Drain 2 hose (use for draining as well as rinsing filter media)
-
-
Servicing filter?
INSIDE FILTER CUPBOARD This is a bit dodgy push release latch- sometimes need to be firm with it. Sometimes helps to open neighbouring cupboard to get better purchase. Also perhaps towel (should be to the right on small shelf) on floor to protect knees 😊
-
Tap here for photos
-
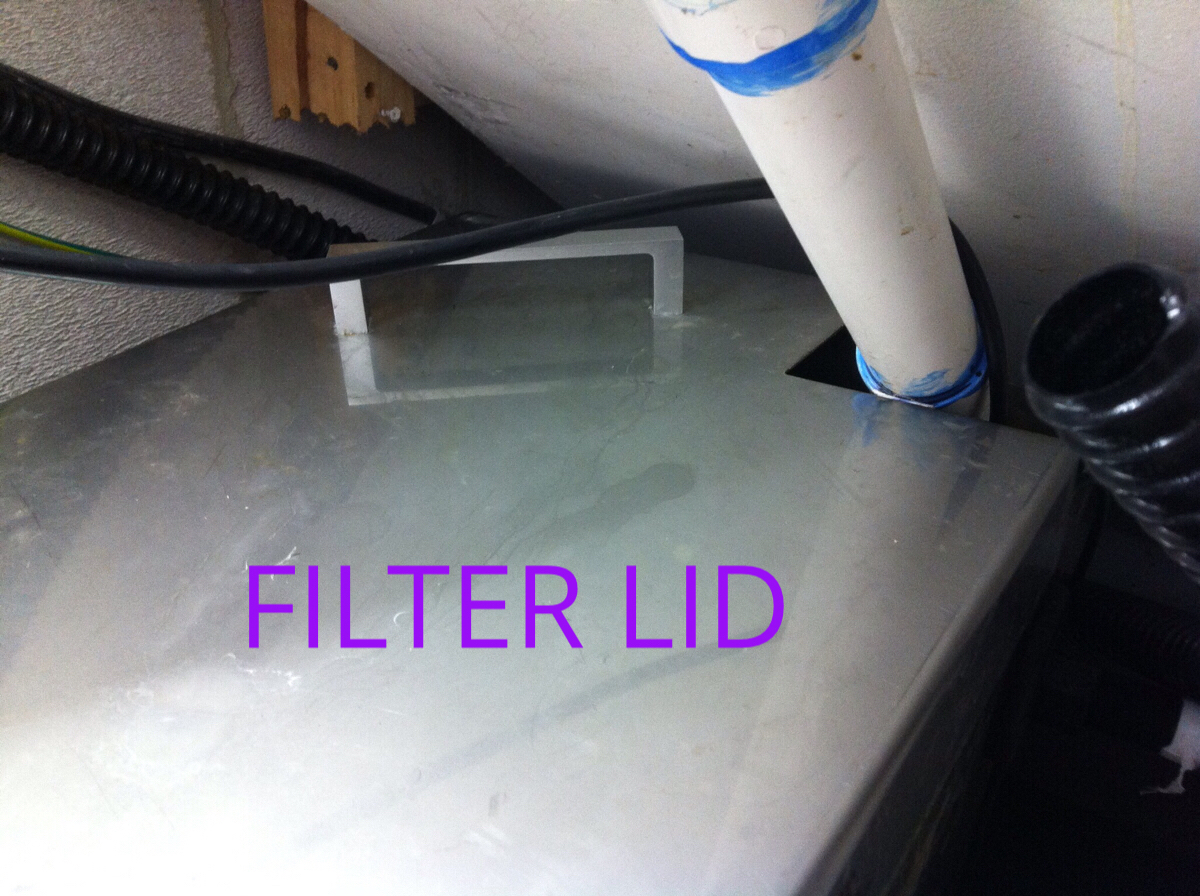
Filter Lid
-
ABOVE THE FILTER
-
turn on SERVICE LIGHT (switches on unit and power board)
-
Remove filter steel lid and place on shelf
-
Turn off power to: Water Witch & Main pump (water will soon come out overflow drain) NB: the inline check-valve mounted directly on the pump may make a thumping sound as the water attempts to back drain through it. This should stop once you open up the drain valve 2
DRAIN PROCEDURE
-
Tap here for step-by-step Water Change instructions
-
1: Open blue Drain Valve 1 at bottom of filter. Water will flow strongly (tap above for pic)
-
2: Open blue Drain Valve #2 above filter tank. Water should syphon strongly. If not then perhaps the DISTRIBUTION BALLVALVE above the tank has not been fully opened in first steps. (Tap above for pic)
-
3: Using the black DRAIN hose, wave the draining water over the filter media for a minute (lift each sheet out partially to rinse). Then place end at pump end to push waste back towards the drain. NB every second or third service take the large sponge filter second from end and transport in a bucket to the sink for washing in the tap. (Tap above for pic)
-
4: REMEMBER: there is a big surface area, and thus a lot of water in a small drop, so just a small water change. Remember also that the filter box itself takes a lot of filling. When close to reaching drain level in main tank (Good time to stop would be just below the support stripping- this looks like not much but once filter box is refilled it will be another inch below), close DRAIN VALVE #1 at bottom of filter box, while leaving the DRAIN #2 from the tank continuing to flow into the filter box. Come back when you hear the water overflowing.
-
Orientate tank-end HOSE to be HORIZONTAL Remove BASKET STRAINER and replace in kit.
-
5a: SETUP the REFILL HOSE and START FILLING
-
5b: When filterbox is full (you may hear a splashing sound from the water coming out the Overflow Drain) then close off DRAIN VALVE #2 to the filterbox
-
FILTER is primed RESTART when water level has reached the top.
-
Rinse TEST VIALS in tank water, pH (square vial) and GH (large round vial) MEASURE 5ml in each and SET ASIDE for later. (Tip: use SQUARE VIAL or a SYRINGE to measure an accurate 5ml for the GH)
The Refill
Things To Do During Refill
-
Eheim Filter to reassemble?
-
Be sure that the top of the filter bucket and head rubber seal are free from any sand or grit before re attaching
-
Easiest to prime while water level is below the OUT pipe
-
CLEAN GLASS. Easiest at LOW WATER LEVELS SOFT ALGAE: lightly with sponge DARK GREEN spots: best with SCRAPERS CAREFUL on curves with scrapers!!
-
Water level high enough? Turn MAIN FILTER ON.
The Filters
EHEIM CANISTER FILTER
-
Flow from filter getting slow?
-
Plan for service to CANISTER FILTER
Water Tests NOTE: the following advice is based on PRE-WATER CHANGE samples
-
WATER TEST SECTION UNDER CONSTRUCTION
pH, GH
-
pH Test? 3 drops in 5ml. (ideal range 7.2)
-
ADD approx 2 tsp CORAL SAND.
-
ADD approx 3 tsp CORAL SAND
-
ADD approx 4 tsp CORAL SAND
-
Is this expected? Been a recent large dose of coral sand last time?
-
Rinse test tube thoroughly and retest. (Any traces of ammonia or GH tester solution will give a false alkaline reading)
-
WOAH! Unlikely! Rinse test tube thoroughly and retest. (Any traces of ammonia or GH tester solution will give a false alkaline reading). If still high then we must assume that there has been an excess amount of coral sand and all we can do is water change. It will eventually come down as the coral sand dissolves.
-
GH TEST. number of drops: ORANGE to GREEN
-
SIZE of water change:
-
ADD 3 TSP SALTS
-
ADD 5 TSP SALTS
-
SIZE of water change:
-
ADD up to 4 TSP SALTS
-
ADD up to 5 TSP SALTS
-
SIZE of water change:
-
ADD up to 3 TSP SALTS
-
ADD up to 4 TSP SALTS
-
TEMPERATURE test
-
A bit too cool. Is heater functioning/plugged in?
-
Replacement Heater with you?
-
Set the thermostat for a conservative 25degrees, we can adjust next month if need be
-
Depending on how long before replacement is likely to be installed then leave post-water change temp approx 26 degrees.
-
Increase THERMOSTAT (clockwise) and make note of how much.
-
Increased THERMOSTAT by:
-
Depending on how long before replacement is likely to be installed then leave post-water change temp approx 26 degrees.
-
Pretty warm. Is THERMOSTAT functioning?
-
Decrease THERMOSTAT (anticlockwise) and note by how much.
-
Decreased THERMOSTAT by:
-
Replacement Heater with you?
-
Check with BRUCE, but if the THERMOSTAT doesn't respond to being turned down then better to have a cool tank than risking cooking the fish, so UNPLUG and remove faulty unit. Leave temperature at approx 26 degrees. Make a follow up here
-
Remove old one and install new one during refill. Set the thermostat for a conservative 25degrees, we can adjust next month if need be
-
Good. Refill with HEATER or KETTLES OF BOILED WATER in COLD months.
Additives
-
Salts added? (Low GH) <br>NOTE: add direct in MAIN FILTER, not in tank directly
-
How many teaspoons?
-
CLAY POWDER ADDED? <br>Typically 2 measured cups. Add direct to tank. Will make cloudy, is normal.
-
How many teaspoons?
RESTART THE SYSTEM
-
· Back at tank: Once water level very close to Overflow INLET to filter (back left top corner) then you may turn on main pump and the water witch. · May be noisy and slow at first but, if successfully moving, turn off filler tap and let Water Witch fill the remainder (this is a good test that the WaterWitch is functioning properly)
-
Once pump running at FULL STRENGTH: Open up both CHILLER and RETURN BALLVALVES.
-
Close CHILLER DISTRIBUTION BALLVALVE 100% at first until you see flow coming through the RETURN BALLVALVE at water's surface. Then OPEN IT to about half-closed (45 degree angle) is the ideal balance of both flows.
Packing up
Supplies (NB. They often buy their own food but if their pellets or flakes are empty then we can fill up with TETRABITS or SPIRULINA FLAKES respectively)
-
Salts refill?
Equipment Check
-
LIGHTS: All units working?
-
Details
-
AIRPUMP still working?
-
Air- pump NOT VITAL to this filter. Note down further details in notes & make sure BRUCE is informed.
FINAL CHECKS
-
Notes
-
FILTER PUMP plugged in and functioning?
-
EHEIM Canister filter plugged in and functioning? (Should see outflow in top right hand quarter)
-
WATER WITCH TURNED ON AND FUNCTIONING
-
FLOW thru CHILLER?
-
Lid returned to filter and drain hose placed between pump pipe and wall (this prevents the pump from being drawn to the wall and being starved of flow
-
SERVICE LIGHT OFF? Towel hung neatly to dry inside cabinet?
-
OUTSIDE GLASS etc CLEAN & WIPED DOWN?
-
Got your: BASKET STRAINER? TOOTH BRUSH? TEASPOON?
-
Photo After
-
Time Finished
")
")